| Once you have created a web project through the New Project wizard, you can start populating it with web pages and code. The most straightforward way to create files is by opening the Projects window, right-clicking the project's node or the specific folder where you want to place the file, and choosing New and then a template from the submenu (see Figure 8-3). A short wizard appears for the template, enabling you to set the name and other characteristics of the file. In general, the wizard guides you to help make sure that the files are placed in an appropriate directory to fit the structure of a well-designed web application. Figure 8-3. Creating a new servlet from a package's contextual menu 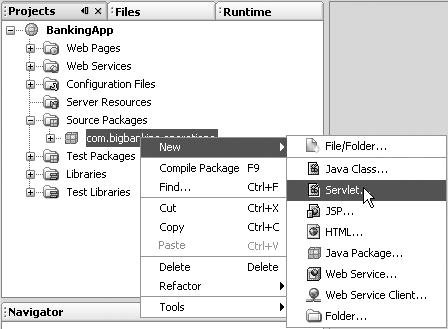
 | The New submenu of a node's contextual menu directly displays a selection of commonly used templates. If you want to see the full selection, choose | New File/Folder. The templates are grouped into several categories, such as Java Classes, Web, and Database. In addition to servlet and JSP file templates, the Web category contains templates for filters, web application listeners, tag files, and tag handlers, which contain useful sample code for those specific types of files. |
Conceptually, files in a web application break down into a few different types of files, the function of which determines where you place the file in the application. The main types of files that you need to add to the project are Web pages and other public files, meaning files that users of the application can access directly through their web browsers. Typically, these include JSP files, HTML files, and image files. Private files, meaning files that are not directly viewable to the end users and that typically do the bulk of the processing in the application. These include Java classes, JSP files, servlets, and tag libraries, and end up within the web/WEB-INF/classes folder of the compiled web application. External resources, meaning files created outside of the project that the files in the project depend on. These can include tag libraries, JAR files that are output from other IDE projects, and other JAR files, and are kept within the WEB-INF/lib folder of the compiled web application.
In addition, there are configuration files such as the deployment descriptor (web.xml) and files specific to the server you are deploying to, but the IDE generates and maintains these files for you. For example, if you create a servlet in the IDE, the servlet is registered in the web.xml file automatically. | Tag libraries can be added to your web application as libraries or as source. See Adding Tags and Tag Libraries later in this chapter for more information on working with tag libraries. |
Creating Web Pages and Other Public Files Generally, you add web pages and other public files directly within the Web Pages node of the Projects window or in a folder of your creation within that node. When the application is built, these files are placed by the project's Ant script in the application's web folder. To add a publicly viewable HTML file, right-click the Web Pages node and choose New | HTML. To add a publicly viewable JSP file, right-click the Web Pages node and choose New | JSP. The ensuing wizard enables you to specify whether the JSP file uses standard syntax (and has the .jsp extension) or XML syntax (has the .jspx extension). You can also have the file created as a fragment (using the .jspf extension), which you would later reference from other pages with include statements. Creating Classes, Servlets, and Other Private Files As with general Java projects, classes are organized within packages under the Source Packages node. For most projects, this node corresponds with a folder on your disk called src. When the application is built, these files are placed by the Ant script in the application's WEB-INF/classes directory. To add a class to your project, right-click the Source Packages node or the node of a specific package and choose New | Java Class. If you have not created a package for the class you are adding, you can do so in the wizard as you are creating the class. To add a servlet to your project, right-click the Source Packages node or the node of a specific package and choose New | Servlet. The wizard for creating the servlet also guides you through registering the servlet in the application's deployment descriptor (web.xml file). If you would like to add a file based on a more specific template, right-click a package node and choose New | File/Folder to get a broader list of templates, including some for JavaBeans components, .properties files, XML files, and specialized web components. Note that many of the web templates have useful skeleton code and suggestions within the comments to get you started developing these kinds of objects. See Table 8-2 for a list of templates that you can find in the Web and Web Services categories of the New File wizard. Table 8-2. Web TemplatesTemplate | Description |
|---|
JSP | Enables you to create a JSP file (standard syntax), JSP document (XML syntax), or a JSP fragment (which would be statically referenced from another file). | Servlet | Creates a Java class that extends the HttpServlet class. Also enables you to register the servlet in the project's deployment descriptor (web.xml) file. | Filter | Creates a Java class that implements the javax.servlet.Filter interface. Filters enable you to modify HTTP requests to a servlet and responses from the servlet. In the wizard, you can create either a basic filter or one that wraps the ServletRequest and ServletResponse objects. In the template's wizard, you can register the filter in the project's deployment descriptor (web.xml) file. | Web Application Listener | Creates a Java class that implements one or more of the listener interfaces available for servlets, such as ServletContextListener and HttpSessionListener. Depending on the interfaces you select in the wizard, the created class will listen for events, such as when servlet contexts are initialized or destroyed, the servlet session is created or destroyed, or attributes are added to or removed from a context or session. In the template's wizard, you can register the listener in the project's deployment descriptor (web.xml) file. | Tag Library Descriptor | Creates a descriptor for a custom tag library. You can then register tag files and tag handlers in this file manually or when you use the New File wizard to create new tag files and tag handlers. | Tag File | Creates an empty .tag file with comments suggesting JSP syntax elements that you can use to create a custom tag. | Tag Handler | Creates a Java class for custom JSP tags. The template includes code comments with sample code and suggestions for how you might go about creating the custom tags. | HTML | Creates an HTML file with the basic tags entered. | Web Service | Creates a simple web service. See Chapter 12 for more information on extending web applications with web services. | Message Handler | Creates a SOAP-based message handler for web services. See Adding Message Handlers to a Web Service in Chapter 12. | Web Service Client | Creates a web service client based on JSR 109. See Chapter 12 for more information on consuming web services with web applications. | WSDL File | Creates a WSDL (Web Services Description Language) file with the basic tags entered. |
Adding External Resources to Your Project If your web application needs to be packaged with any libraries, you can add them through the Libraries node. If your project has been set up to work with the Tomcat server, the JSP and servlet libraries are included automatically and listed under a subnode for the Tomcat server. You can add external resources to your project in one of the following three forms: An individual folder or JAR file. A cluster of resources (library). This cluster might include multiple JAR files, sources for the JAR files (which are necessary for code completion or if you want to step through the library's code with the debugger), and Javadoc documentation. You can create such a cluster in the Library Manager (Tools menu). The output of another IDE project.
To add an individual folder or JAR file to your project, right-click the Libraries node of your project, choose Add JAR/Folder, and navigate to the folder or JAR file in the file chooser. To add a cluster of related resources to your project, right-click the Libraries node, choose Add Library, and select the library from the list in the Add Library dialog box. If the library you are looking for is not there, you can add it to the list by choosing Manage Libraries. | Besides providing a way to cluster resources, the Library Manager makes it easy to access commonly used resources. Even if you do not need to cluster resources, you still might want to add individual resources to the Library Manager to save yourself from having to dig through file choosers to add resources to other projects. |
To add the results of another IDE project, right-click the Libraries node of the current project, choose Add Project, and navigate to the project's folder on your disk. In the file chooser, NetBeans IDE project folders are marked with the  icon. icon. | If you want to add a JAR file or the output of a project to the WAR file without making it part of the project's compilation classpath, you can do so through the Packaging node in the Project Properties dialog box. See Customizing Contents of the WAR File later in this chapter. |
Adding Tags and Tag Libraries Tags and tag libraries can be added to a web project in any of the following forms: Packaged in a JAR file containing a tag library descriptor file (TLD) and the associated tags, in the form of tag files (using JSP syntax) and/or tag handlers (written in Java). Such tag libraries appear in a web application's WEB-INF/lib folder or in the server's shared libraries folder. You can add a tag library to a web project through the web project's Libraries node (see Adding External Resources to Your Project earlier in this chapter). If you are developing a tag library from scratch, you can create a Java Library project for that library and then add the library to a web project by rightclicking the web project's Libraries node and choosing Add Project. See Chapter 3 for information on creating Java Library projects. As tag files (using either standard or document syntax) included in the web application's WEB-INF/tags folder. You can add new tag files to your project by right-clicking the project's node and choosing New | File/Folder and then selecting the Tag File template from the Web category in the wizard. As a TLD file located in the WEB-INF/tlds folder and tag handlers (written as Java files) within the Source Packages node. You can add new TLD files and tag handlers to your project by right-clicking the project's node and choosing New | File/Folder and then selecting the templates from the Web category in the wizard.
|