Text and Masking
| Masking can be used to produce some of the more interesting effects that you see. Whenever you are working with masks, you are working with at least two separate layers : the layer being masked and the layer doing the masking. You can have anything that you like on the layer that is being masked. What you place on the masking layer will act as a window to the layer below. You can use static text as a mask, use text as a mask with tweening, or use a static text mask and tween the masked layer. You'll get a chance to look at masking in more detail in Chapter 9, "Masking Effects." The best way to get a handle on this concept is to just try it. Exercise 7.4 Using Masking to Create Text Effects If you are already comfortable with masking, go ahead and skip to the next section. If you haven't used masking before, this is just a quick exercise to introduce you to the concept.
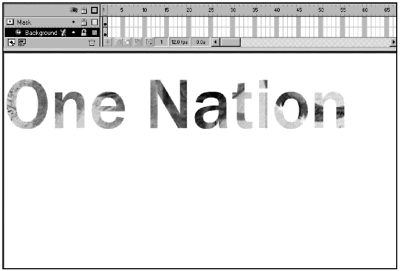
Now you can see the effect of masking. The letters that you typed on the Stage create a window that you can look through to the graphic on the layer below. Note that both the masking and masked layers are locked. If you unlock either layer, you won't be able to see the masking effect again until you relock it or right- or Control-click and choose Show Masking. (See Figure 7.8.) Figure 7.8. With both the Mask and the Masked layers locked, you can see the effect of the text mask. You can also choose to tween your mask, or to leave your mask stationary and tween the graphic or graphics beneath it. Again, you'll explore masking techniques in more detail in Chapter 9. Sometimes it's easier to let someone else do the work for you. Take a quick look at how you can use text effects created in a third-party program. |
EAN: 2147483647
Pages: 257