Start in Photoshop
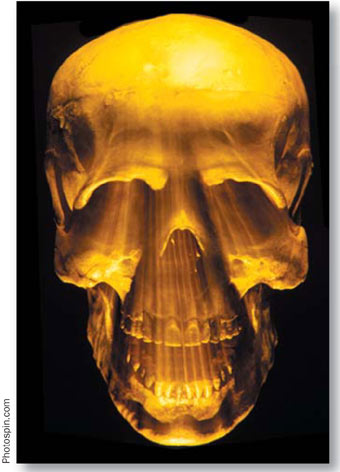
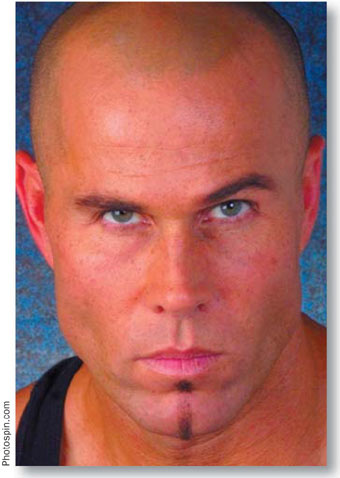
This animation looks complicated, but it's really very simple to make. We started in Photoshop with two images a portrait that we doctored up a little, and a creepy photo of an illuminated skull. We scaled and transformed the two images slightly so the features line up. Now the file is ready for you to animate.
In the steps that follow you'll add a layer mask to the skull, cut a hole in the layer mask, and move the layer mask independently of the artwork to create an animated journey beneath the skin. Both Photoshop and ImageReady offer layer masking. We'll start working in Photoshop, then jump to ImageReady to complete this project.
 Make a Circular Selection Make a Circular Selection
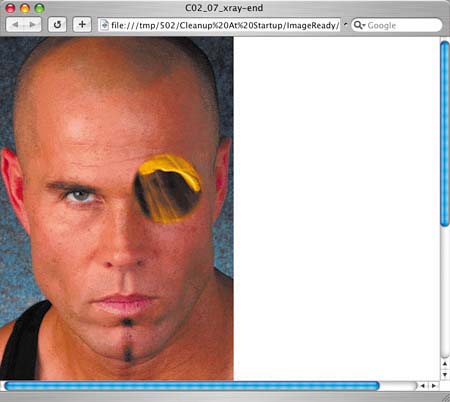
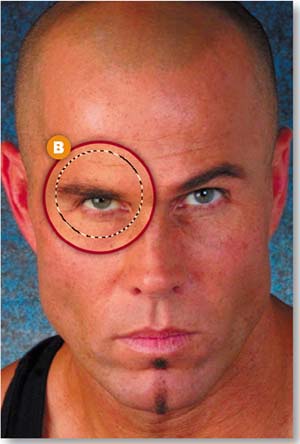
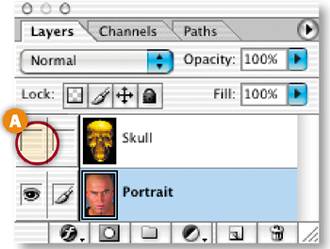
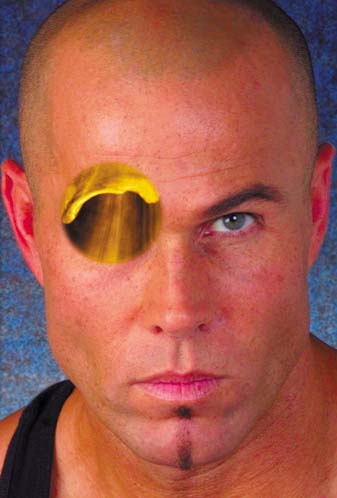
Start in Photoshop by making a circular selection that you'll use as you create a layer mask. Hide the Skull layer temporarily by clicking in the Visibility field of the Skull layer A. Select the Elliptical Marquee tool in Photoshop's toolbox, and add a slight feather by typing 1 in the Feather field in the Options bar. Drag out a selection, holding the Shift key to constrain the selection to a circle. Make the selection a little bigger than the man's right eye B.
 Add a Layer Mask Add a Layer Mask
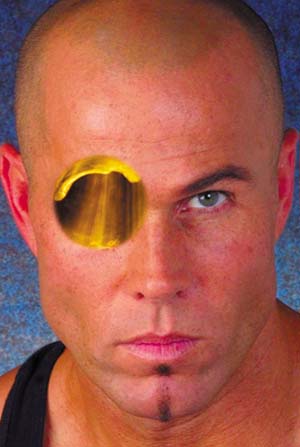
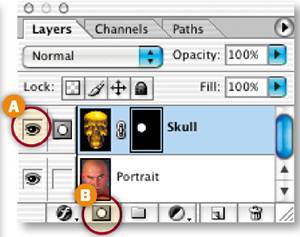
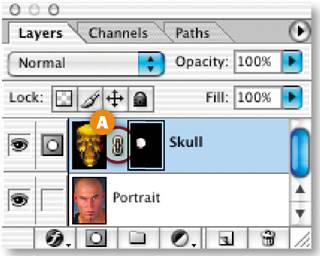
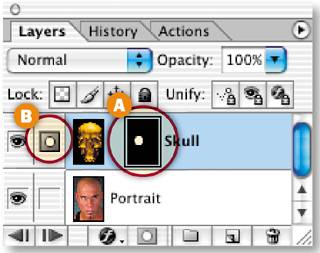
Click in the Visibility field of the Skull layer again to make that layer visible A. Click on the Skull layer to select it. With the circular selection active, click the Add Layer Mask icon at the bottom of the Layers palette B.
Photoshop adds a layer mask to the Skull layer. The layer mask is filled with white inside the area you selected and with black everywhere else. The white pixels reveal the skull image. The black pixels mask it so that you can see through to the layer below.
The layer mask is represented by the grayscale thumbnail on the right side of the Skull layer.
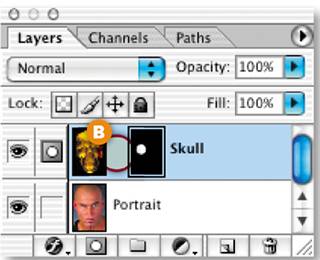
 Unlink the Layer Mask Unlink the Layer Mask
Click the link symbol between the layer mask thumbnail and the image thumbnail A. The link symbol disappears B, indicating that the layer and its layer mask are now unlinked. This makes it possible to move the layer mask independently of the skull image so that you can animate the layer mask without disturbing the image.
 Jump to ImageReady Jump to ImageReady
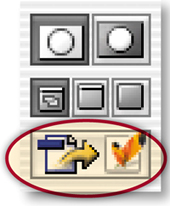
Click the Edit in ImageReady button at the bottom of the Photoshop toolbox to launch ImageReady and open this file in ImageReady with all the changes you made to it in Photoshop. You're moving to ImageReady because Photoshop doesn't have animation features.
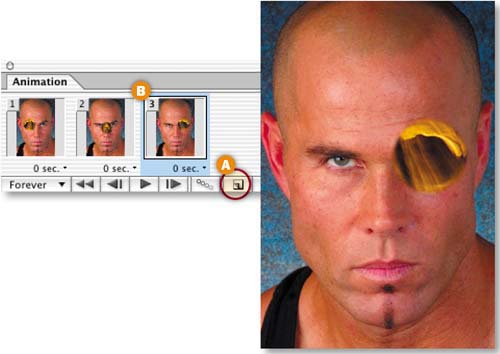
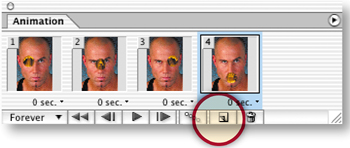
 Create Animation Frame 2 Create Animation Frame 2
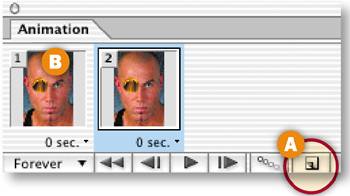
Choose Window>Animation to open the Animation palette with Frame 1 of the animation automatically displayed. Click the Duplicate Animation Frame icon at the bottom of the Animation palette A to create Frame 2 B. Frame 2 is now a copy of Frame 1. Next, you'll make a change to Frame 2 to begin constructing the animation.
 Select the Layer Mask Thumbnail Select the Layer Mask Thumbnail
In the Layers palette, click on the Skull layer's layer mask thumbnail A so that you're working on the layer mask, rather than on the skull image. You can tell the layer mask is selected because it's surrounded by a thin border and the field just to the left of the Skull layer contains a mask symbol B (as opposed to the paintbrush symbol you'll see there when the image thumbnail is selected).
 Move the Layer Mask on Frame 2 Move the Layer Mask on Frame 2
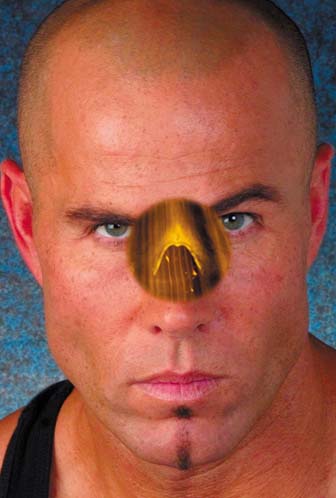
Select the Move tool in the toolbox. With Frame 2 still selected, click and drag the layer mask, so that the nose of the skull appears in the white circular area of the mask. This suggests the illusion that you're seeing through the image of the man to the nose area of his skull. You're actually just rearranging the mask, with its revealing white area and nonrevealing black area, on the Skull layer, making parts of the Skull layer visible and invisible.
TIP Managing Layer Masks. To view a layer mask in the document window, Option/Alt-click the layer mask thumbnail in the Layers palette. A red X appears through the thumbnail. You can modify the mask with editing tools or painting tools (which turn to grayscale when you're working on a layer mask). Option/Alt-click again to return to regular view.
To delete a layer mask without affecting the image, click and drag it to the trash can icon at the bottom of the Layers palette and click Discard at the prompt. To copy a layer mask to another layer, select the target layer in the Layers palette and drag the layer mask to the Create Layer Mask icon at the bottom of that palette. |
| 
 Create Frame 4
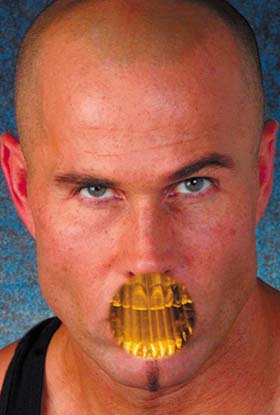
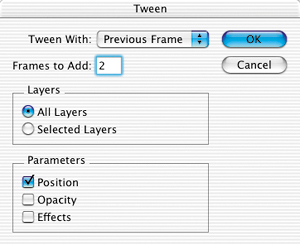
 Add Tweens
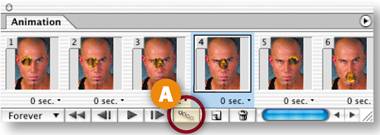
 Preview the Animation
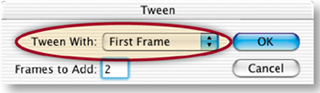 Set the Timing