Basic Edits
| [ LiB ] |
Basic Edits
Avid Xpress Pro allows you to perform two kinds of edits, overwrite and splice. Each of these edits performs very different functions. Overwrite edits are very similar to insert or assemble edits found in linear editing. A splice edit is very similar to a film-style edit, whereby two edits are separated and a clip is spliced in between. The next sections look at each edit in more detail.
Overwrite Edits
To perform an overwrite, you simply mark an IN point and OUT point on your source side monitor. Click the Overwrite button, which is mapped in between the source and record screens (see Figure 3.15). As a default, it is the B key on your keyboard.
Figure 3.15. This is the Overwrite button.

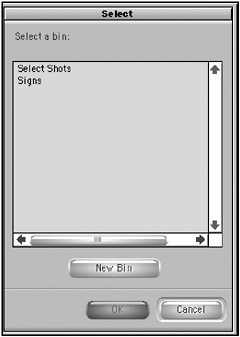
If you have multiple bins open when you perform this edit, the following dialog box will appear (see Figure 3.16). To select the bin you want to keep your sequence in, double-click the bin's name or single click a bin and select OK. If you only have one bin open , this dialog box will not appear.
Figure 3.16. You need to decide which bin you want to keep your sequence in when more than one bin is open.
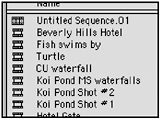
Because you performed an edit, you are creating what is called an edited master or sequence . A sequence is a variety of shots edited together. Notice in your bin you'll find a new clip. This is the sequence clip and its temporary title is Untitled Sequence 01 (the default name given by Avid Xpress Pro). Don't leave the sequences named this way. Click on the name of the sequence and re-name it.
Although it looks very similar to the other clips in your bin, if you switch to Text view, you'll notice that the sequence uses a different icon (see Figure 3.17). It's important for you to identify the difference between a sequence and a clip. When using Text view, identifying each is easy.
Figure 3.17. Sequences use different icons.
You'll also notice that your Timeline now has an edit in it. The Position Indicator in the Timeline always goes to the end of an edit, assuming that you are going to do another edit. You can scroll through the Timeline and you'll notice that you also will be scrolling through your record monitor. The two are linked. If you move forward in the record monitor you'll also be moving forward in the Timeline.
Place the Position Indicator at the end of the Timeline on the last frame or highlight your Timeline window and press the End key on your keyboard. This is the position you are going to perform your next edit.
Double-click another clip to load into the source monitor. Mark your IN and OUT points. Press the Overwrite button or press the B key on your keyboard to make the edit. Figure 3.18 shows a total of five edits. The name the clip has in the Timeline is the same name you gave the clip in the bin. For demonstration purposes, the edits are named Clip 1 Clip 5 (see Figure 3.18).
Figure 3.18. Five edits are in this sequence.

In this current sequence, let's assume you wanted a different shot as your first edit. In the Timeline, move the Position Indicator to the beginning. Open another clip into the source monitor and mark an IN and OUT point. If you perform another Overwrite edit, the results are as follows (see Figure 3.19).
Figure 3.19. When you overwrite a shot into the Timeline, it lays over existing shots.
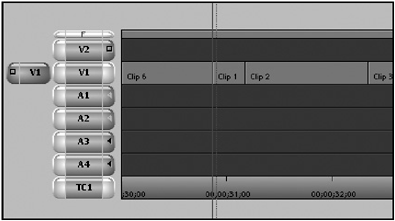
Notice that the overall length of the sequence did not change. The footage in clip 6 simply went over clip 1 and because clip 6 is shorter than clip 1, a small portion of clip 1 remains in the Timeline.
Splice-in Edits
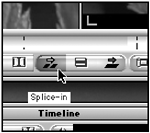
The second type of edit in Avid Xpress Pro is called a splice-in edit. This type of edit inserts or "splices" tracks and moves clips to different positions in the Timeline (see Figure 3.20).
Figure 3.20. The Splice-in button is the second type of edit Avid Xpress can perform.
Splice-in edits can very helpful when you're adding footage to an existing sequence.
Let's re-examine the Timeline. This time, you'll splice-in a shot in at the beginning (see Figure 3.21). Load a clip into the source monitor, mark an IN and OUT point, and then place the Position Indicator in the Timeline at the beginning of your sequence. Click on the Splice-In button or press the V key on your keyboard to perform the edit.
Figure 3.21. The results of using the splice-in edit.

Notice the difference between an overwrite edit and splicing-in an edit. The overall length of this sequence is longer. Instead of placing the new edit "over" the existing material, it " pushed " the edits down and inserted in the new material.
These edits create two very different results. If you're simply building a sequence, it really doesn't matter which edit you choose. But if you're adding edits earlier to a sequence, the differences between an overwrite edit and splice-in edit are dramatic.
Three-Point Editing
Avid Xpress Pro is three-point editing system. In other words, the system bases all edits on three IN and/or OUT points. This combination can be two IN points and one OUT point or one IN point and two OUT points. If you do not mark an IN point or an OUT point in the Timeline or the source monitor, the Position Indicator automatically becomes your IN point.
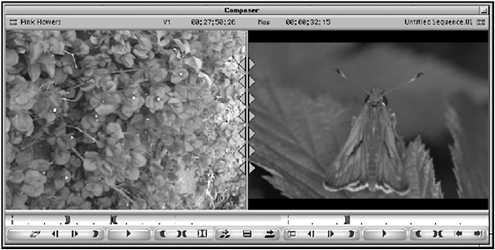
Let's examine some of the benefits of three-point editing. In the following example, the source clip is marked with an IN and an OUT point (see Figure 3.22). In the Timeline or on the record side, you simply need to add an IN point. There is no need for an OUT point due to the fact that the source side already dictates how long the edit will be.
Figure 3.22. In this example, there are only three points marked.
Backtiming
Another benefit of three-point editing is backtiming. Backtiming allows you to use the duration of the IN and OUT marks on one side to calculate the duration of the edit based on either the IN or OUT points marked on the other side monitor. For example, if you marked an IN and OUT on a clip that was exactly two seconds, the clip will edit in to the Timeline as a two-second edit. However, if you had marked an OUT point in the record monitor, the edit would still be two seconds but it would match the source Mark OUT with the record Mark OUT and "backtime" the edit in place.
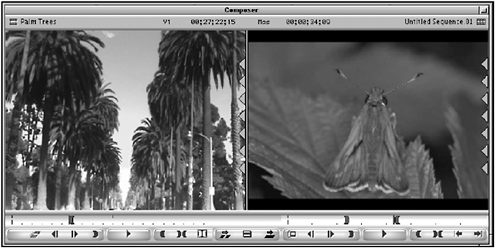
It's easy to perform a backtimed edit. Instead of having two IN points, you can mark two OUT points and the system will automatically backtime the clip in place. To make a backtimed edit, mark an OUT point on the source side but do not have an IN point. In the Timeline or record side, mark an IN and an OUT point. Because all the edits are based on three points, Avid Xpress Pro will now line up the OUT points of the source material and the sequence and backtime the edit into the sequence (see Figure 3.23).
Figure 3.23. Avid Xpress Pro makes backtiming easy.
Editing Audio
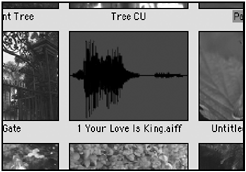
So far you have explored editing video. Next, you learn how to edit in a short audio track. Avid Xpress Pro allows you to edit up to 24 tracks of video and 24 tracks of audio. Audio tracks use a different icon in the bin. In Frame view, audio-only files display as a waveform (see Figure 3.24).
Figure 3.24. Audio clips display different icons in Frame view.
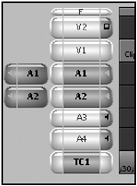
Staying with the overwrite edit, open an audio clip. In the Timeline, you'll notice that only two tracks of audio are displayed for the source side. There is no video associated with this clip. If you turn off the video track on the record side by clicking on it, only the audio tracks will be edited (see Figure 3.25).
Figure 3.25. Editing with audio only.
| [ LiB ] |