How XML View Mapper Works
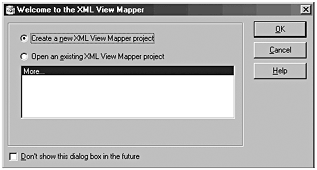
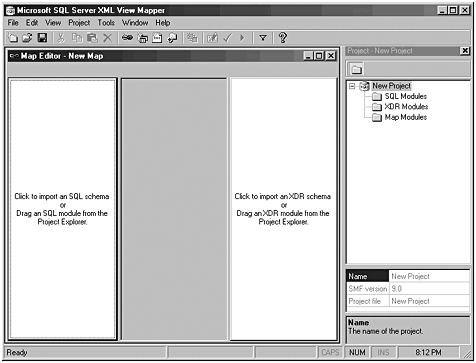
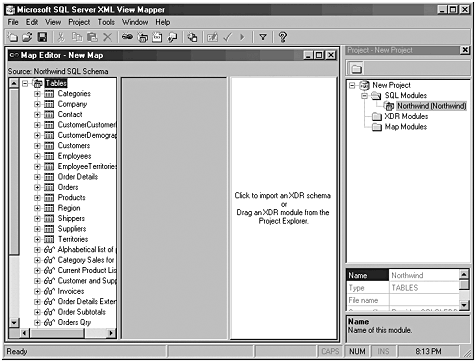
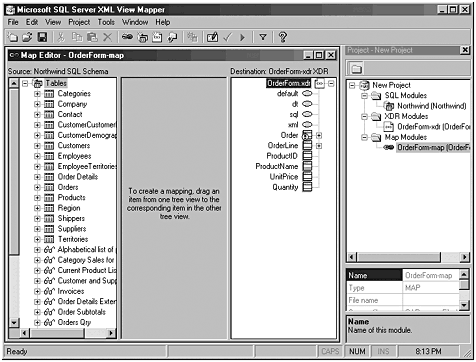
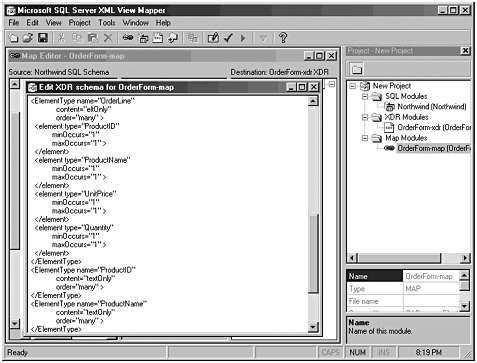
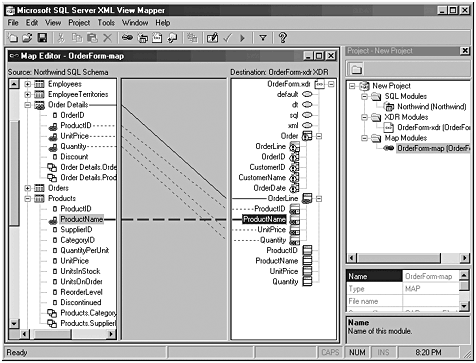
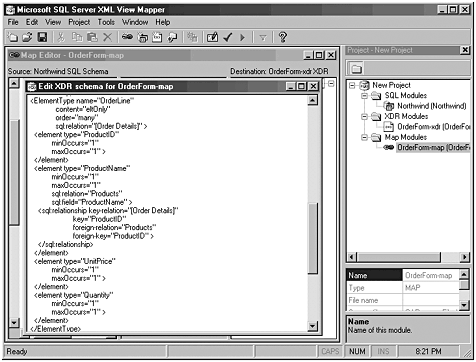
| The following discussion and figures explain the various stages of creating a View schema. Figure G.1 shows View Mapper upon first starting it up. Figure G.1. XMLView Mapper's opening screen. Clicking on the left pane brings up the Data Link dialog box, where you'll fill out the required information to select the Northwind database. Figure G.2 shows the result after selecting Create a New Project. Figure G.2. Creating a new project. After the information is filled in, you'll be presented with all tables and view components of the Northwind database, as shown in Figure G.3. Clicking the >> button will transfer all the components to the right side of the screen. Figure G.3. The table and view selection screen. Figure G.4 shows the result after clicking OK. The Map Editor lists the tables and views that are included in our project. Figure G.4. After loading the SQL schema. Clicking the right pane of the Map Editor will present a file dialog box that enables you to select a particular XDR schema file to work with. All files in the project are tracked in the right pane. Sample schemas come with the software. Figure G.5 shows the result after selecting the OrderForm.xdr schema. Figure G.5. Both the SQL schema and the XDR schema are loaded. At this point, you can right-click on the XDR schema pane and select XDR Editor to show the text version of the XDR schema. Figure G.6 shows the text file after calling up the editor. In our example and also in Figure G.8, I've scrolled down a bit to concentrate on the <ElementType name ="Orderline" line. That's where obvious changes will occur to show you the addition of annotations. Figure G.6. The starting XDR schema. Let's look at Figure G.7. A lot has changed. After closing the Editor, I clicked on the Order Details table in the left pane and then did a drag-and-drop to the OrderLine element on the right side. Then, after expanding the Products table, I did the same between ProductName elements on both the left and the right. The dotted line between elements of the OrderDetails and OrderLine elements show up after expanding the Order Details table. The important point here is that the lines between the left and right sides (known as the Mapping Pane ) represent the annotations of a View schema file. Figure G.7. Dragging and dropping to relate elements. The last figure, Figure G.8, shows the text version of the View schema file. Did you notice how all the annotations, such as sql:relation and sql:relationship , have been inserted for you? Isn't that a bit easier than doing so by hand? Figure G.8. The XDR schema file after joining tables. You have the option to modify a schema as you see fit, and there also is built-in schema validation provided for you. I believe this software will save you a lot of work in the long run (some would say even in the short term ), so enjoy using it. And like I said in Appendix F, "IBM's XSL Editor," it's really hard to beat the cost of $0.00. |