Timing a Presentation

graphics/microsoft74.gif

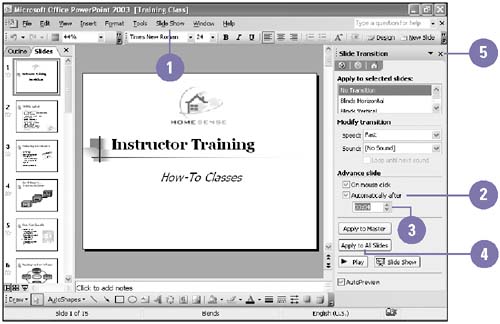
If you have a time limit for presenting your slide show, you can use PowerPoint's timing features to make sure that your presentation is not taking too long or going too fast. You can specify the amount of time given to each slide and test yourself during rehearsal using the slide meter , which ensures that your timings are workable . By rehearsing timings, you can vary the amount of time each slide appears on the screen. If you want the timings to take effect, make sure the show is set to use timings in the Set Up Show dialog box.

Set Timings Between All Slides

graphics/one_icon.jpg

Click the Slide Show menu, and then click Slide Transition.

graphics/two_icon.jpg

Select the Automatically After check box.

graphics/three_icon.jpg

Enter the time (in seconds) before the presentation automatically advances to the next slide after displaying the entire slide.

graphics/four_icon.jpg

Click Apply To All Slides.

graphics/five_icon.jpg

When you're done, click the Close button on the task pane.

graphics/11inf16.jpg

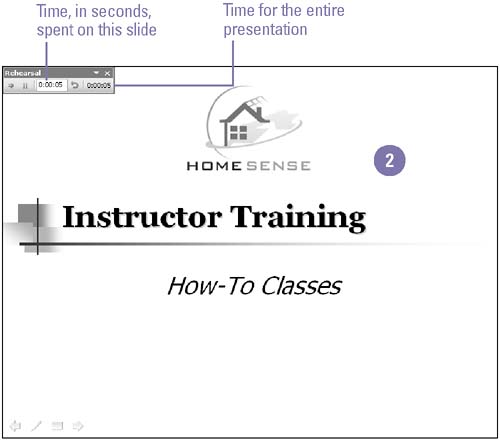
Create Timings Through Rehearsal

graphics/one_icon.jpg

Click the Slide Show menu, and then click Rehearse Timings.

graphics/two_icon.jpg

As the slide show runs, rehearse your presentation by clicking the mouse or pressing Enter to go the next slide.

graphics/three_icon.jpg

Click Yes to accept the timings you just recorded.

graphics/four_icon.jpg

Review the timings in Slide Sorter view.

graphics/11inf17.jpg


Show Me. Microsoft Office 2003
Show Me Microsoft Office 2003
ISBN: 0789730073
EAN: 2147483647
Year: 2002
Pages: 418

flylib.com © 2008-2017.
If you may any questions please contact us: flylib@qtcs.net