Arranging Text in Columns  Newspaper-style columns can give newsletters and brochures a more polished look. You can format an entire document, selected text, or individual sections into columns. You can create one, two, or three columns of equal size. You can also create two columns and have one column wider than the other. Word 2003 fills one column with text before the other, unless you insert a column break. Column breaks are used in two-column layouts to move the text after the insertion point to the top of the following column. You can also display a vertical line between the columns. To view the columns side by side, switch to print layout view. Create Columns -
 | Click the Print Layout View button. | -
 | Select the text you want to arrange in columns. | -
 | Click the Columns button on the Standard toolbar. | -
 | Drag to select the number of columns you want. | 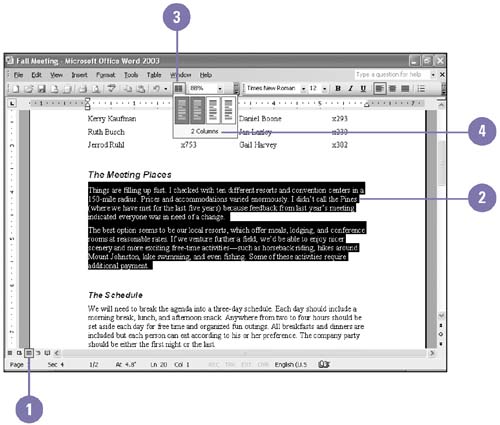 Did You Know? You can remove columns quickly . Select the columns, click the Columns button on the Standard toolbar, and then click the first column. You can align text in a column . Click the Align Left, Center, Align Right, or Justify button on the Formatting toolbar to align paragraphs in columns. | Modify Columns -
| | Click the Print Layout View button, and then click in the columns you want to modify. | -
| | Click the Format menu, and then click Columns. | -
| | Click a column format. | -
| | If necessary, enter the number of columns you want. | -
 | Enter the width and spacing you want for each column. | -
 | To place a vertical line between columns, select the Line Between check box. | -
 | Click OK. | 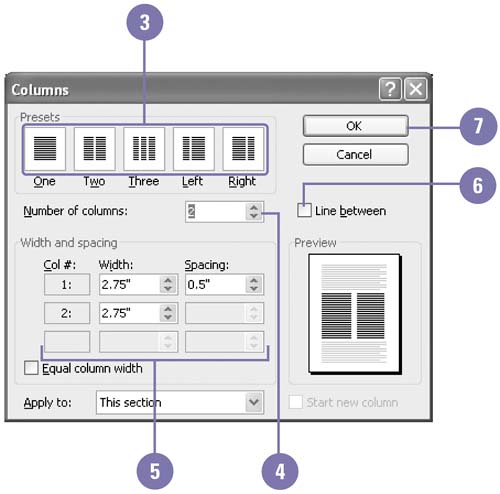 Insert a Column Break -
| | Click where you want to insert a column break. | -
| | Click the Insert menu, and then click Break. | -
| | Click the Column Break option. | -
| | Click OK. | -
| | To delete a column break, click the page break in Normal view, and then press the Delete key. | 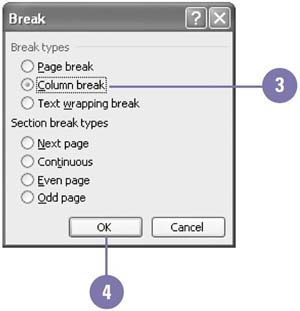  |