The Basic GNOME Interface
The standard GNOME desktop has all of the characteristics of today s GUI operating systems. It includes a panel, a Main Menu button, and icons. You can customize each of these components for your own needs, or even configure a standard interface for your GNOME installations. You can control and customize GNOME s look and feel through the GNOME Control Center. When you first start a GUI on Red Hat Linux, you ll probably see a desktop similar to Figure 16.1.
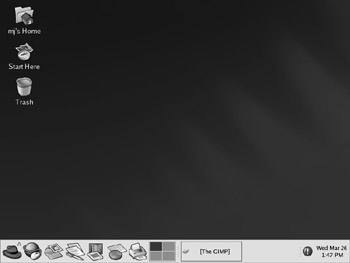
Figure 16.1: The GNOME desktop
| Note | In Red Hat Linux, the panel is functionally equivalent to the Microsoft Windows taskbar; the Main Menu button (with the red hat icon) corresponds functionally to the Microsoft Start button. |
An Overview of GNOME
The basic GNOME desktop is deceptively simple. As you can see from Figure 16.1, it includes a way to navigate to your home directory ( username s home); a Start Here button that opens available applets, utilities, and applications; and a Trash folder. All three use Nautilus, which is an Explorer -style graphical shell that you use to manage your files, your GNOME configuration, and any GUI tools associated with your Linux system. We ll use Nautilus again later in this chapter. In the following sections, we ll examine the buttons on the panel and the GNOME Control Center.
The GNOME Panel
The GNOME panel is one place where you can call up a number of applications, switch between open programs, and even switch between open workspaces. I ve included a view of my GNOME panel in Figure 16.2. In this case, the GNOME panel includes seven icons on the left, which are briefly described in Table 16.1.
Figure 16.2: The GNOME panel
| Icon | Description |
|---|---|
| | Clicking this button opens the GNOME Main Menu, which provides access to available programs and utilities; it works like the Start button in Microsoft Windows. |
| | Opens the Mozilla web browser. |
| | Starts the Evolution personal information manager; functionally similar to Microsoft Outlook. |
| | Begins the OpenOffice Writer; functionally similar to Microsoft Word. |
| | Opens the OpenOffice Impress presentation manager; similar to Microsoft PowerPoint. |
| | Starts the OpenOffice Calc spreadsheet program; similar to Microsoft Excel. |
| | Begins the GNOME Print Manager. |
| Note | A workspace is like a standard desktop, with its own icons and open programs. By default, GNOME includes four workspaces; the data for three are stored in spare video memory. |
GNOME Workspaces and Open Programs
GNOME is flexible. You can place open windows in several workspaces. So instead of opening and closing windows, you can just switch workspaces to get to your applications. For example, I can have OpenOffice Writer in one workspace, OpenOffice Impress in a second, The GIMP image program in a third, and a terminal window in a fourth workspace. A view of the four workspaces appears in a thumbnail on the panel, as shown in Figure 16.3.

Figure 16.3: Four GNOME workspaces
To switch to another workspace, click on its corresponding thumbnail. To move an application to another workspace, click on the upper-left corner of the application. You ll see the drop-down menu shown in Figure 16.4.
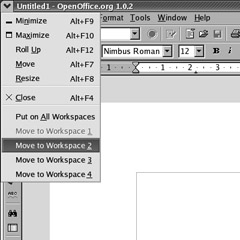
Figure 16.4: Moving to Workspace 2
You can also switch between open applications shown on the panel. For example, Figure 16.5 illustrates a screen where you can switch between three open applications.

Figure 16.5: Switching between applications
Other GNOME Panel Items
Finally, on the far right of the panel are two more icons. The red exclamation point is a Red Hat Network Alert Icon, which suggests that you need to use up2date to connect to the Red Hat network to upgrade some packages. (If it s a blue check mark, your system is up-to-date with the latest packages.). The up2date utility is covered in Chapter 10 .
If you left-click on the date and time on the panel, you ll see the calendar for the current month; if you right-click on this area and select Adjust Date & Time from the pop-up menu, you ll open the redhat-config-date utility, which we discuss in Chapter 19 .
It s easy to customize the GNOME panel. Right-click on an open area of the panel, and click Properties in the menu that appears. You ll see the Panel Properties window, shown in Figure 16.6.
There are a number of things that you can do with the properties of your GNOME panel. You can change the size and location of the panel. You can hide it by default until you hover the mouse near the panel. On the Background tab, you can set the background of the panel itself.
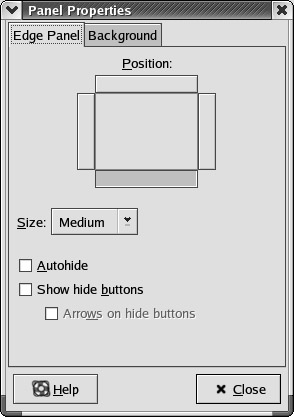
Figure 16.6: The GNOME Panel Properties window
| Tip | Many Linux administrators use a command line interface in GNOME. To start it, right-click the desktop. In the pop-up menu that appears, select New Terminal. This opens the gnome-terminal command line window. Alternatively, you can open this command line interface by selecting Main Menu System Tools Terminal. |
The GNOME Main Menu
Now we ll take a look at the GNOME Main Menu. Click on the red hat in the lower-left corner of the desktop. You should see a menu similar to that shown in Figure 16.7.
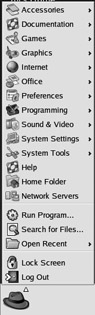
Figure 16.7: The GNOME Main Menu
As you can see, the GNOME Main Menu opens a series of other commands and menus. They are briefly described in Table 16.2. We cover some of these menus in more detail in this and future chapters. Many programs under these menus are specifically associated with KDE, the K Desktop Environment, and will be covered in Chapter 17 . Major applications from this menu, such as office suites and graphics, will be covered in Chapter 18 . We discuss Red Hat “specific administration tools in Chapter 19 .
| Menu or Command | Description |
|---|---|
| Accessories | Opens a group of small programs, such as text editors and calculators . |
| Documentation | Enters any documents that you may have loaded from the Red Hat Linux documents CD. |
| Games | Starts any games that you may have installed. |
| Graphics | Accesses graphics applications for editing, screenshots, faxes, PDF readers, and more. |
| Internet | Includes a series of applications that you can use to communicate on a TCP/IP network such as the Internet. |
| Office | Opens a group of applications associated with the OpenOffice suite of programs; other office suites should be accessible through this menu. |
| Preferences | Allows you to customize your settings; mostly related to the desktop. |
| Programming | Opens access to a group of programming tools; strangely enough, Emacs is part of this group. |
| Sound & Video | Adds multimedia applications, including a CD writer. |
| System Settings | Includes access to many redhat-config-* administrative utilities; most require root-level access. |
| System Tools | Starts a menu with a variety of administrative tools. |
| Help | Opens a GNOME help session in a simplified browser. |
| Home Folder | Starts Nautilus with a view of the files in your home directory. |
| Network Servers | Provides access to shared folders from other computers, including Microsoft Windows computers via Samba. |
| Run Program | Opens a Run Program dialog box where you can type in the text name for an application. |
| Search For Files | Starts a front end to the Find command for file searches, starting from a specified directory. |
| Open Recent | Allows you to open recently accessed documents; normally uses OpenOffice. |
| Lock Screen | Starts a secure screensaver; to return to the desktop, you need your username and password. |
| Log Out | Exits GNOME. |
If you don t see a specific menu, you may not have installed the associated package(s). For example, you won t see a Games menu unless you ve installed associated packages such as kdegames-* or gnome-games-* .
The GNOME Control Center
Now we ll look at some more detailed configuration options for the GNOME desktop, available through the GNOME Control Center. You can open it from the Main Menu: click Main Menu ˜ Preferences ˜ Control Center. This opens a Nautilus window with a series of icons, shown in Figure 16.8. Every icon is associated with a graphical application that can help you work with GNOME.
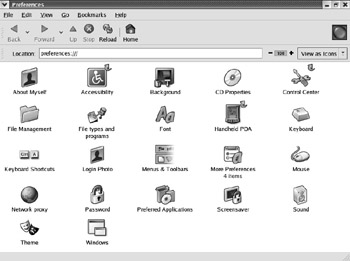
Figure 16.8: The GNOME Control Center
The Control Center icon opens a second Preferences window. We describe each of the other applets in the following sections.
| Note | The applets in the GNOME Control Center are also available in the Main Menu Preferences submenu. |
About Myself
The About Myself applet opens the User Information window, shown in Figure 16.9. It allows you to enter additional information related to your account, such as phone numbers and locations. This serves as a front end to the chfn command. The detailed information is accessible with the finger command.
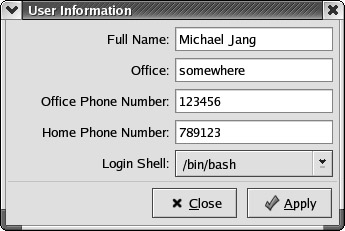
Figure 16.9: User Information
Accessibility
The Accessibility applet opens the Keyboard Accessibility Preferences window, shown in Figure 16.10. If you want to change any features, activate the Enable Keyboard Accessibility Features option.
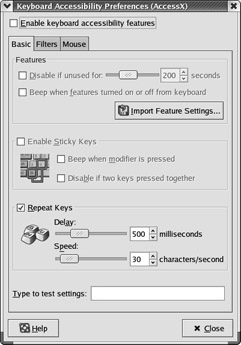
Figure 16.10: Keyboard Accessibility Preferences
This window includes three tabs. The Basic tab allows you to customize standard settings for your keyboard. The Filters tab takes a look at input; for example, if your fingers shake when you type, the Enable Bounce Keys option can ignore duplicate pressed keys made within a few milliseconds . The Mouse tab allows you to manage the speed of the mouse pointer on the screen.
Background
The Background applet starts the Background Preferences menu, shown in Figure 16.11. This allows you to customize the display or picture shown in the desktop background. To change the background picture, click on the picture shown under Select Picture.
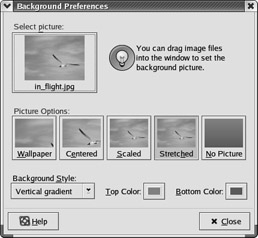
Figure 16.11: Background Preferences
CD Properties
This applet opens the CD And DVD Preferences window, shown in Figure 16.12. As you can see, it allows you to set preferences when CDs or DVDs are inserted in their respective drives . By default, data CDs are automatically mounted, audio CDs are played with gnome-cd , and blank CDs get access to the Nautilus CD burner . You can set different CD or DVD commands in the respective Command text boxes.
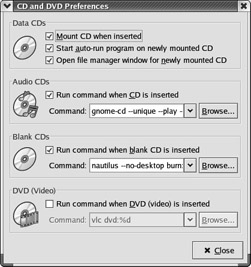
Figure 16.12: CD And DVD Preferences
| Note | The Control Center icon opens a second Preferences window. |
File Management
The File Management applet allows you to manage the look and feel of file views in Nautilus. As shown in Figure 16.13, the File Management Preferences window contains four tabs:
-
The Views tab allows you to customize the look and feel of files in Nautilus. By default, it is in Icon View, which can include thumbnail pictures of graphics files.
-
The Behavior tab lets you determine what happens when you click on a file. For example, you can set your preferences to run executable files when clicked.
-
The Icon Captions tab helps you adjust the information displayed with each icon.
-
The Preview tab allows you to determine the behavior of a text, image, sound, and directory (folder) files when viewed through a Nautilus window.
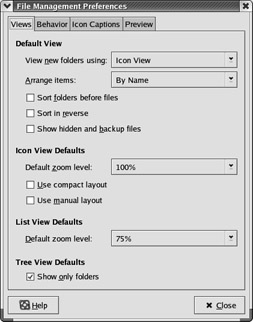
Figure 16.13: File Management Preferences
File Types And Programs
The File Types And Programs window, shown in Figure 16.14, lets you associate different file types with specific applications. File identification depends on the extension, such as .doc or .tif . If you want to add or change the program associated with a particular file type, select it and click Edit.
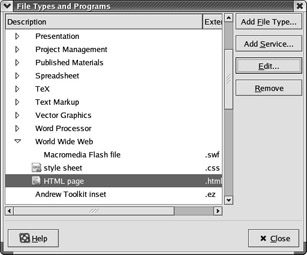
Figure 16.14: File Types And Programs
| Note | The HTML page file type shown in Figure 16.14 can be found under Documents World Wide Web. |
Font
The Font Preferences program window lets you configure the default font for various components on your desktop, as shown in Figure 16.15. You can still specify custom fonts in different applications and utilities, such as terminal windows.
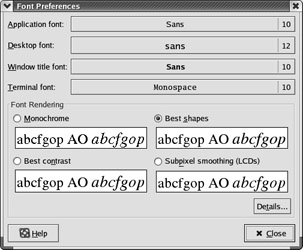
Figure 16.15: Font Preferences
Handheld PDA
The Handheld PDA applet is a front end to gnome-pilot , which can be used for synchronizing data between GNOME and handheld devices that conform to the PalmPilot and PalmOS standards. When you open the applet for the first time, it starts a wizard, which helps you define the cradle, device, and allowed users. The GNOME Pilot Settings window is shown in Figure 16.16.
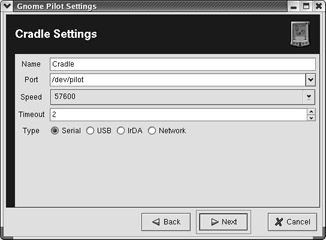
Figure 16.16: GNOME Pilot Settings
Keyboard
The Keyboard Preferences window, shown in Figure 16.17, permits you to customize how your keyboard responds to a key that you keep pressed, the way the cursor blinks, and whether a sound is associated with keyboard events.
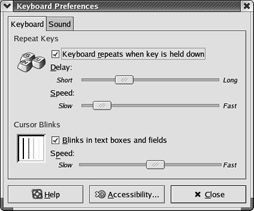
Figure 16.17: Keyboard Preferences
Keyboard Shortcuts
The Keyboard Shortcuts window that is shown in Figure 16.18 lists functions that you can perform with various control keys on your keyboard, including Shift, Ctrl, Alt, Tab, and Esc. There are two sets of defaults: one for the GNOME desktop, another for Emacs.
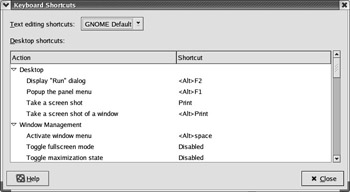
Figure 16.18: Keyboard Shortcuts
If you want to change a shortcut, highlight it, press the Backspace key, and then press the keys you want to use as a shortcut for that action.
Login Photo
The Login Photo window is associated with the GNOME Display Manager (GDM) described in Chapter 15 . It allows you to set a photo associated with the GDM standard greeter. It doesn t start unless you ve logged in using GDM.
To make this work, you ll need to enable the Show Choosable User Images option in the GDM Setup menu on the Standard Greeter tab described in Chapter 15 . Once set, the Select A Photo window shown in Figure 16.19 allows you to set a photo for that particular login situation.
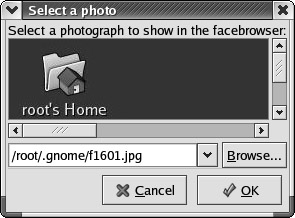
Figure 16.19: Selecting a photo for GDM
| Note | Login photo files are limited to 64KB. |
Menus And Toolbars
The Menu And Toolbars Preferences window, shown in Figure 16.20, allows you to modify the look and feel of icons and text in program menus.
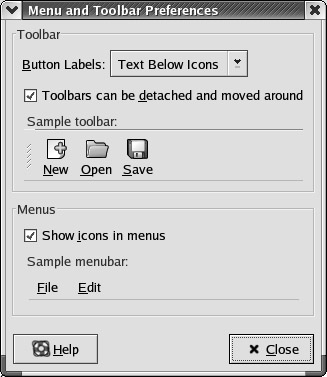
Figure 16.20: Menu And Toolbar Preferences
Mouse Preferences
The Mouse Preferences window, shown in Figure 16.21, allows you to manage the characteristics of your pointing device. It includes three tabs:
-
The Buttons tab allows you change the orientation and double-click delay.
-
The Cursors tab gives you a selection of different cursors .
-
The Motion tab helps you manage the speed of the cursor as well as drag-and-drop behavior.
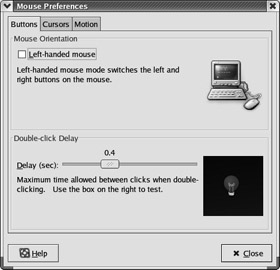
Figure 16.21: Mouse Preferences
Network Proxy
The Network Proxy Configuration window allows you to set the path for an external network connection, most likely to the Internet. If there is a proxy server for your network, you can set the addresses for the protocols shown in Figure 16.22. Alternatively, some administrators provide an Automatic Proxy Configuration link that you can enter in the Autoconfiguration URL text box.

Figure 16.22: Network Proxy Configuration
Password
The Password applet is straightforward. It allows you to change the login password for the current user account. It serves as a front end to the passwd command, where you enter the current password, and then the new password twice.
Preferred Applications
You can select a preferred web browser, text editor, and command-line interface terminal in the Preferred Applications window. The default web browser is Mozilla; there is no default text editor, and the default terminal is gnome-terminal . You can review the Preferred Applications window in Figure 16.23.
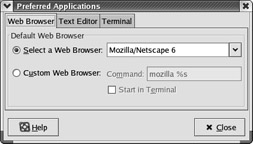
Figure 16.23: Preferred Applications
Screensaver
You can configure the screensaver of your choice through the Screensaver applet. The Screensaver Preferences window, shown in Figure 16.24, allows you to configure a random or specific screensaver pattern, along with delay times and screensaver performance settings.
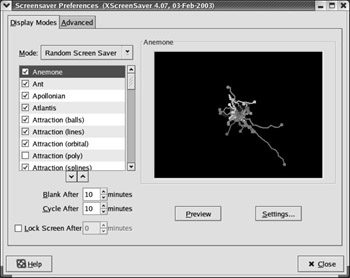
Figure 16.24: Screensaver Preferences
| Note | GNOME does not allow screensaver access to the root user, unless you run the xhost +localhost command. The xhost command, described in Chapter 15 , allows network access to the named computers. In fact, GNOME discourages root access to their GUI. While I ve used the root account for this book, I would not leave a root-enabled computer unattended, so I don t need a screensaver. |
Sound
If you ve configured a sound card on your computer, you can use the Sound applet to activate sounds on different events, such as e-mail receipt, logins, errors, and more. The Sound Preferences window, shown in Figure 16.25, allows you to specify different sounds for the specified events.
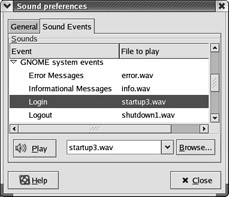
Figure 16.25: Sound Preferences
Theme
The Theme Preferences window, shown in Figure 16.26, is also straightforward. It shows the Red Hat Bluecurve theme that is now the default for Red Hat desktops. Click Details, and you can set different themes for controls, window borders, and icons.

Figure 16.26: Theme Preferences
Windows
The Window Preferences window, shown in Figure 16.27, allows you to set the behavior of windows in your GUI. You can set what the window does when you double-click the title bar or the key associated with moving a particular window.

Figure 16.27: Window Preferences
More Preferences
The GNOME Control Panel includes a link to More Preferences, which opens a different window with the following three items: CD Database, Panel, and Sessions. We cover the associated preferences windows later in this chapter.
EAN: 2147483647
Pages: 220