Section 6.8. My Server Is So Secure I Can t Log In as Root
6.8. My Server Is So Secure I Can't Log In as RootIf you've forgotten your GRUB and root passwords, you're not stuck. You do not have to reinstall Linux. The problem may be as simple as a misconfigured bootloader, a mislabeled kernel, or an incorrect partition. Or the problem may be more complex, such as a bug-laden kernel or problematic files associated with the boot process. I describe some of these issues in Chapter 7. The techniques described in this annoyance can help you solve all of these problems. Rescue disks can help you get around boot problems and get into your system. Once you've booted into Linux, you can repair any problems that you see. You should also read this annoyance from the point of view of the cracker. If you need a really secure system, you need to think like someone who enjoys breaking into computers. It will help you understand the reasons behind the last annoyance in this chapter. 6.8.1. Rescue DisksEvery Linux distribution that I've used includes some sort of rescue-disk system. It can help you recover from problem kernels, lost root passwords, misconfigured installation files, and more. In this annoyance, I show you how to use the basic rescue disks. I cover how you might use these rescue disks for a troubled system in Chapter 7. Some rescue disks are more self-contained than others. The Red Hat/Fedora rescue system works from the first installation CD. As shown in Figure 6-2, it can boot your system in several ways, which I'll describe shortly. Figure 6-2. Fedora rescue screen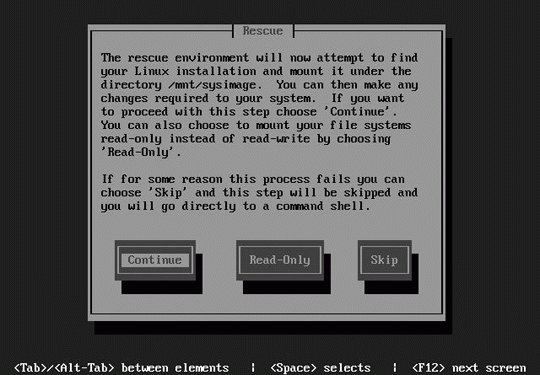 Rescue disks load minimal systems onto a RAM disk. The tools contained on those systems are often quite limited. At least the vi text editor (which should be all that a Linux geek needs) is included so you can edit key configuration files after booting. Rescue systems support password-free root user access. Once you've mounted your root directory (/) in read-write mode, you can recover (or change) the root password. The first step is to restore the standard filesystem hierarchy. Normally, this is possible with the chroot command. The directory that you use depends on the rescue disk, which I'll describe shortly.
6.8.1.1. Creating a Red Hat/Fedora rescue diskThere are two different kinds of rescue disks that you can create on Red Hat/Fedora distributions. The best kind is customized for your system, and you can create it with the mkbootdisk command. The alternative is already available as part of the first Red Hat/Fedora installation CD, and I describe how you can use that as a rescue disk shortly. To customize a rescue disk for your system, all you need is the active kernel version number, which you can check with the uname -r command. Insert a floppy disk, and you can create a customized rescue disk with the following command, which takes the output from uname -r, the active kernel version number, and applies it as input to mkbootdisk: mkbootdisk `uname -r` In most cases, the boot image is too big for a 1.44 MB floppy drive; most PCs no longer have floppy drives. If you don't have a floppy drive but do have a CD burner, you can create a customized rescue CD with the following command, which writes at standard (1x) speed: mkbootdisk --iso --device rescue.iso `uname -r` cdrecord -v speed=1 rescue.iso Naturally, if your CD writer can handle faster rates, you can increase the value of speed. Alternatively, you can use the first Red Hat/Fedora installation disk as a rescue disk. 6.8.1.2. Rescuing a Red Hat/Fedora systemThe procedure for rescuing the latest Red Hat/Fedora distributions is straightforward. If you have a rescue disk, you can use it to boot your system directly. Otherwise, all you need is the first installation CD, using the procedure described here. At the installation boot screen, enter the linux rescue command. You're taken through the first few steps associated with installation, including language and keyboard. Once you reach the screen shown in Figure 6-2, you have three choices:
After you make your choice, no login is required. You have root privileges on this system. 6.8.1.3. Rescuing a SUSE systemIn a similar fashion, you can rescue a SUSE system by booting from the first installation CD or DVD. For example, with SUSE 9.2/9.3/10.0, the procedure is easy: just highlight and run the Rescue System command from the first GUI boot menu. But if you have fatal problems with hardware or drivers, you may need to run the manual rescue method:
At the Rescue login: prompt, you can log in as the root user. A password is not required. None of your existing partitions are mounted. But if the partitions are error-free, you should be able to mount them on a directory such as /mnt. Make sure to check that you're mounting the right partition; remember, you can list the current partitions on the first IDE drive with the fdisk -l /dev/hda command. If you've read the previous section on Red Hat/Fedora, its rescue mode automatically mounts your configured directories. Once you've mounted appropriate directories, you can restore your original filesystem with the chroot command. If you've made a mistake, you can always return to the rescue filesystem with the exit command. Now you can repair your bootloader or reset your root password as needed. 6.8.1.4. The Debian from Scratch rescueThe Debian from Scratch CD was developed by John Goerzen as an alternative to the standard Debian installer. When you boot from this CD, it loads a not-too-minimal version of this operating system.
Once loaded, Debian from Scratch includes a wide variety of tools, including fdisk, parted, development environments, full networking support, CD/DVD burning tools, print tools, and even the mutt mail reader. As I described in the previous section on SUSE rescues, you should be able to mount your root (/) partition on a directory such as /mnt. Make sure to check that you're mounting the right partition; remember, you can list the current partitions on the first IDE drive with the fdisk -l /dev/hda command. Once you've mounted appropriate directories, you can restore your original filesystem with the chroot command. If you've made a mistake, you can always return to the rescue filesystem with the exit command. Now you can repair your bootloader or reset your root password as needed. 6.8.1.5. Using KnoppixThe Knoppix CD (http://www.knoppix.org) is gaining popularity as the universal rescue disk. It boots a complete Linux system from the CD with an array of excellent tools that you can use to rescue almost any PC. As you can see in Figure 6-3, Knoppix loads a complete Linux operating system from the CD. Figure 6-3. Knoppix GUI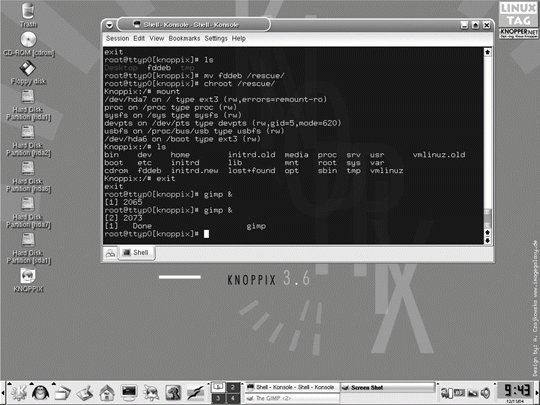 Knoppix can even help you rescue Microsoft operating systems. As with any Linux distribution, it includes native support for FAT-style formats (FAT16, FAT32, VFAT). If you have an NTFS-formatted partition with Microsoft Windows, Knoppix can load the associated Microsoft NTFS drivers, which can make the associated partitions writable from this Linux system.
6.8.1.6. USB bootYou can configure many PCs to boot from a USB device, including floppy, CD, and key drives. If USB boot options are not available in your BIOS, look for an upgrade. You may be pleasantly surprised. If you can boot from a USB drive, there are several Linux distributions customized for USB keys. They include:
If your system can't natively boot via USB, some distributions have 1.44 MB boot floppies that can help you boot from the USB drive. With the advent of 1 GB and larger USB keys, you can configure a complete bootable distribution such as Knoppix or SUSE Live CD on a USB key. |

EAN: 2147483647
Pages: 144