Choosing InDesign
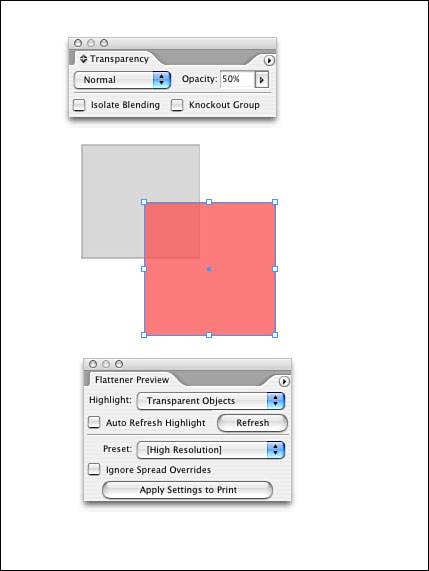
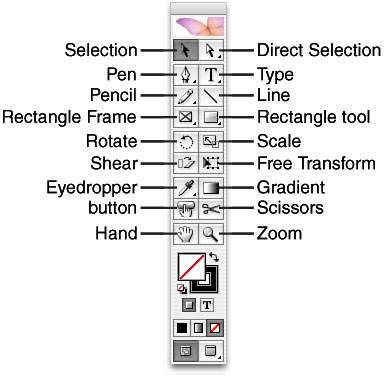
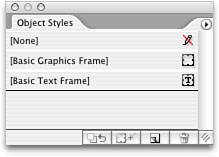
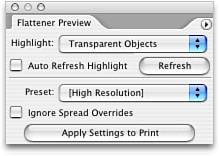
| It probably goes without saying that, in purchasing this book, you already own Adobe InDesign CS2. However, if by chance you are researching your purchase, I suggest you investigate the Adobe website, using the following URL: http://www.adobe.com/products/indesign/conversion.html. Here you will find a number of resources guiding you through productivity and return on investment studies as well as conversion issues to consider. See more about converting in Chapter 3, "Converting to InDesign from Another Application." If, on the other hand, you have made your purchase and are ready to get started, may I first congratulate you on an excellent decision. You have chosen a superior page layout product that includes robust layout features, tight integration with the most popular Adobe products (collectively known as the Creative Suite), and rich creative and design features that would satisfy the most discriminating designer. As I've indicated in the introduction, I will not assume you are simply upgrading from a previous version of InDesign. In this chapter, I cover the most commonly used features as well as point out new features to the readers who are upgrading. Creative Suite AdvantagesThe advantages of purchasing the Creative Suite are innumerable. To be able to purchase these powerful and creative products for a price comparable to the cost of a single standalone competitor is truly remarkable. Think carefully when choosing between the Standard and Premium editions of Creative Suite. The Standard Edition includes InDesign, Illustrator, Photoshop, Version Cue, Bridge, and Stock Photos. The Premium Edition adds Acrobat 7 Professional and GoLive to this list, thereby extending your content distribution enormously. Adobe Bridge (New Feature) and Version CueThese file management applications are available with Adobe's individual application purchases as well as both the Standard and Premium versions of Creative Suite. Bridge and Version Cue allow you to work, collaborate, and manage within an all-Adobe workspace. Adobe describes Bridge as "the new navigational control center built for Adobe Creative Suite and its components." It enables you to browse and organize your project files while providing centralized access to your project files, applications, and settings. For example, Bridge can manage the PDF review process as well as the color settings. You can organize, browse, locate, and view assets using Bridge instead of your operating system's file navigation (via the Use Adobe Dialog button or Use OS Dialog button). For those of you familiar with the File Browser in previous versions of Photoshop, think of Bridge as a more robust version of File Browser but now shared by all the Adobe Creative Suite applications. Bridge enables you to store your projects locally on your hard drive. If you are in a workgroup setting and you own Creative Suite Standard or Premium, you can install Bridge and Version Cue and configure them to store your projects on your server. Take a look at Adobe Bridge in Figure 1.1. Figure 1.1. The Adobe Bridge interface.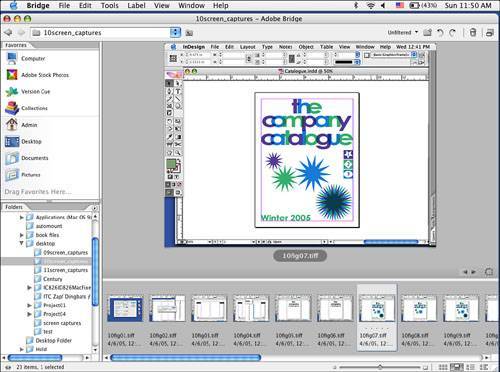 Version Cue allows you to file share, manage versions of your projects, track alternative versions and the status of project files, maintain communication with others about the status of the project (in use, synchronized, and so on), and perform utilitarian processes such as backing up Version Cue projects. Managing projects in a universal workspace shared by all users enables easier collaboration across workgroups. Figure 1.2 shows where you access Version Cue in Bridge. Later in this chapter, you will see the indicator in the InDesign window. Figure 1.2. The Version Cue feature in Bridge.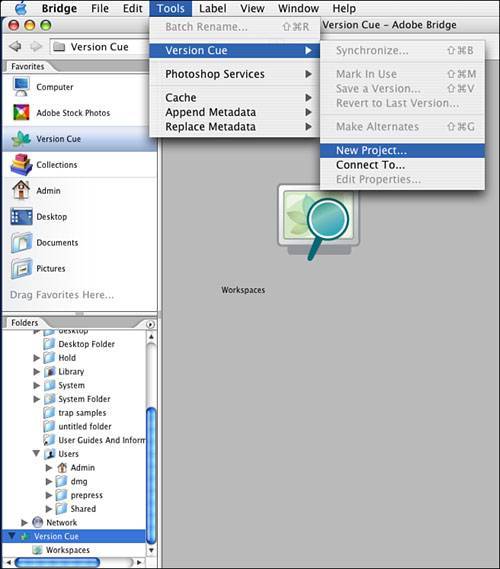 PageMaker UsersWhile Chapter 3 specifically covers converting PageMaker files, I thought it would be worthwhile to include some thoughts in this chapter about exploring. InDesign CS2 has added specific Pagemaker features for users who are now making the switch. It contains the following: a PageMaker tool palette; PageMaker keyboard shortcut sets; and plugins that enable features such as InBooklet, automated bullets and numbering, data merge, and so on. Object Styles (New Feature)Just like paragraph styles or character styles, object styles in InDesign CS2 enable you to define graphic, text, and frame attributes as saved styles you can apply repeatedly to achieve consistency in your design and increase your productivity. Featured in Chapter 9, "Developing a Newsletter," you will use this new feature to create consistent text frames. See Figure 1.3 for an example of both the palette and a new style I created to demonstrate the feature. Figure 1.3. The Object Styles palette.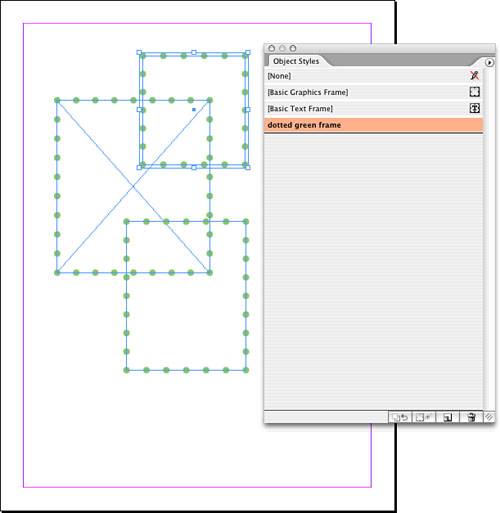 Photoshop and PDF Layer Support (New Feature)InDesign CS2 enables you to import layered Photoshop files, selectively showing and hiding Photoshop layers without altering the image in Photoshop. Additionally, the visibility of Layer Comps in a Photoshop file can be controlled in InDesign, without exiting to Photoshop. Maintaining those layers gives you greater flexibility in experimenting with alternative versions as you create. Layers themselves are covered in Chapter 8, "Putting Together an Interactive Presentation." TransparencyContinued support exists for transparency, including drop shadows, feathering, and changing the opacity and color blending modes of any object (imported or created directly in InDesign). Transparency is invoked when using any of the features previously mentioned. Flattening can be previewed via the Flattener Preview palette. The act of flattening can be managed via the Pages palette or the Print or Export dialog boxes. Transparency is featured in several chapters throughout this book. The two primary palettes are shown in Figure 1.4, but bear in mind that drop shadows and feathering also invoke transparency. You can quickly identify transparency in use by looking at the Pages palette. Borrowing a convention from Photoshop, InDesign uses a checkerboard pattern in the page icons to indicate transparency is in use on a certain page. Figure 1.4. The Transparency and Flattener Preview palette. OpenType Font SupportContinued support also exists for Adobe OpenType, a new font standard jointly innovated by Adobe and Microsoft. It combines the best of all font structuressingle file structure, cross-platform compatibility, and extended character set support. Access to all the characters of your OpenType fonts is easy with the Glyphs palette, found on the Type pull-down menu. The Glyphs palette gives you access to all the font characters of all the typefaces in every font family you own. Use of the Glyphs palette is featured in Chapter 5, "Creating an Advertisement and a Poster." Anchored Objects (New Feature)In an improvement to inline graphics or anchored frames, anchored objects are controlled via new commands found on the Object pull-down menu. You select Anchored Objects, Options, Inserting, Releasing. The previous implementation of anchored frames restricted the frames to the interior of the text frame in which they were anchored, but anchored objects are tethered to their text anchor; however, they can float outside the text frame itself. You can find more on this feature in Chapter 10, "Designing a Product Catalogue." See Figure 1.5 for an example of anchored object options. Figure 1.5. The Anchored Object Options window.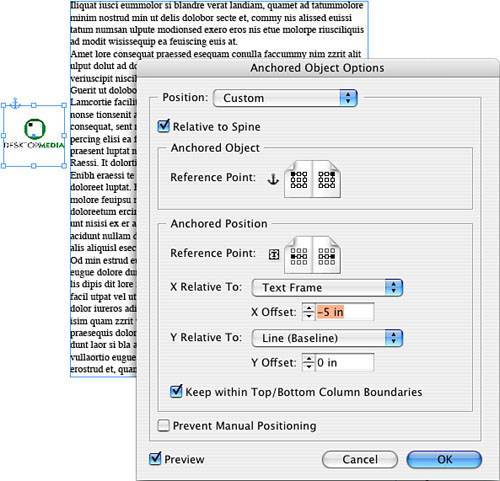 TablesTables are one of the most important features of InDesign. Although they are far more robust than other products on the market, they're easy to use. Tables can be created and enhanced using either the Table pull-down menu or the Table palette. You can import tables from Microsoft Word and Excel, as well as copy and paste tables from those applications. Tables can incorporate both text and graphics. You have complete control over the way every table cell looks, including its fills, strokes, and tint fills applied in a pattern, such as every other row. You can format text, tab it, indent it, rotate it, and style it any way you choose. Tables are featured in Chapters 9, 10, and 11. Direct Export to PDFExpanded support for PDF export includes support for presets, PDF industry standards, and version compatibility. PDF presets can be customized, saved, and shared with others. If you own Creative Suite, PDF presets can be set universally for all CS2 applications from a common repository shared by all applications within the suite. Almost every chapter in this book steps you through the creation of a PDF. Snippets (New Feature)You can export InDesign objects as snippets that can be shared by other Adobe applications almost like shared libraries. The steps are simple: To create a snippet, simply select an object or several objects; go to the File pull-down menu; and select Export, InDesign Snippets. Note that the file extension for snippets is .inds. Whatever you have selected is saved as an independent file that you can browse and use via the Place commandyou can even drag and drop it from Adobe Bridge! Figure 1.6 shows an example of a snippet. Figure 1.6. Snippets in Bridge.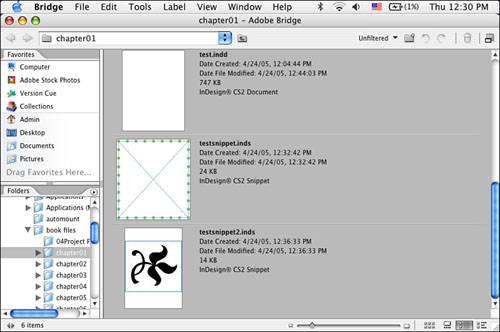 The InDesign CS 2 WindowFigure 1.7 shows the InDesign CS 2 window. In addition to identifying the various components of the InDesign window, it's important to point out components that are new to this specific version. At the bottom of the window, directly to the right of the page indicatorand new to this versionis the Version Cue status bar. It lets you know the current state of your file, such as never saved, open, version, alternate, and so on. Figure 1.7. The InDesign CS2 window and its features.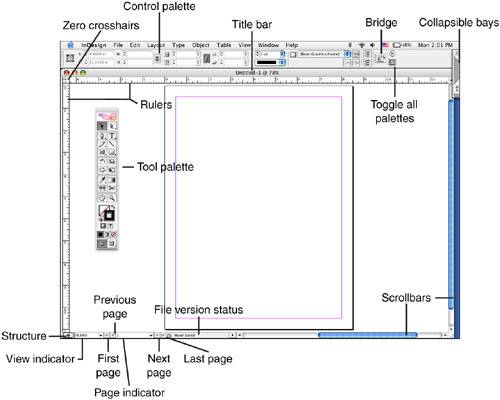 InDesign CS2 ToolsThis section covers the set of tools available in InDesign CS2. The following list details each tool's role as shown in Figure 1.8:
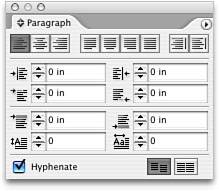
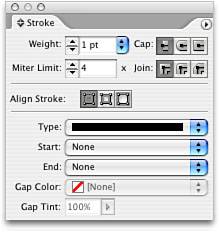
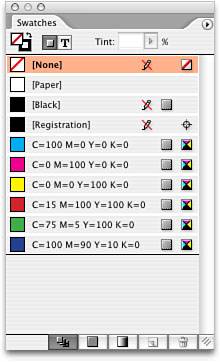
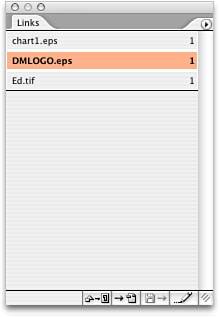
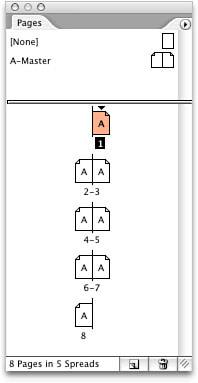
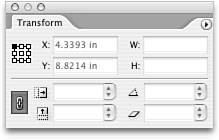
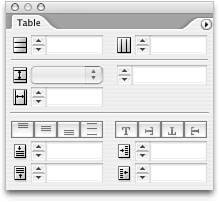
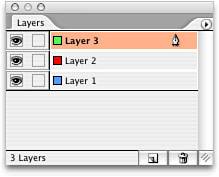
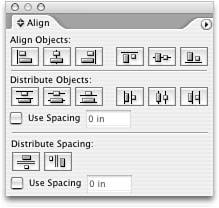
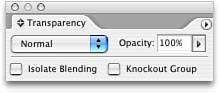
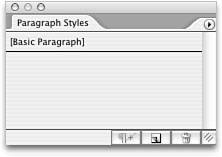
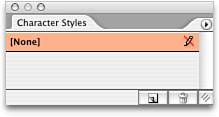
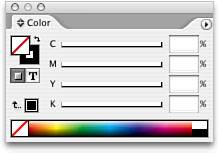
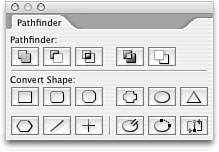
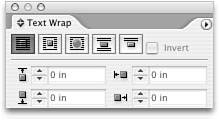
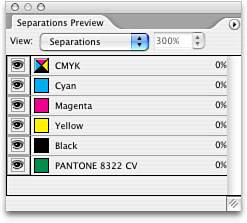
Figure 1.8. The InDesign CS2 tools. The tools in the Tool palette are shown in Figure 1.8. InDesign CS2 Primary PalettesThis section covers the primary palettes, which you will use regularly. Each is described in detail. Figure 1.9 shows the Character palette. This floating interface enables you to manage character level formatting, including font, size, leading, kerning, tracking, horizontal and vertical scale, baseline shift, skew, language control, type styles, underline and strikethrough options, and OpenType options. Figure 1.9. The Character palette. The Paragraph palette (shown in Figure 1.10) is the floating interface that enables you to manage paragraph level formatting, including alignment, indentation, paragraph spacing, drop caps, hyphenation, lock to baseline grid, justification, keeps, nested styles, paragraph rules, and bullet and numbering options. Figure 1.10. The Paragraph palette. The Stroke palette, shown in Figure 1.11, lets you manage the stroke format of an InDesign element, including weight, cap and join styles, stroke alignment (this new feature has the following options: Align Stroke to Center, Align Stroke to Inside, and Align Stroke to Outside of Object), and stroke styling options. Figure 1.11. The Stroke palette. The Swatches palette, shown in Figure 1.12, enables you to manage saved colors, tints, gradients, and inks, including defining, applying, editing, and deleting them. Adding unnamed colors is also a powerful feature of the Swatches palette because it enables you to add previously undefined colors to it, thereby saving the colors like styles. If you update the swatch, the object is also updated wherever the color is assigned. Figure 1.12. The Swatches palette. The Links palette is a floating interface that enables you to manage the links between the InDesign layout and the resource files placed in InDesign (see Figure 1.13). Figure 1.13. The Links palette. The Pages palette, shown in Figure 1.14, lets you manage the pages in a layout, including pages, master pages, master page items, numbering, sectioning, and page flattening. Figure 1.14. The Pages palette. Figure 1.15 shows the Transform palette, a floating interface that enables you to change the location, size, rotation, and shear attributes of a transformation. Figure 1.15. The Transform palette. The Table palette, shown in Figure 1.16, is a floating interface that enables you to manage and edit tables in InDesign, including rows and columns (and their respective widths and heights); text alignment and rotation; indentation; and the formatting of cells, rows, and columns. Figure 1.16. The Table palette. The Layers palette is a floating interface that enables you to create, manage, and delete layers. Placing elements on layers gives you greater control over managing a complex layout (see Figure 1.17). Figure 1.17. The Layers palette. InDesign CS2's Secondary PalettesThis section covers the secondary palettes, which I feel you will use often, but perhaps not regularly. Each is covered in detail here. The Tabs palette is a floating interface that enables you to create, edit, and manage tab stops and leaders (see Figure 1.18). Figure 1.18. The Tabs palette. The Align palette is a floating interface that lets you align and distribute objects relative to each other (see Figure 1.19). Figure 1.19. The Align palette. The Transparency palette is a floating interface, shown in Figure 1.20, that enables you to change the opacity of its fills and strokes. This palette also lets you utilize Blending Modes much like those in Photoshop. Figure 1.20. The Transparency palette. The Paragraph Styles palette, a floating interface, enables you to define, edit, and apply paragraph styles. The palette itself contains saved paragraph formats (see Figure 1.21). Figure 1.21. The Paragraph Styles palette. The Character Styles palette is a floating interface that enables you to define, edit, and apply character styles. The palette itself contains saved character formats (see Figure 1.22). Figure 1.22. The Character Styles palette. Figure 1.23 shows the Gradient palette, a floating interface that enables you to create linear and radial gradients. They can later be saved as swatches in the Swatches palette. Figure 1.23. The Gradient palette. The Color palette is a floating interface that enables you to create colors. They can later be saved as swatches in the Swatches palette (see Figure 1.24). Figure 1.24. The Color palette. Figure 1.25 shows the Pathfinder palette, a floating interface that enables you to combine and convert shapes. This palette also provides vertical and horizontal distribution of selected objects. Figure 1.25. The Pathfinder palette. The Object Styles palette is a new palette. This floating interface allows you to define, edit, and apply object styles. The palette itself contains saved object attributes (see Figure 1.26). Figure 1.26. The Object Styles palette. The Text Wrap palette is shown in Figure 1.27. It's a floating interface that enables you to manage the flow of text around an object. Figure 1.27. The Text Wrap palette. The Separations Preview palette, shown in Figure 1.28, allows you to view a layout in each separate color, as it will be produced by your commercial print provider. Figure 1.28. The Separations Preview palette. The Flattener Preview palette, shown in Figure 1.29, lets you view different effects that flattening controls have over elements or pages that involve transparency. Figure 1.29. The Flattener Preview palette. |


EAN: 2147483647
Pages: 148