5.4 How to use the Connector Builder Assistant tool
|
| < Day Day Up > |
|
Connectors provide the links between a Web interface and your business logic on the mainframe. One of the features in WSAA is the ability to quickly gather connector information to be able to supply it to a tool, such as WebSphere Studio Application Developer.
While the document, WebSphere Studio Asset Analyzer for Multiplatforms V2R1 Create the connector information for a COBOL CICS application, SC18-7159, describes how to use the Connector Builder Assistant tool with the sample code provided with WSAA, we thought it would help you to see how it works with the Trader 2 application.
To obtain the code you need to build a connector, you must perform the following activities:
-
Create a connector builder project
-
Identify the CICS transactions you want to use
-
Identify the input and output data structures of those transactions
-
Create the analysis and report files
We describe the steps to follow for each one of these in the following sections.
5.4.1 Create a connector project
To create a connector builder project, perform the following steps:
-
In your Web browser, open the Home page of WebSphere Studio Asset Analyzer.
-
Click the Connect tab. The Connector Builder Assistant tool page is displayed.
There are a few other ways in which you can access a link to create a new connector builder project. These include:
-
Home -> Connector builder projects
-
Explore -> MVS assets -> Project
These paths take you to the Project summary page.
-
-
Click Create a new connector builder project. The Creating a new connector builder project page is displayed, as shown in Figure 5-12.
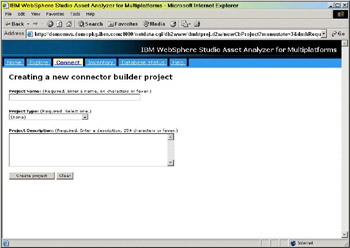
Figure 5-12: Creating a new connector builder project page, preliminary viewNote The contents are strikingly similar to the Creating a new analyze-change project page shown in Figure 4-3 on page 120. This is by design; the contents of both pages appear on the Project summary page.
-
Enter the name of your project in the Project Name field. For this example we use the sample project, “WSAA Connect project 1.”
-
Select an entry from the Project Type list box. For this example, use the first entry, CICS callable (ECI) transactions. The only other selection is:
-
IMS transactions
-
-
Enter a description of your project in the Project Description field.
We suggest that you enter a concise, explicit description. For example:
Build connector project for program MYTRADS. This is one aspect of the Trader 2 web interface project.
The text you enter in this field is displayed on the Project summary page. If you provide a clear description, you will easily be able to find your connector projects.
-
When you are finished, click the Create project button. The CICS callable (ECI) transaction connectors : Project Contents page is displayed, as shown in Figure 5-13.
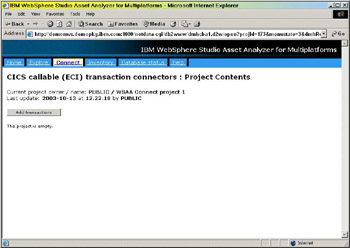
Figure 5-13: CICS callable (ECI) transaction connectors : Project Contents page, preliminary view
This is just another one of those exciting WSAA pages. At least the message, “The project is empty,” gives you some indication that you need to do something to add information to the project.
| Note | This page’s title is very long. To keep the flow of our text, we will refer to it as the Project Contents page. |
5.4.2 Identify the CICS transactions you want to use
Obviously you need to add at least one transaction to the project. To do so, perform the following steps:
-
Click the Add transactions button. The Add Transactions to Project page is displayed, as shown in Figure 5-14.

Figure 5-14: Add Transactions to Project page, preliminary view -
Choose a source of the transactions. For this example, select All transactions from a known CICS region from the list box. The other possible selections are:
-
All CICS transactions IO from a known site.
-
Transactions with no screen IO from a known CICS region.
-
CICS transactions with no screen IO from a known site.
This affords you the ability to access just about every kind of transaction that your WSAA system or product administrator loaded into the WSAA database.
The page is redisplayed, and a new field is displayed.
Note The field that is displayed is based on your selection. If you chose one of the region options, you have the ability to select a specific CICS region. If you chose one of the site options, you have the ability to select a specific site.
-
-
Choose a CICS region. For this example, we select CICSA from the list box. This is the region that contains the Trader 2 application, which the WSAA system or product administrator loaded in “How to load CICS resources” on page 67.
Note Curiously, the WSAA development team felt the need to have a link next to this field to let it display the corresponding summary page. It lists the same information that you see in the list box. Perhaps they believed that some application programmers would want to continue to research which CICS region (or site) they needed to work with.
If you do use this link, we suggest that you right-click it to open a separate browser window. That way, the information you already entered will remain on the page.
The page is redisplayed, and a list of transactions is displayed, as shown in Figure 5-15.
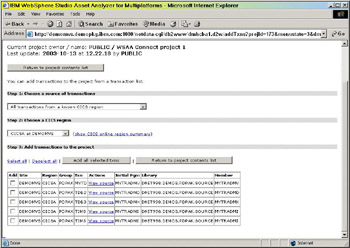
Figure 5-15: Add Transactions to Project page, with transactions listed -
Select one transaction (or more) that you want to use for your project. For this example we use MYTD, which invokes the program MYTRADMV.
-
Click the Add all selected txns button. The page is redisplayed, and the transaction (or transactions) that you selected are greyed out.
-
Click the Return to project contents list button. The Project Contents page is displayed again, this time with the transaction (or transactions) that you selected, as shown in Figure 5-16.
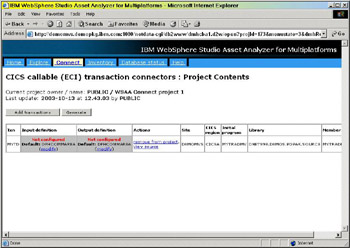
Figure 5-16: CICS callable (ECI) transaction connectors : Project Contents page, with selected transaction
5.4.3 Identify the input and output data structures
You must now configure the input and output definitions for this transaction. To do so, perform the following steps:
-
Click modify in the Input definition column. The Configuring Transaction MYTD for Input page is displayed, as shown in Figure 5-17.
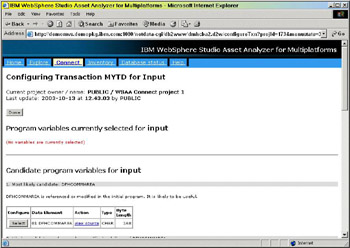
Figure 5-17: Configuring Transaction MYTD for Input pageThere are several sections to this page, which you can see when you scroll down. These sections list, from most likely to least likely, the program variables that will be useful in your connector builder project.
Note Carefully review the contents of each section to make sure you understand how WSAA delineates among these candidates.
-
For this example, click the Select button next to the data element, DFHCOMMAREA.
-
Click the Done button at the top of the page. The Project Contents page is displayed.
The status of the Input definition is now marked, Configured.
-
Click modify in the Output definition column. The Configuring Transaction MYTD for Output page is displayed.
The sections on this page are identical to the ones shown on the Input page.
-
Click the Select button next to the data element, DFHCOMMAREA.
-
Click the Done button at the top of the page, when you are finished. The Project Contents page is displayed.
5.4.4 Generate the analysis and report files
The final activity provides you with the necessary components for your Web-based application. To generate the results, perform the following steps:
-
Click the Generate button. The Generate Connector Builder Results for Project page is displayed, as shown in Figure 5-18.
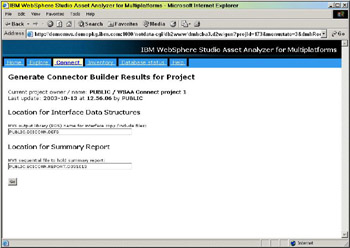
Figure 5-18: Generate Connector Builder Results for Project page -
If necessary, change the high-level qualifier of each data set name to match your TSO user ID and click the Go button. WSAA processes the information and displays the results in the Generated Results for Project page, as shown in Figure 5-19.
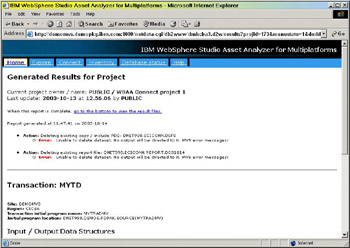
Figure 5-19: Generated Results for Project pageNote As you can see, this function did not work for us on the DemoMVS system. We have reported the problem to WSAA Support. At the time this chapter was last reviewed, we were still awaiting a fix.
WSAA is supposed to create a new copybook, which contains the data structure you identified, and a report specifying the activities that were performed. Links at the bottom of the page let you view the contents of the new files.
|
| < Day Day Up > |
|
EAN: 2147483647
Pages: 84