Understanding Dreamweaver Behaviors
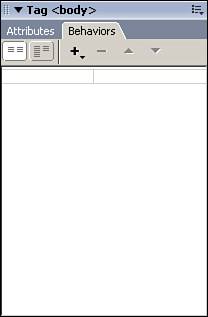
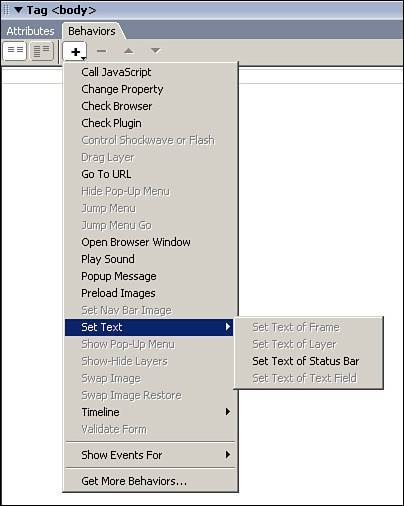
| As the development of your web pages continues, it's likely that you'll want to add feature functionality beyond just the simple hyperlinks. The good news is that JavaScript offers you a whole range of new options that supplement those offered by standard HTML. So what if you're not a scripting guru who can create functions and arrays in your sleep? Dreamweaver is going to do most of the work for you and even write the necessary code to add options such as opening external browser windows, validating forms, and even checking to see whether the visitor has a specific browser plug-in installed. Just sit back and you'll see how easy it is to make Dreamweaver behaviors spice up your web applications! JavaScript and DreamweaverOh sure, I said that you wouldn't have to understand any JavaScript and the first subsection I jump into is called "JavaScript and Dreamweaver." Great trick, eh? Actually, before we start exploring the snippets and behaviors that come with Dreamweaver, I thought it would be a good idea to give a brief background on JavaScript because it is the language that Dreamweaver uses to generate behaviors. If the thought of learning anything about a scripting language is completely revolting, go ahead and skip on to the next section. If, however, you want to learn a little more about JavaScript and how it relates to Dreamweaver, read on. JavaScript is one of the more popular client-side scripting languages in use today. Don't confuse JavaScript with its big brother Javawhich is a full-blown object-oriented language. Although they share similar syntax, JavaScript is essentially a stripped-down version of Java that is much easier to write and implement because it doesn't have to be compiled prior to execution. In addition, because it is a client-side language, the machine rendering the code in the browser is the one that does all the work. Unless you really want to get into developing your own scripts, it's likely that you'll take advantage of the predefined functions that are built into JavaScript. For instance, if you wanted to open a new browser window, you could use the JavaScript function Window.Open() If you want to close that same browser, you could use the function Window.Close() These are just a couple of examples of the many built-in functions that JavaScript offers and, as I mentioned before, Dreamweaver makes it very easy for you to access some of the more common functions through the JavaScript snippets and behaviors. Using JavaScript SnippetsAlthough Chapter 24, "Working Efficiently in Dreamweaver," already covered snippets, it's worth spending a minute to take a closer look at the JavaScript snippets that are included in the Snippets panel. To view the JavaScript snippets, open the Snippets panel by choosing Window, Snippets and then expand the JavaScript folder (see Figure 28.1) Figure 28.1. The Snippets panel with the JavaScript folder expanded. As you can see, Macromedia has provided quite a few JavaScript code snippets that can be used for everything from mathematical calculations to reading cookies. I highly recommend that you take some time to go through these folders and see what types of scripts are available for use in your pages. Doing so could save you the time and hassle of building your own script, only to discover that Macromedia had already provided you with everything you needed. Tip One of the snippets I use most frequently is the Starter Function snippet located in the starter script folder. This snippet places the bare necessities of a JavaScript function in the page and saves me the hassle of typing it every time I need to create a function. It also saves me from typos, to which I am prone. Just as was discussed in Chapter 24, after you find a snippet that you want to use, it's extremely easy to apply it to your page. Just place your cursor on the code line where you would like the snippet inserted, and then double-click on the appropriate snippet and the code is added to your page. If areas of the code need to be customized, they are indicated as such. Figure 28.2 shows the Starter Function applied to the head section of the page code. Figure 28.2. The Starter Function snippet has been added to the code.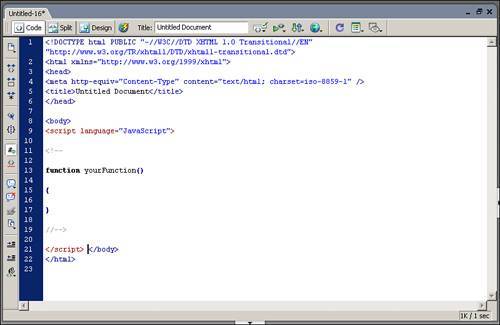 Applying BehaviorsIf you're still unsure about your ability to add JavaScript functionality to your pages, let's make it even easier. What if I told you that you could add JavaScript to your pages and never have to write a line of code? Sound good? Well, Dreamweaver's behaviors do exactly that. Dreamweaver behaviors are accessed via the Behaviors panel and represent some of the most commonly used scripts applied to web pages. The Behaviors panel (see Figure 28.3) enables you to track and organize those behaviors that are already applied to your pages and apply new behaviors to the page. Figure 28.3. The Behaviors panel helps you track the behaviors that have been applied to your page. To apply a behavior to your page, click the plus sign on the panel and choose the appropriate behavior from the menu. Some behaviors require that a specific object be selected before the behavior can be applied, such as the Control Shockwave or Flash behavior. Logically, Dreamweaver applies this behavior only to Shockwave (Director) or Flash movies. Other behaviors are grouped into categories such as the Set Text behaviors, shown in Figure 28.4, which enable you to choose between setting the text of a frame, layer, text field, or the status bar. Figure 28.4. Some behaviors are logically grouped by their function. Table 28.1 gives a brief overview of the Dreamweaver behaviors.
After they are applied to the page, these behaviors are assigned an event handler that indicates when they should be triggered. If the default handler is not the one that you want, you can adjust it via the drop-down menu in the leftmost column of the Behaviors panel. The states that are available are
After you have applied behaviors to your page, you may determine in the future that a behavior is no longer necessary. To remove a behavior from your page, click the minus sign in the Behaviors panel to remove it from the page. Tip Using the minus sign is truly the only safe way to fully remove a behavior. Deleting objects that have behaviors assigned to them without first deleting the behavior can result in orphaned code being left in your pages, so be sure to use the minus sign. |

EAN: 2147483647
Pages: 337