| Dreamweaver's Layout mode is a special document view designed to make it easier to create cells and tables for page layout purposes, as opposed to creating tables for tabular, chart-type data. You can move portions of your design around the page with a freedom you would not have working in traditional Design view. The underlying markup is still tables, but you get more visual interface options along the way. After you have created a table, you can see how it looks in Layout mode by following these steps: - If you're in Code view, switch to Design view. (You must first be in Design view to get to Layout mode.)
- Click the Layout tab along the Insert bar and then click the Layout button. Alternatively, you can select View, Table Mode, Layout Mode from the main menu or press (Command-F6) [Ctrl-F6].
- You'll notice that in Layout mode, your table now appears with a different "look" ”that of a layout table rather than an HTML table.
You are now ready to modify your table using Layout mode's tools and options. NOTE To return to working on your tables outside of Layout Mode, select View, Table Mode, Standard Mode. Dreamweaver switches back to the Standard mode of Design view, where you can continue working or switch to Code view, as you prefer. You can also press Ctrl-F6 again.
Drawing Layout Tables and Cells in Layout Mode A layout cell is very similar to a table cell in that it contains your content. However, the purpose of layout tables and cells is to help you organize and move tables around in a way that would be prohibitively difficult if you were just inserting table cells and rows normally. Layout mode is especially helpful if you're using tables to create a visual structure, as opposed to a data chart. As with table cells, layout cells cannot exist outside a layout table. If you create a layout cell, Dreamweaver automatically places it within a layout table, and will create a layout table if none exists. Create an additional layout table anywhere on the page where you want more control over that portion of the page. NOTE You can nest layout tables, enabling you to create more complex layouts.
Drawing a Layout Table You can create one layout table at a time in Dreamweaver, or multiple tables one after another, as the following sections explain. Creating a Single Layout Table Make sure you are in Layout mode. From the Layout tab of the Insert bar, click the Layout Table button. Position your cursor in the document; notice that it changes to a crosshair (+) when you move below any existing content. Now click and drag to create your layout table. TIP If the no-draw cursor appears while you are trying to draw a layout table below existing content, resize the Document window. Doing so creates more empty space between the bottom of the existing content and the bottom of the window.
Create Multiple Layout Tables Continuously Follow the steps in "Creating a Single Layout Table," but use (Control-drag) or [Command-drag]. As long as you continue to hold down (Control) or [Command], you can draw layout tables one after the other (see Figure 9.1). This prevents you from having to re-select the Layout Table button. Figure 9.1. Each layout table appears in green, with a tab denoting Layout Table at the upper left. 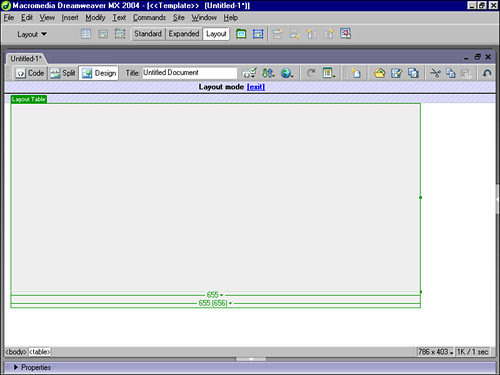 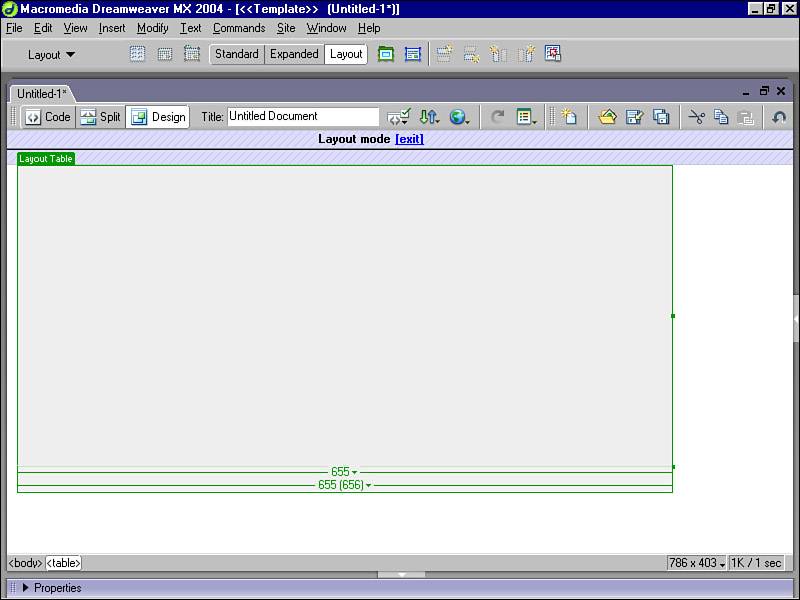
Drawing a Layout Cell As with tables, you can draw layout cells one at a time, or in batches, as described in the following sections. Creating a Single Layout Cell Make sure you are in Layout mode. From the Layout tab of the Insert bar, click the Draw Layout Cell button. Position your cursor in the document. Notice that it changes to a crosshair (+) when you move below any existing content. Position your cursor on the page where you want to start the cell, then drag to create. The cell appears on the page with a blue outline. (If no layout table already exists to host the cell, Dreamweaver creates one for you.) Create Multiple Layout Cells Continuously Follow the procedure in "Creating a Single Layout Cell," but use (Control-drag) or [Command-drag]. As long as you continue to hold down (Control) or [Command], you can draw layout cells one after the other. This prevents you from having to re-select the Draw Layout Cell button. The cell appears on the page with a blue outline. CAUTION Cell edges automatically snap to the edge of the surrounding layout table if you draw the cell too close to the edge of the layout table. To avoid this, temporarily disable snapping by holding down (Alt) or [Option] when drawing the cell.
Nesting a Layout Table Make sure you are in Layout mode. From the Layout tab of the Insert bar, click the Layout Table button. Position your cursor in the gray empty area of the existing layout table. Notice that it changes to a crosshair (+). Now click and drag to create your nested layout table. CAUTION You can create a nested layout table only in the empty area of an existing layout table, or around existing cells. You can't create a layout table inside a layout cell.
Formatting in Layout Mode A range of utilities is available to assist you in creating a great table design within Layout mode. You can use the Property inspector to modify your layout table and cell attributes; you can add content to a layout cell and modify that cell to more effectively manage that content; and you can let Dreamweaver help you make decisions about using spacer graphics for table layout integrity.  | Dreamweaver MX 2004 adds a new tables mode called "Expanded." (The button's between Standard and Layout on the Insert bar.) When you're in Expanded Tables mode, added cell padding and spacing is placed in all tables in a document temporarily. This increases the tables' borders for ease of editing, allowing you to select items within tables more easily, or more precisely position the insertion point. For example, you might expand a table to make it easier to place the insertion point to the left or right of an image, without accidentally selecting the image or the table cell. Just be careful: After placing the insertion point, return to Standard or Layout mode to make your edits. Some visual functions, such as resizing, don't work correctly in Expanded Tables mode. |
Setting Layout Table and Cell Attributes Many options exist for modifying layout tables and cells. When you're working in Layout mode, these settings (such as width, height, background, no wrap, cell padding, and cell spacing) apply to the layout tables and cells, as well as to the way the markup will be generated to create the underlying table-based design. In addition, several options for layout tables and cells you might not have seen before include the following: -
Fixed ” Allows you to specify a pixel value width for your table or table cell. In fixed design, you must never exceed a cell's parameters. If you have a cell that is 125 pixels wide, but you put a 200-pixel-wide graphic in it, the table renders it improperly. -
Autostretch ” Results in the table or table cell having a percentage value. The resulting table or cell is therefore dynamic and will automatically flow to fill the available space. -
Clear Row Heights ” Removes specific height settings for all the cells in the layout table. -
Make Widths Consistent ” In fixed designs, matches the width of the cell to its contents. So, if you create a layout cell that is 300 pixels wide and the content is 250 pixels wide, this feature resets the cell width to 250. -
Remove All Spacers ” Removes any spacers used in your layout. Spacers are transparent images, such as a single-pixel GIF file, that Dreamweaver uses to force cells to a particular width. -
Remove Nesting ” Removes any nested layout tables without removing the content. NOTE Because Dreamweaver adds heights as you work on your design in Layout mode, you will likely want to remove that markup. To do so, select the Clear Row Heights option from the Property inspector, or the Clear All Heights option from the drop-down menu at the top (or sometimes bottom) of the table in Layout view. Do this only after you've added the content to the cells within that row, to avoid deleting empty rows entirely.
Selecting Options for a Layout Table Select the layout table by clicking the layout table's tab, or click the <table> tag in the tag selector at the bottom of the Document window. In the Property inspector, make modifications to the properties available. Press (Return) [Enter] at any time to apply a property. Save your file to update the changes. Selecting Options for a Layout Cell Select the layout cell by clicking the edge of the cell (which takes a certain amount of coordination!), or (Command-click) [Ctrl-click] anywhere in the cell. In the Property inspector, make modifications to the properties available. Press (Return) [Enter] at any time to apply a property. Save your file to update the changes. Adding Content You can add any kind of content you would like to a layout cell, just as you would with a traditional HTML table cell. Adding Text to a Layout Cell Place your cursor in the layout cell where you want to add text. Start typing. The cell automatically expands as you type, if needed. You can also paste text copied from another document into a cell. Adding an Image to a Cell Place your cursor in the layout cell where you want to add the image. Now either choose Insert, Image, or, in the Common tab of the Insert bar, click the Images button, and select Image. The Select Image Source dialog box appears, where you can select an image file. Click OK. The image now appears in the layout cell. You also can add other elements, such as objects and applets. Simply add them to the layout cell as you would to a normal document (see Figure 9.2). Figure 9.2. This layout table has cells containing text, images, and Flash objects. 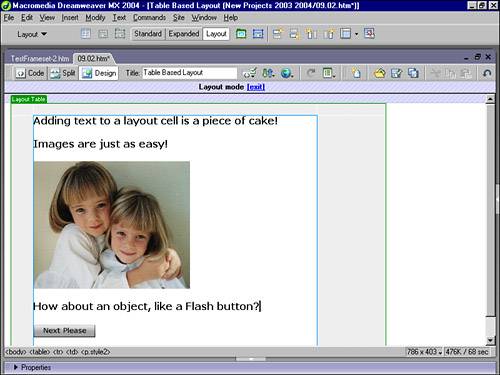 
 | Trying to add content to a layout table but having difficulties? See "Adding Content" in the "Troubleshooting" section of this chapter . |
Moving and Resizing Layout Cells and Tables Rare is the table or cell that satisfies the designer completely at first placement. Dreamweaver makes changing layout cells and tables easy. Resizing a Layout Table Clicking the tab at the top left of the table selects the table and displays selection handles around it. To resize the table, drag the selection handles. Moving a Nested Layout Table You can't move a main layout table, but you can move a nested layout table. Clicking the tab at the top left of the table selects the table and displays selection handles around it. Now you can either drag the table to another location on the page, or press the arrow keys to move the table one pixel at a time. Holding down Shift while using an arrow key moves a table ten pixels at a time. Resizing a Layout Cell Select a cell by clicking the edge of the cell or by (Control-clicking) or [Command-clicking] anywhere in the cell. The selection handles now appear around the cell. Drag a selection handle to resize the cell. The cell edges automatically snap to align with other cells' edges, if any are present. Moving a Layout Cell Select a cell by clicking an edge of the cell or by (Control-clicking) or [Command-clicking] anywhere in the cell. Selection handles appear around the cell. Now either drag the cell to another location within its layout table, or use the arrow keys to move the cell one pixel at a time. Holding down Shift while using an arrow key moves a cell ten pixels at a time. Moving a Nested Layout Cell Select a cell by clicking the edge of the cell or by (Control-clicking) or [Command-clicking] anywhere in the cell. Selection handles now appear around the cell; use them to resize. NOTE Layout cells, like table cells, cannot overlap, and a layout cell cannot be made smaller than its contents. Overlapping and clipping can be done with Draw Layers, if you need those features.
|