Sharpening an Area
The Sharpen tool works in the opposite way as the Blur tool: It tries to improve the focus of edges that are soft so that the image appears clearer. So, for example, you might want to use this tool if one small spot on a layer looks out of focus.
-
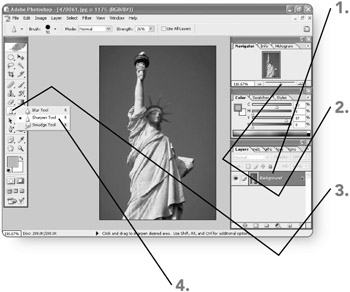
Click on the layer in the Layers palette that holds the content you want to sharpen. The selected layer will become the active layer.
-
Use the Navigator to zoom in on and display the area to sharpen. The selected area will become more visible.
-
Click and hold the Blur tool in the toolbox. A submenu will appear.
-
Click on Sharpen Tool . The Sharpen tool will become the active tool.
-
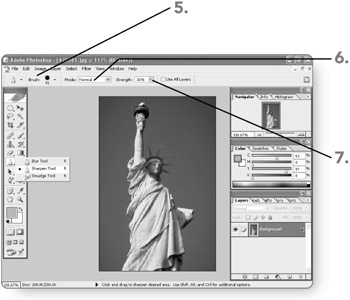
Choose a Brush style on the options bar. The selected brush will become active for the Sharpen tool.
-
Make a choice from the Mode drop-down list on the options bar. The selected mode will become active for the Sharpen tool.
-
Select the Strength text box contents, type a new entry , and press Enter . (Alternately, click on the right arrow beside the Strength choice, drag the slider, and then click on the right arrow again.) The strength setting will become active for the Sharpen tool.
-
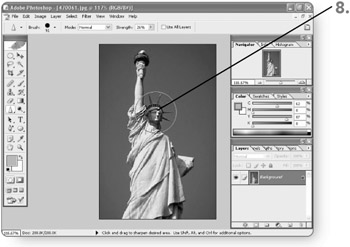
Drag on the layer to apply the sharpening. Sharpening will begin to appear. When you finish adding all the necessary sharpening, you can continue working with another tool or operation in Photoshop.
| Note | If you use a large, sharp brush and a higher Strength setting with the Sharpen tool, clicking or dragging can have unwanted effects beyond sharpening ”the color of pixels outside the area to be sharpened may be changed dramatically. Even though the impact of sharpening can be subtle, you still want to use the Sharpen tool sparingly to avoid those unwanted changes. |
EAN: 2147483647
Pages: 179