Creating JavaScript Functions
This is the script you developed earlier in this chapter to display a message:
<html> <head> <title>A first JavaScript example</title> <script language="javascript"> document.write("You are using JavaScript"); </script> </head> <body> <h1>A first JavaScript example</h1> </body> </html> The JavaScript document.write("You are using JavaScript"); is executed as soon as the <head> section is loaded, which means that the message “You are using JavaScript” appears in the Web page before the header, “A first JavaScript example,” does, as you saw earlier in Figure 2.3.
That’s fine as far as it goes, but isn’t that a little backward? After all, shouldn’t the header come first? How can you make it work that way?
Here’s how: place the <script> element in the <body> of the Web page, which means the code in the <script> element won’t be executed until after the header has already been displayed, like this:
<html> <head> <title>A first JavaScript example</title> </head> <body> <h1>A first JavaScript example</h1> <script language="javascript"> document.write("You are using JavaScript"); </script> </body> </html> Here, the header appears first, followed by the text “You are using JavaScript.” In other words, where you place your <script> element in a Web page determines when it is executed.
On the other hand, the modern way of doing things is to place the <script> element in the <head> section of a Web page. So how can you make that work? How can you make your code in a <script> element execute only when you want it to?
That’s what functions are all about. By placing your code in a function, that code won’t be executed until you call the function. A JavaScript function is a set of code statements that are specifically executed only when you want them to be. Those statements are set off from the rest of your code by surrounding them with { and } in the body of the function.
| Note | A function is just like the methods you’ve already seen-like the document object’s write method-except that a function isn’t connected to an object. |
For example, say you wanted to create a function named showMessage. That would look like this in the <script> element:
<html> <head> <title>A first JavaScript example</title> <script language="javascript"> function showMessage () { . . . } </script> </head> <body> <h1>A first JavaScript example</h1> </body> </html> Note how this works: You use the keyword function to define a new function, then give the name of the function, followed by a pair of parentheses (more on what those parentheses are for later in this chapter). Then you use curly braces, { and }, to enclose the JavaScript statements you want to have run when the function is called.
How do you call this function? You just have to use its name as a JavaScript statement. In this case, you can use browser events to call this function. In particular, you want to call the function after the <body> element has been loaded. You can make sure the <body> element has been loaded with the onload event attribute like this:
<html> <head> <title>A first JavaScript example</title> <script language="javascript"> function showMessage () { . . . } </script> </head> <body onload=""> <h1>A first JavaScript example</h1> </body> </html> So how do you actually call the showMessage function using the onload attribute? You just have to use the name of the function, followed by parentheses, as a JavaScript statement, so you call that function when the <body> element has been fully loaded like this:
<html> <head> <title>A first JavaScript example</title> <script language="javascript"> function showMessage () { . . . } </script> </head> <body onload="showMessage()"> <h1>A first JavaScript example</h1> </body> </html> Excellent; you’re making progress.
You now might be wondering if you can simply place the document.write call in the showMessage function to display the message “You are using JavaScript” like this:
<html> <head> <title>A first JavaScript example</title> <script language="javascript"> function showMessage () { document.write("You are using JavaScript"); } </script> </head> <body onload="showMessage()"> <h1>A first JavaScript example</h1> </body> </html> Sadly, the answer is no. The showMessage function will indeed be called after the body of the page loads, and that’s fine. But there’s a catch: when the body is loaded, you can no longer use the document.write method because the document is considered closed. And opening it again to write to it clears any text in it, so that’s no good here. All you’d see is the “You are using JavaScript” message because the “A first JavaScript example” header will have been overwritten.
So what can you do? You can do what all Ajax applications do when faced with this issue: you can write the message to a specific part of the Web page. For example, say that you add a <div> element and name it targetDiv, like this:
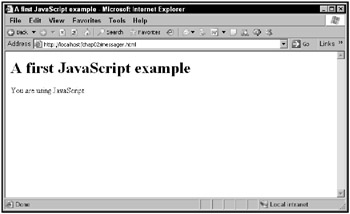
<html> <head> <title>A first JavaScript example</title> <script language="javascript"> function showMessage () { document.write("You are using JavaScript"); } </script> </head> <body onload="showMessage()"> <h1>A first JavaScript example</h1> <div > </div> </body> </html> Now when the showMessage function is called, you can write the message to the targetDiv <div> element. You can get a JavaScript object corresponding to that <div> element with the JavaScript expression document.getElementById('targetDiv'). The object corresponding to the <div> element supports a number of properties, such as the innherHTML property, corresponding to the HTML inside the <div> element. To rewrite that HTML, and so display the message, you need only to assign the text of the message to the <div> element’s innerHTML property in messager.html like this:
<html> <head> <title>A first JavaScript example</title> <script language="javascript"> function showMessage () { document.getElementById('targetDiv').innerHTML = "You are using JavaScript"; } </script> </head> <body onload="showMessage()"> <h1>A first JavaScript example</h1> <div > </div> </body> </html> You can see the results in Figure 2.9. The message was indeed written to the body of the page after the header, all thanks to the magic of functions, which let you call JavaScript code when you’re ready to execute that code.

Figure 2.9: Writing a message to a Web page
Note the following line of code from earlier in the chapter:
document.write("You are using JavaScript"); Here, you’re writing the text “You are using JavaScript” to a Web page. You do that by passing the text to write to the write method. In fact, you can also pass data to the functions you write as well (remember, the difference between a function and a method is simply that a method is a function built into an object), and that’s coming up next.
Passing arguments to functions
Being able to pass data to functions is an important part of JavaScript because passing data to functions means those functions can work on that data, and they can even pass you back results. For example, you might have a function that adds two numbers and gives you a result, and to use that function, you have to be able to pass it the two numbers to add.
Say, for example, that you want to pass the message text to display in the Web page to the showMessage function rather than simply having that function automatically display the text “You are using JavaScript.” How could you do that?
You start by specifying a name you want to refer to the message text by in the body of the function. If you want to refer to that text by the name “message,” for example, you do so by placing the name message in the parentheses after the name of the showMessage function. message is now called an argument of the showMessage function:
<html> <head> <title>Passing function arguments</title> <script language="javascript"> function showMessage (message) { document.getElementById('targetDiv').innerHTML = "You are using JavaScript"; } </script> </head> <body onload="showMessage()"> <h1>Passing function arguments</h1> <div > </div> </body> </html> In the body of the showMessage function, you can refer to the text passed to the function using the name message, which means you can assign that text to the targetDiv <div> element like this:
<html> <head> <title>Passing function arguments</title> <script language="javascript"> function showMessage (message) { document.getElementById('targetDiv').innerHTML = message; } </script> </head> <body onload="showMessage()"> <h1>Passing function arguments</h1> <div > </div> </body> </html> Great! This sets up the showMessage function. Now you can pass text to that function simply by placing that text inside the parentheses when you call the function. For example, you might want to display the message “You are seeing this thanks to JavaScript.” You could do that like this in the Web page, messagerArguments.html:
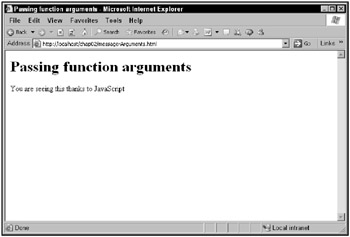
<html> <head> <title>Passing function arguments</title> <script language="javascript"> function showMessage (message) { document.getElementById('targetDiv').innerHTML = message; } </script> </head> <body onload="showMessage( 'You are seeing this thanks to JavaScript')"> <h1>Passing function arguments</h1> <div > </div> </body> </html> The results are shown in Figure 2.10, where the text you passed to the showMessage function was indeed faithfully displayed. Not bad.

Figure 2.10: Writing a message to a Web page using function arguments
Note that this example uses a <div> element to display text. Another element you’ll frequently use in Ajax applications is the <span> element. The <div> element is a block element, which means that it get its own line in the browser’s display. The <span> element, on the other hand, is an inline element, which means that you can use it to change the text inside sentences or other text.
Take a look at this example, span.html, which displays text in a <span> element:
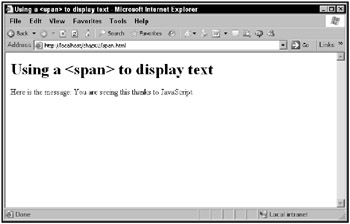
<html> <head> <title>Using a <span> to display text</title> <script language="javascript"> function showMessage (message) { document.getElementById('targetSpan').innerHTML = message; } </script> </head> <body onload="showMessage( 'You are seeing this thanks to JavaScript')"> <h1>Using a <span> to display text</h1> Here is the message: <span > </span>. </body> </html> The results are shown in Figure 2.11. Note that the text of the message appears inline in the sentence at the bottom of the page.

Figure 2.11: Writing text using a <span> element
| Note | When you’re working with Ajax, it’s important to be able to insert data into a Web page where you want that data to go; and one of the most common techniques to do that is to use <div> and <span> elements, as you’ve just seen. The <div> element is the most popular, but it’s a block element, which means it gets its own line in the display; and if you don’t want that, you can always use an inline <span> element. |
There’s still more to consider when passing arguments to JavaScript functions. You can pass multiple arguments, not just the single arguments you’ve seen so far. Handling multiple arguments is just about as easy as handling single arguments: you just list them inside the parentheses, separated by commas, when creating a function. For example, say you wanted to pass the name of the <div> element to display text in the showMessage function. You could do that like this in a new Web page, multipleArguments.html:
<html> <head> <title>Passing multiple function arguments</title> <script language="javascript"> function showMessage (message, divName) { document.getElementById(divName).innerHTML = message; } </script> </head> <body onload="showMessage( 'You are seeing this thanks to JavaScript')"> <h1>Passing multiple function arguments</h1> <div > </div> </body> </html> And when you pass multiple arguments to the function, you also separate those arguments with commas:
<html> <head> <title>Passing multiple function arguments</title> <script language="javascript"> function showMessage (message, divName) { document.getElementById(divName).innerHTML = message; } </script> </head> <body onload="showMessage( 'You are seeing this thanks to JavaScript', 'targetDiv')"> <h1>Passing multiple function arguments</h1> <div > </div> </body> </html> And that’s all you need. This Web page gives you the same result as the messagerArguments.html Web page did earlier.
There’s still more that you can do with functions: you can return values from functions.
Returning values from functions
Functions act as self-contained sections of code. As the name indicates, each function is usually designed to have a single function, that is, perform a single task. The idea is that you can divide and conquer your programming by segmenting it up into self-contained functions. You already know that you can pass data to functions so that they perform their tasks. What about letting them communicate the results of those tasks back to you?
That’s where returning values from functions comes in. You can let a function handle the data you’ve sent it and send you back the results of its calculation. For example, say that you want to add two numbers using a function named adder and display the results. To do that, you might create a new function, adder, and pass two numbers to add to that function.
Here’s how you might pass two numbers, 5 and 3, to adder and display the results:
<html> <head> <title>Returning values from functions</title> <script language="javascript"> function showMessage () { document.getElementById("targetDiv").innerHTML = "5 + 3 = " + adder(5, 3); } </script> </head> <body onload="showMessage()"> <h1>Returning values from functions</h1> <div > </div> </body> </html> There are two things to note here: first, the expression adder(5, 3) will be replaced by the results returned from the adder function, which is 8. Second, note that you can join strings together in JavaScript by using a +, like this: "5+3="+adder(5, 3). This gives you "5+3=8".
What about creating the adder function? That looks like this:
<html> <head> <title>Returning values from functions</title> <script language="javascript"> function showMessage () { document.getElementById("targetDiv").innerHTML = "5 + 3 = " + adder(5, 3); } function adder(operand1, operand2) { . . . } </script> </head> <body onload="showMessage()"> <h1>Returning values from functions</h1> <div > </div> </body> </html> So how do you actually add two numbers and return a value from the adder function? You can use + in JavaScript to add the two numbers passed to the adder function, and you use the return statement to return a value from a function, so the adder function’s body looks like this:
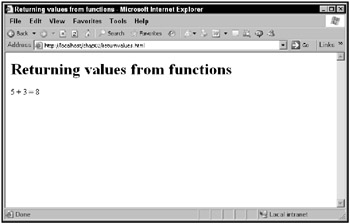
<html> <head> <title>Returning values from functions</title> <script language="javascript"> function showMessage () { document.getElementById("targetDiv").innerHTML = "5 + 3 = " + adder(5, 3); } function adder(operand1, operand2) { return operand1 + operand2; } </script> </head> <body onload="showMessage()"> <h1>Returning values from functions</h1> <div > </div> </body> </html> Excellent; that’s all you need. You can see the results in Figure 2.12, where 5 and 3 were indeed passed to the adder function, which returned a value of 8.

Figure 2.12: Returning values from functions