| The Basic Motion settings, as shown in Figure 12.27, determine the size , rotation, position, and anchor point around which the clip rotates. As with all effect parameters, you can reset this to its default position by clicking the red X reset button. Each of the parameters is keyframeable to change over time by setting different parameters with keyframes in the associated parameter Timeline to the right of each parameter setting. The parameters are as follows : -
Scale The slider and percentage box resize the clip up or down in size. -
Rotation Rotates the clip on the Z-axis (like the traditional spinning newspaper/headlines shot might do). -
Center Clicking the crosshair button and then clicking anywhere in the Canvas resets the clip's center position. -
Anchor Point Sets the position of the anchor point that the rotation rotates around. Its default position is the center of the clip's frame. Using the Crop Parameters If you crop the edges of a clip with the Crop tool, as you did in the preceding chapter, the Crop parameters change. Figure 12.28 shows these controls. You can crop the frame's Left, Right, Top, and Bottom edges by using the sliders or by entering a number of pixels in the adjoining boxes. Note too that you can change the crop values over time and create a moving crop. You could use this in all sorts of ways, the most obvious of which would be a hard-edged wipe coming from one of the four sides and continuing across the screen. At the bottom of the set of sliders in this parameter control, you can soften the edges with the Edge Feather parameter control. Figure 12.28. The Crop parameter controls. 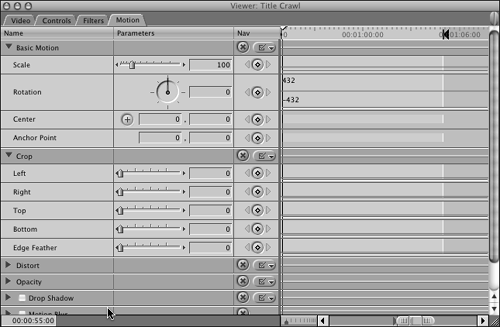 Cropping is a percentage of screen width. If you crop more than 50% from two edges, the image reappears, so keep this in mind when you are cropping both sides of the image. You can also use the Image + Wireframe view of the Viewer or Canvas and crop the sides with the Crop tool (which you activate by pressing C). When you use this method, your crop coordinates are reflected here. Using the Distort Parameters Each of the four corners of your video can be placed anywhere, including outside the raster of your image. When this parameter is not changed, you see the pixel coordinates from the center of each of the four corners, as shown in Figure 12.29. You can change them by typing in new coordinates, or you can change your view of the Viewer or Canvas to be Image + Wireframe and activate the Distort tool by pressing D. Wherever you drag a corner with the Distort tool, its new coordinates are reflected here. It's probably more intuitive to use the Distort tool than the Distort parameter controls. Each corner can be programmed to move over time with keyframes. Figure 12.29. The Distort parameter controls. 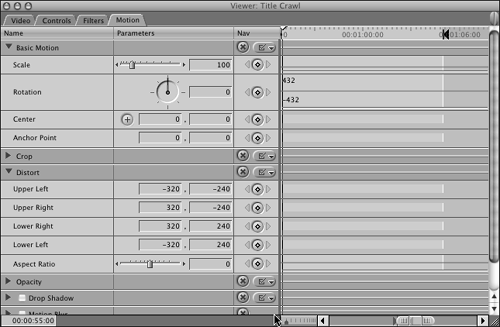 The one exception to using the Distort tool in the Canvas is that it doesn't include the Aspect Ratio slider. By dragging the slider to the left, you squeeze the top and bottom edges of the video, and by moving this slider to the right, you squeeze the image's sides closer together. You can also distort the picture in the Viewer or Canvas by holding down the Shift key and using the Selection tool (press A) to drag a corner in the Image + Wireframe view. Using the Opacity Parameter The Opacity Parameter, shown in Figure 12.30, is as simple as it looks. You've already been setting keyframes for this parameter by adding keyframes to a video's opacity in the keyframe overlay of the Timeline window. If you check the sequence, you can double-click any video clip and see these keyframes mirrored here. The same is true if you set keyframes and values herethey are reflected in the keyframe overlay of the video in the Timeline window. Figure 12.30. The Opacity parameter control. 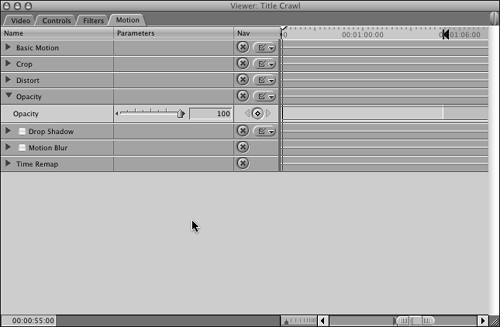 Using the Drop Shadow Parameters Figure 12.31 shows the Drop Shadow parameters in the Motion tab. Its use is pretty straightforward. You must turn it on using the check box next to its name for it to become active. The Drop Shadow can be used on titles as well as any other video clip, such as those used in a picture-in-picture effect. Keep in mind that its parameters are programmable to change over time. You could create an effect in which the light source of the drop shadow moves, for example. Figure 12.31. The Drop Shadow parameter controls. 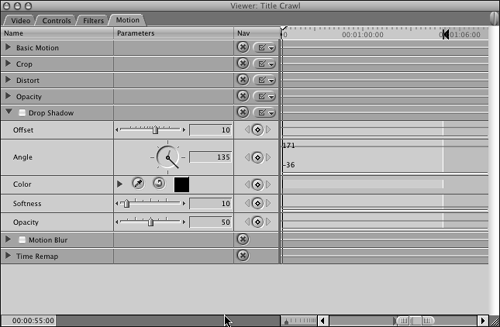 The Drop Shadow parameters are as follows: -
Offset Determines the distance between the shadow and the object it is a shadow of. -
Angle Determines the angle of the shadow from the object. -
Color Determines the color of the drop shadow and uses the same color controls as the native Title generators. -
Softness Blurs the shadow around its edges to give the effect of a diffused light source. -
Opacity Determines the opacity of the drop shadow. Using the Motion Blur Parameters When the Motion Blur parameter, shown in Figure 12.32, is checked on, it blurs any clip with motion applied to it. An example of this is a clip that has been programmed to move across the screen. This parameter does not add blur to motion within a frame. It uses the specified sample rate and amount of blur (%) you specify in its two settings. The higher the sample rate and the greater the percentage you apply to it, the more blurred the move becomes. Figure 12.32. The Motion Blur controls. 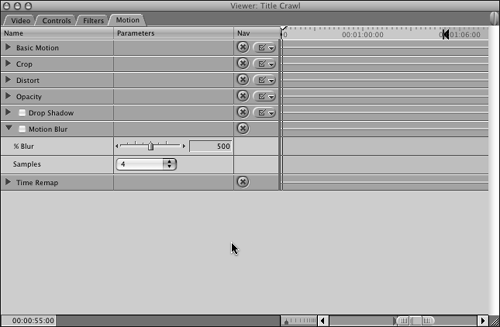 This could be used to fly titles with blurs. As the title comes onto the screen, it becomes blurry, giving it a special effect. |