| At first glance, the concept of collections might seem a little redundant: aren't they just another container for tagged image files, sort of like categories or subcategories? But collections act in a uniquely different way from either categories or tags. For one thing, collections aren't limited to a single tag or category. That is, a collection can be composed of photos from a number of different tags or categories. And, unlike categories that are dependent on one of the four arrangement options to sort and display their photos, the photos within collections can be sorted and reordered, independent of their date or folder structure. The sorting feature of collections is particularly useful when you're creating a project like a PDF slide show or Web photo gallery. Not only can you select the photos that you want to include, you can also arrange them to display in whatever order you want. To show or hide the collections pane 1. | If the Collections tab isn't visible, click the Organize Bin button in the lower-right corner of the Photo Browser.
| 2. | Click the Collections tab to bring the Collections pane to the front of the Organize Bin (Figure 13.71).
Figure 13.71. The Collections pane shares the Organize Bin with the Tags pane. 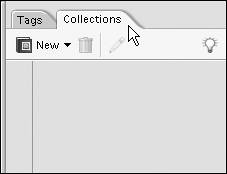
|
 Tip Tip
The Collections pane features a helpful tip window containing short, one-line primers on creating and using collections. To open the window, just click on the lightbulb tip icon on the right side of the Tags tab.
To create a new collection 1. | Click the New button at the top of the Collections pane.
| 2. | From the New drop-down menu, choose New Collection to open the Create Collection dialog box (Figure 13.72).
Figure 13.72. Use the New menu in the Collections pane to open the Create Collection dialog box. 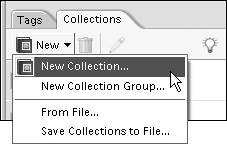
| 3. | Leave the Group menu set to None (Top Level).
You'll learn more about collection groups later in this section.
| 4. | In the Name text box, enter a name for your collection.
| 5. | In the Note text box, enter information relevant to the photos that you may want to include in the collection (Figure 13.73).
Figure 13.73. The Create Collection dialog box is similar to the Create Tag dialog box with areas to enter name and note information. 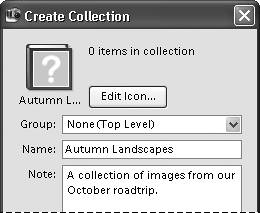
The first photo you add to a collection automatically becomes the icon for that collection. Since this is an easy and convenient way to assign collection icons, we'll ignore the Edit Icon button for now.
| 6. | Click OK to close the Create Collection dialog box.
Your new collection appears in the Collections pane (Figure 13.74).
Figure 13.74. New collections appear in alphabetical order in the Collections pane. 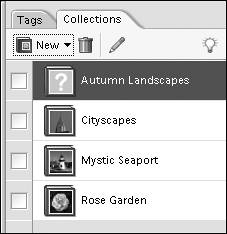
By default collections are sorted in alphabetical order in the Collections pane.
|
To change a collection's properties 1. | In the Collections pane, right-click on the collection whose properties you would like to change.
| 2. | From the collection pop-up menu, choose Edit (name of collection) collection (Figure 13.75).
Figure 13.75. Use a collection's pop-up menu to open its Edit Collection dialog box. 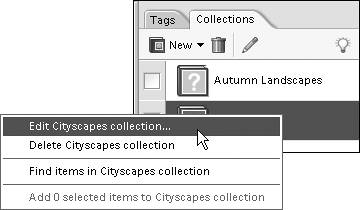
| 3. | In the Edit Collection dialog box, make the desired changes and click OK.
|
To delete a collection 1. | In the Collections pane, right-click on the collection you would like to delete.
| 2. | From the collection pop-up menu, choose Delete (name of collection) collection (Figure 13.76).
Figure 13.76. Delete a collection in one simple step from the collection pop-up menu. 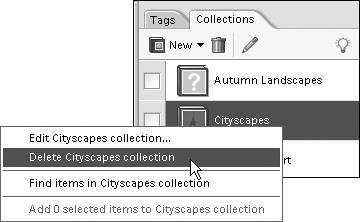
| 3. | In the Confirm Collection Deletion warning box, click OK (Figure 13.77).
Figure 13.77. The Confirm Collection Deletion warning box gives you an opportunity to change your mind before you delete a collection. 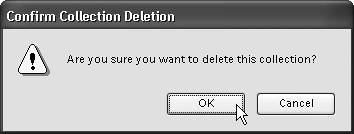
The collection is removed from the Collections pane, and the link to any images in the Photo Browser is broken.
|
To add photos to a collection Do one of the following: - From the Photo Browser, drag a photo onto the appropriate collection in the Collections pane.
- From the Collections pane, drag a collection onto a photo thumbnail in the Photo Browser.
A collection icon appears below the photo in the Browser window to indicate that it is part of a collection, and in the Collections pane, the collection assumes that photo for its collection icon (Figure 13.78).
Figure 13.78. The first photo that you add to a collection will serve as that collection's icon in the Collections pane, and a collection icon will appear below every photo thumbnail in the Photo Browser added to a collection. 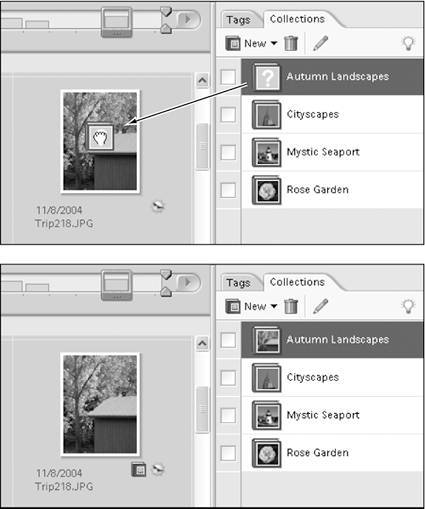
To view a photo collection In the Collections pane, do one of the following: - Double-click on a collection.
- Click the blank box to the left of a collection.
A small binoculars icon will appear in the box, and the Photo Browser will change to display just the photos in that collection (Figure 13.79).
Figure 13.79. When the binoculars icon is visible next to a collection in the Collections pane, only that collection's photos will appear in the Photo Browser. 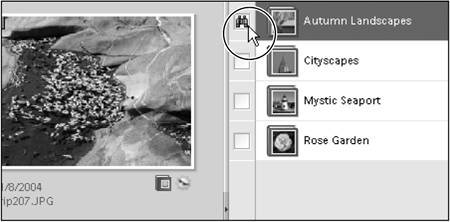
To return to the main Photo Browser window, click the Back to All Photos button, or click the binoculars icon in the Collections pane.
To arrange photos within a collection 1. | In the Collections pane, double-click on a collection to view it in the Photo Browser.
| 2. | In the Photo Browser, click to select a photo, and then drag it to a new location (Figure 13.80).
Figure 13.80. To reorder photos within a collection, drag a thumbnail to a new location in the Photo Browser (top). When you release the mouse button, the thumbnail will snap into place in its new location (bottom). 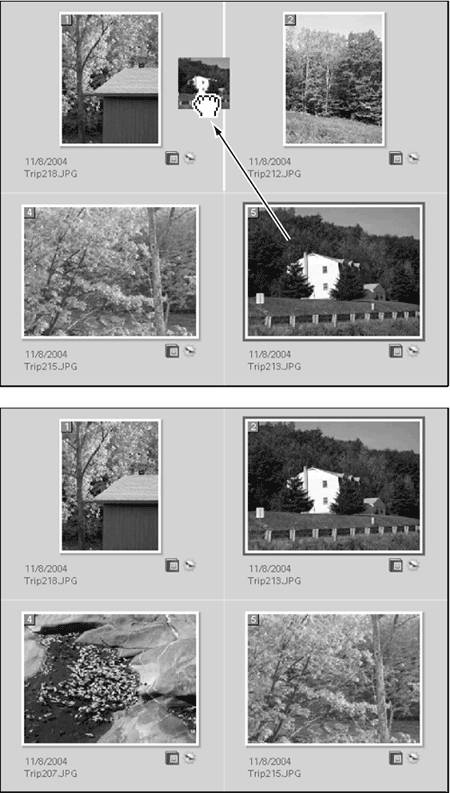
When you release the mouse button, the photo will snap into place in the new location, and the photo thumbnails will automatically renumber.
|
To remove photos from a collection With a collection displayed in the Photo Browser, select a photo thumbnail and then do one of the following: - Right-click inside a photo thumbnail, then from the thumbnail pop-up menu choose Remove from Collection > (name of tag) (Figure 13.81).
Figure 13.81. Thumbnail menus give you quick access to tasks such as adding and removing a tagged photo from a collection. 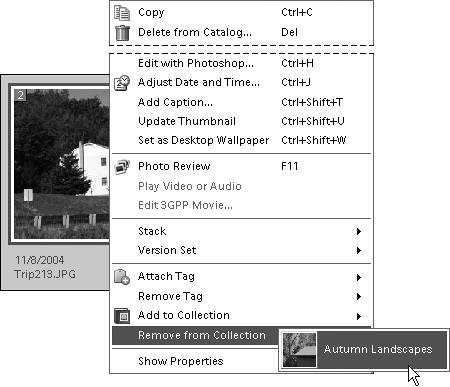
- Right-click on the collection icon below the photo thumbnail and select Remove from (name of collection) collection from the small pop-up menu (Figure 13.82).
Figure 13.82. Remove a photo from a collection with a single click on the collection icon below the thumbnail in the Photo Browser. 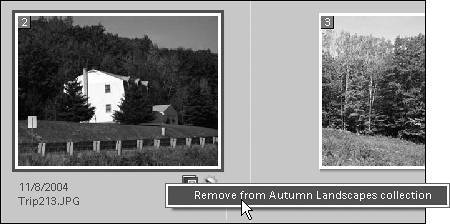
To create a collection group 1. | Click the New button at the top of the Collections pane.
| 2. | From the New drop-down menu, choose New Collection Group to open the Create Collection Group dialog box (Figure 13.83).
Figure 13.83. Use the New menu in the Collections pane to open the Create Collection Group dialog box. 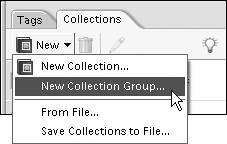
| 3. | In the Collection Group Name text box, enter a name for your collection Group (Figure 13.84).
Figure 13.84. The Create Collection Group dialog box. 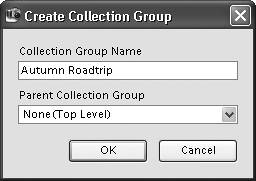
| 4. | Leave the Parent Collection Group option set to None (Top Level).
You can group one collection group within another. If you'd already created a collection group, its name would be displayed in the Parent Collection Group menu, and you then would have the option of nesting your new collection group within the existing one.
| 5. | Click OK to close the Create Collection Group dialog box.
Your new collection group appears in the Collections pane (Figure 13.85).
Figure 13.85. New collection groups appear at the bottom of the stacking order in the Collections pane. 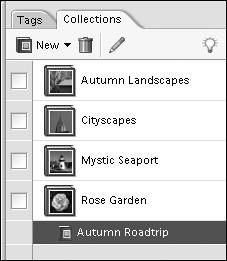
Your new collection group appears at the bottom of the list in the Collections pane.
|
To add a collection to a collection group 1. | In the Collections pane, right-click on the collection you want to include in the collection group.
| 2. | From the collection pop-up menu, choose Edit (name of collection) collection.
| 3. | From the Group menu in the Edit Collection dialog box, choose the group in which you want to place the collection (Figure 13.86).
Figure 13.86. Once you've created a collection group, you can add collections to it from the Edit Collection dialog box. 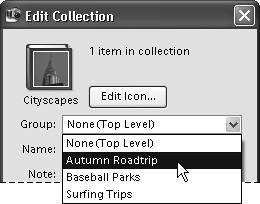
| 4. | Click OK to close the Edit Collection dialog box.
In the Collections pane, the collection will appear within the collection group you defined (Figure 13.87).
Figure 13.87. Collections appear nested in their collection groups in the Collections pane. 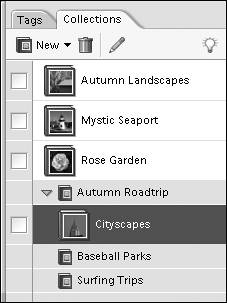
|
Tip
|