| With the Attach to Email feature, Photoshop Elements streamlines the process of sending digital photos to family and friends. If your photo is too large or is in the wrong file format, Photoshop Elements can automatically resize your image and save it as a JPEG file, if you prefer. But it's all up to youyou can send photos and images in any file size or format, as long as you have the bandwidth for it. To attach a simple photo to email 1. | Open the photo or image you want to send.
| 2. | From the File menu, choose Attach to Email (Figure 10.39).
Figure 10.39. From the File menu, choose Attach to Email. 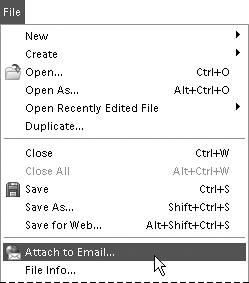
Photoshop Elements automatically launches the Elements Organizer, and the E-mail dialog box appears.
| 3. | From the E-mail Client drop-down menu, select the email service you want to use, and then click Continue (Figure 10.40).
Figure 10.40. Choose the email service you want to use from the E-mail dialog box 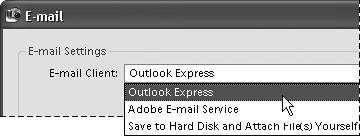
The Attach to E-mail dialog box appears (Figure 10.41).
Figure 10.41. The Attach to E-mail dialog box gives you options for attaching and sending your images. 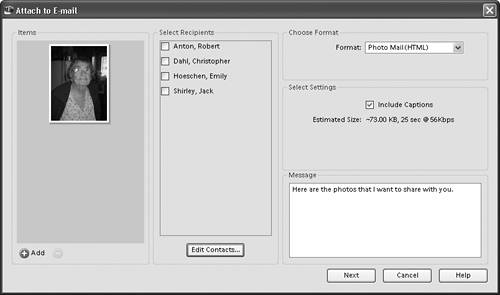
| 4. | In the Attach to E-mail dialog box, choose a name (or names) from the Select Recipients window list (Figure 10.42).
Figure 10.42. You can select a single person, or multiple persons to receive your image. 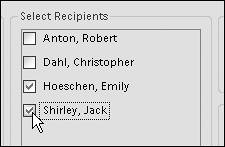
If you're using the Attach to E-mail function for the first time, your Select Recipients window will probably be empty, and you'll want to create a recipient list.
| 5. | To create a new contact/recipient, or to edit a recipient's contact information, click the Edit Contacts button in the Attach to E-mail dialog box (Figure 10.43).
Figure 10.43. You can also add or edit recipient names by clicking the Edit Contacts button. 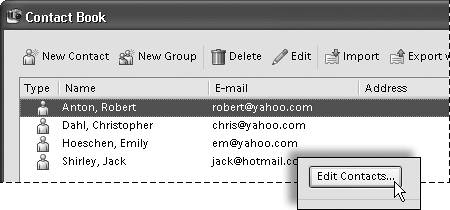
| 6. | In the Contact Book dialog box, click New Contact, or select an existing contact, and then click the Edit button (Figure 10.44).
Figure 10.44. Select a contact to edit in the Contact Book dialog box. 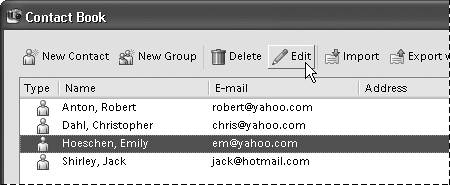
| 7. | In the Edit Contact window, you can add detailed telephone and mailing address information (Figure 10.45).
Figure 10.45. Enter detailed contact information for each of your recipients in the Edit Contact window. 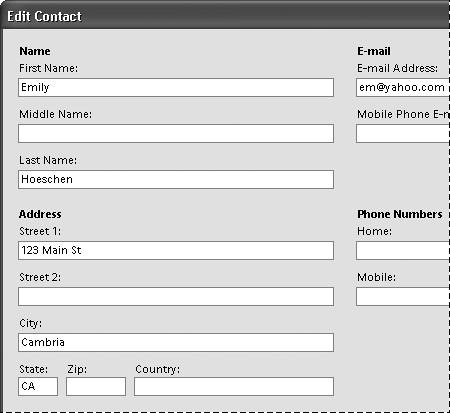
| 8. | When you've finished editing your contact information, click OK to close the Edit Contact window. Then click OK again to close the Contact Book dialog box.
| 9. | From the Format drop-down menu in the Attach to E-mail dialog box, select Individual Attachments (Figure 10.46).
Figure 10.46. To email a single photo, check that Individual Attachments is selected. 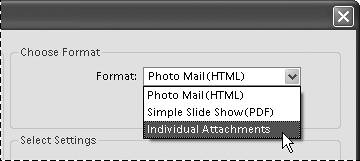
| 10. | Check that the Convert Photos to JPEGs option is selected (Figure 10.47).
Figure 10.47. The Convert Photos to JPEG option allows you to make changes to your photo attachment before you send it. 
When the Convert Photos to JPEGs option is selected, you can make size and quality adjustments to your email attachment.
| 11. | From the Maximum Photo Size drop-down menu, you can choose to change the size of your attachment or leave it unchanged (Figure 10.48).
Figure 10.48. You can change the size of your image attachment without affecting the original image file. 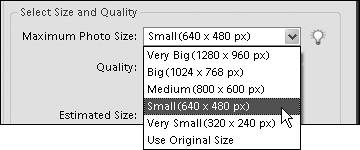
| 12. | If you choose an option other than Use Original Size, you can use the Quality slider to control the size and download speed of your attachment (Figure 10.49).
Figure 10.49. A Quality slider allows you to make size and quality adjustments to your image, just as you can in the Save for Web dialog box. 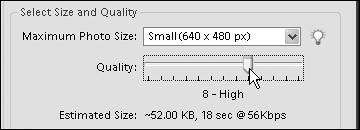
| 13. | If you like, you can enter a message in the Message area in the lower-right corner of the dialog box (Figure 10.50).
Figure 10.50. You can type an email message directly in the Attach to E-mail dialog box. 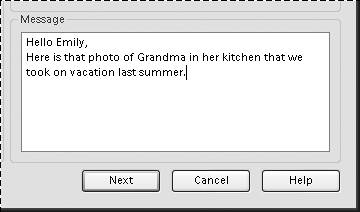
| 14. | Once you're satisfied with your settings, click the Next button.
Your default email program opens automatically and attaches a copy of your photo to your email (Figure 10.51).
Figure 10.51. An email, with the attachment included, is automatically created for you. 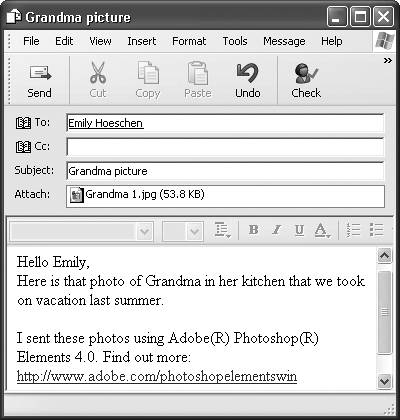
|
 Tip Tip
You can import contact information you've created in Outlook Express directly into your Photoshop Elements Contact Book. Click the Import button in the Contact Book dialog box. In the Choose Contact Source dialog box, click to select Outlook Express, and then click OK. Your Photoshop Elements Contact Book will automatically be populated with your Outlook Express contacts.
To attach a photo on custom stationery to email 1. | Open the photo or image that you want to send, and then follow the steps in the previous procedure to select a list of recipients.
| 2. | From the Format drop-down menu in the Attach to E-mail dialog box, select Photo Mail(HTML) and then click the Next button (Figure 10.52).
Figure 10.52. To create a custom email attachment, select Photo Mail(HTML). 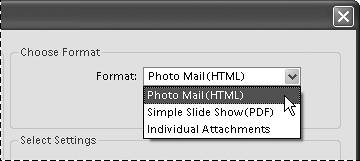
Your photo opens in the Stationery & Layouts Wizard (Figure 10.53).
Figure 10.53. The Stationery & Layouts Wizard. 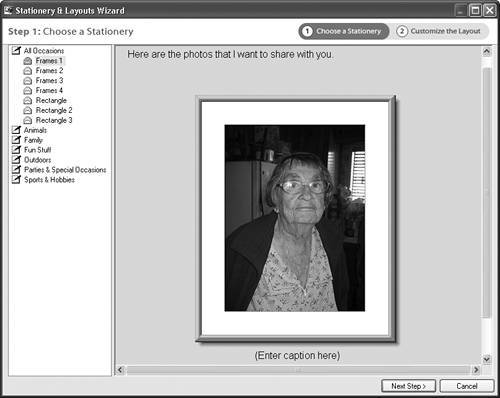
| 3. | From the Stationery pane on the left side of the Wizard window, choose a station ery layout on which you'd like to place your photo (Figure 10.54). Then click the Next Step button at the bottom of the Wizard.
Figure 10.54. You can choose from an extensive list of predesigned stationery templates. 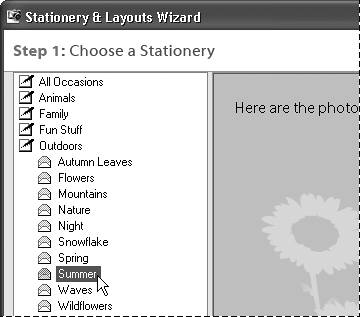
| 4. | If you like, use the various sliders, buttons and drop-down menus to customize the look of your stationery (Figure 10.55).
Figure 10.55. You can further customize any of the stationery templates to give them just the look you want. 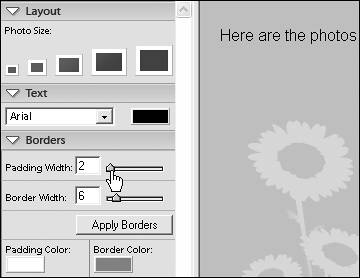
| 5. | Insert a message and caption into the placeholder text areas, and then click the Next button.
Your default email program opens automatically and places your photo on its special stationery into the body of your email (Figure 10.56).
Figure 10.56. An email, with the custom stationery attachment included, is automatically created for you. 
|
Tip You can also share your photos with friends and family all over the world, with the Adobe Photoshop Services Kodak EasyShare Gallery. From the Photoshop Elements Organizer, click the Share button and select Share Online to launch your Web browser and open the EasyShare Gallery homepage. Once you follow the simple steps for creating an account, you can post photos and send email notices to direct your family and friends to your personal online photo galleries (Figure 10.57). Figure 10.57. In cooperation with Kodak, Adobe offers a fun and simple way to use Web posting service, so that you can share your photos with anyone who has online access. 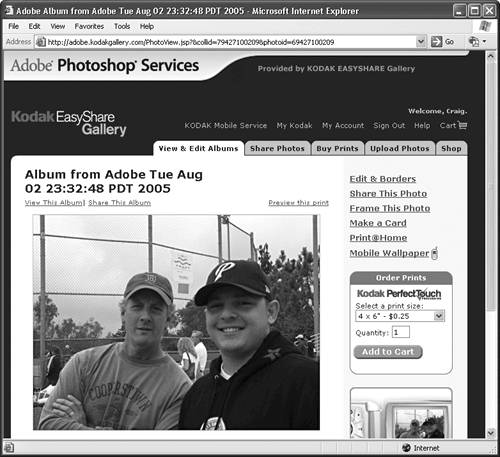
|