Creating Web Services with the .NET Framework SDK
|
Creating Web Service Consumers
Web Service consumers actually utilize the functionality found in the methods of a particular service. A consumer may be a Windows application, a Web page, or any device that can utilize the .NET environment. In this section, the consumers include a simple Windows application and a Web page. This section also explores utilizing the .NET Framework SDK without the aid of Visual Studio.NET to create consumers.
Creating a Windows Consumer with Visual Studio.NET
To utilize a Web Service from a Windows program, open Visual Studio.NET and select “Visual C# Projects” on the lefthand side of the “New Project” dialogue box. On the righthand side select “Windows Application.” Figure 6.9 shows the proper selections in the “New Project” dialogue.
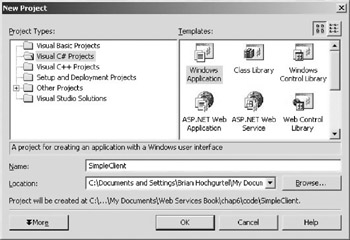
Figure 6.9: The “New Project” dialogue box for creating a Windows application.
Go into design mode of Visual Studio and make the Windows application look like what appears in Figure 6.10. This involves dragging and dropping two text boxes, two labels, and a button onto the Windows form. Name the top text box “simpleSymbol” and the bottom text box “stockResult.” The button needs to be named “testButton.”
Figure 6.10 shows the design of the Windows program so far.
Next, from the project menu, select “Add Web Reference.” This brings up the “Add Web Reference” dialogue shown in Figure 6.11.
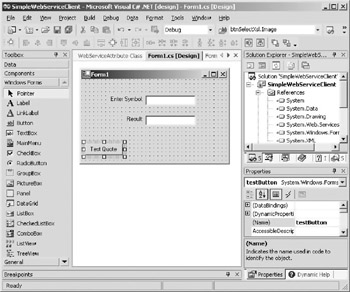
Figure 6.10: The design of the Windows program.
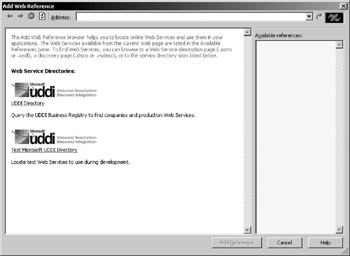
Figure 6.11: The “Add Web Reference” dialogue of Visual Studio.NET.
| Tip | To create the Web reference, you must enter the path of the WSDL file through a URL and not a local file. |
The URL used in this example is: http://localhost/XPlatform/StockQuote/Service1.asmx?wsdl. Your path may vary depending on where you installed your Web root and Web Service.
| Tip | If you don’t know the URL of your Web Service, open the service’s project in Visual Studio.NET and execute it without debugging. This will open a browser window to the service. Then click the service description link. The URL displayed in the address bar of your browser now reveals the WSDL needed to make the Web reference. |
Figure 6.12 shows how the Web reference to local host appears in the “Solution Explorer” window of Visual Studio.NET.
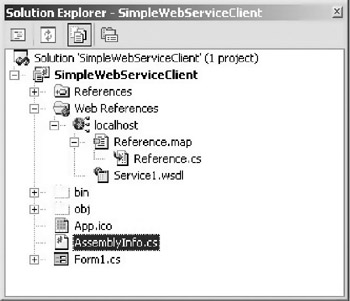
Figure 6.12: The Web reference to local host in the “Solution Explorer” window.
When the project is built, the Web reference creates a dll for the project to access the functionality in the Web Service. For an in-depth explanation of what happens in this step, see “Creating Consumers with the .NET Framework SDK” later in this chapter. This section examines doing this step manually and should help you understand what Visual Studio.NET does for you when it creates a reference.
The next step is to double click on “testButton” in the window designer (see Figure 6.10).
This brings up the click event for the button, and here is where you need to put the code for connecting the Web Service.
The following code sample calls the GetTestQuote method described when you created the Web Service from the first example in this chapter. This code first defines two strings for sending and receiving values. The variable stockSymbol gets its value from the enterSymbol text field. Then the following line of code creates the example object.
localhost.XPlatformServices example = new localhost.XPlatformServices();
Localhost is the name of the site the Web reference was created for and XplatformService is the name of the service for which the Web reference was created.
This is how you create objects in C#. By creating the Web reference, you can treat the Web Service as if it were any other object.
Now that the example object is created, the code calls the GetTestQuote method, which always returns the value as a string. This happens because of the ToString() attached on the end of the original method call. Then the stockResult text field receives the value of the stockValue variable. Note that stockResult.Text sends the value of stockValue to the field on the form.
private void testButton_Click(object sender, System.EventArgs e) { //stock value returned by the service string stockValue; //the symbol entered into the enterSymbol text box string stockSymbol = enterSymbol.Text; //create object example to communicate with service localhost.XPlatformServices example = new localhost.XPlatformServices(); //call the GetTestQuote method convert to a string for display stockValue = example.GetTestQuote(stockSymbol).ToString(); //Put the result in the appropriate text box. stockResult.Text = stockValue; } To execute the example, select “Build” from the toolbar in Visual Studio.NET and “Build Solution,” because you need to compile the Web reference in addition to the Visual C# code. If it builds without errors, select “Debug” and then “Start.” This executes the Windows application you just created. Figure 6.13 shows the Visual C# application executing.
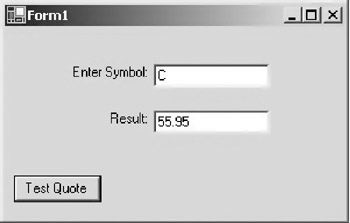
Figure 6.13: The Visual C# client executing and receiving a value back from the Web Service.
Remember that the Web Service only returns a value for the symbol “C” whereas it returns -1 for everything else.
|
EAN: 2147483647
Pages: 128