Appendix D: Burlap and Hessian APIs
|
Using ResinLauncher
Once a project has been created, you can add a new class to the project and place servlet code into the class. For example, add a new Class called EclipseServletTest and place the code in Listing C.1.
Listing C.1: Example Hello World Servlet.
import java.io.*; import j avax.servlet.*; import javax.servlet.http.*; public class EclipseServletTest extends HttpServlet { public void doGet(HttpServletRequest request, HttpServletResponse response) throws ServletException, IOException { response.setContentType("text/html"); PrintWriter out = response.getWriter(); out.println("<title>Hello, World!</title>"); out.println("<hl>Hello, World!<Xhl>"); } } To execute the Hello World Servlet within Resin, click on the small arrow just to the right of the Run button. In the drop down menu that appears, click on the Run ... entry to bring up the dialog shown in Figure C.5.
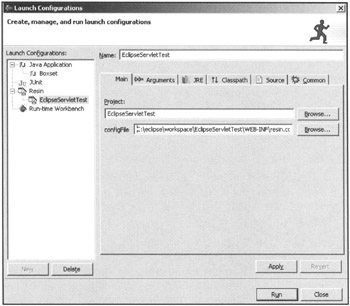
Figure C.5: The Launch Configurations dialog.
The Launch Configurations dialog is important because it shows the various runtime options that can be set, as well as the Resin config file to use when executing the servlet project. The Improve Resin Plugin for Eclipse will automatically create a resin.conf file for the current project and default to that file. If you are just developing your servlets, you can use this file. An example of the file created for our example is shown in Listing C.2.
Listing C.2: Automatically built resin.conf file.
<caucho.com> <java compiler='' args="-g"/> <http-server app-dir='doc' class-update-interval='2'> <http port='8080'/> <servlet-mapping url-pattern='/servlet/*' servlet-name='invoker'/> <servlet-mapping url-pattern='*.jsp' servlet-name='com.caucho.jsp.JspServlet'/> <web-app id='EclipseServletTest' app-dir='C:\eclipse\workspace\EclipseServletTest' /> </http-server> </caucho.com>
Once you've added any options for the execution of the servlet, click on the Run button. Figure C.6 shows the output in the Console window of Eclipse. You will see that Resin has started and is ready to process requests. To see if your servlet works, open a browser and browse to the URL: http://local-host:8080/servlet/ EclipseServetTest. You will see the output shown in Figure C.7
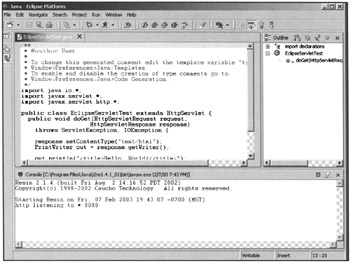
Figure C.6: Resin started within Eclipse.
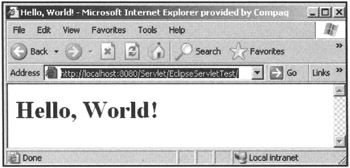
Figure C.7: The sample servlet executing.
Debugging
Now, the real power of the system comes into play; the plugin enables you to set breakpoints in your servlet code to aid in debugging. Figure C.8 shows an example of a breakpoint that was set in the servlet code and triggered when the URL above was used.
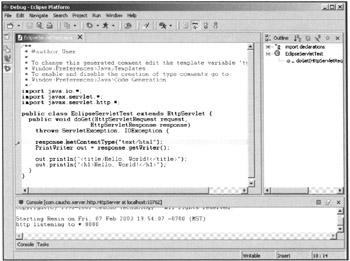
Figure C.8: Breakpoint in the servlet.
In order to activate the Resin server, select Debug..., set the appropriate config file, and press Debug. When you browse to the servlet, the system will trigger the breakpoint and allow you to debug your code.
|
EAN: 2147483647
Pages: 180