Selecting Print Queues
|
| < Day Day Up > |
|
Now that I have all these print queues, you might be wondering how I can switch among them when printing. If I am switching a lot, it is probably easiest to just select the queue I want to use from the print dialog box of a program like OpenOffice. If, however, I am going to print several documents in succession requiring the same queue, I might just want to make that queue the default printer, if it is not already.
Changing the default printer is a no-sweat operation. There are a couple of ways to do it, but I will tell you the easiest one. Once you create a few queues of your own, all you need to do is open the Print Manager by clicking the printer icon in the left portion of the GNOME Panel. When you do this, you will be able to see your print queues, each shown in the form of a printer icon in the GNOME Print Manager window. In my case, my present default is Color300, but I am going to change the default to Gray300. To do this, I simply right-click Gray300 and select Set as Default in the pop-up menu. Gray300 now has a check mark on it to indicate that it is the default print queue, as you can see in Figure 6-8.
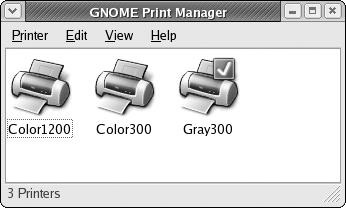
Figure 6-8: Setting a default print queue in the GNOME Print Manager
The approach you take to printer queues depends on you and your needs. You might not need anything more than a single print queue, but at least you now know how it all can be done. Whatever you eventually choose to do, you needn’t worry at every point along the way, because you can undo anything you have done in one way or another. Just have fun with it. Feel empowered. Move on.
|
| < Day Day Up > |
|
EAN: 2147483647
Pages: 188