Section 13.5. Installing Tomcat
13.5 Installing Tomcat
Installing Tomcat is getting easier all the time. The current version (4.1.3 Alpha) makes it even easier than it was when I began writing this book.
There are different versions of the Tomcat software available at any given time. These likely include beta releases and a version called FCS. FCS stands for "First Customer Shipment," and indicates that the software has passed beta stage and is ready for a production environment.
It is probably best to stick with a production-quality release. Apache makes it clear on its Web site at http://jakarta.apache.org what the current production-quality release is.
To download Tomcat, go to the Apache Web site. Follow the links to the binary downloads section. For a Windows system, choose the most recent jakarta-tomact-4.x.xx file. You can optionally get the src version that has everything in the compiled version, along with all source code, written in Java. You will have to compile this version yourself, however.
Included in the download is the servlet API, which contains the official reference implementation of the servlet and JSP API.
Once you have downloaded the files, you need to unpack them. Create a folder on the top level of your disk called tomcat4 and unpack the files there. You can use the following commands to unpack your files:
cd tomcat4 jar -xf jakarta-tomcat-4.0.4.zip
Note
The Java JAR utility and the WinZip utility use the same algorithm for compressing file collections. You can therefore use them interchangeably to unpack your downloads. To find out how to pack and unpack files using the JAR utility, please see the Quick Reference appendix of this book. That reference shows you how to do common tasks such as this in an easy-to-look-up manner.
Now that Tomcat is downloaded and unpacked, there are a few steps to perform to configure Tomcat to listen for JSP and servlet requests .
JSP and servlet servers are different from ColdFusion servers. They need to be configured more than ColdFusion servers do; there is comparatively less about the process that is automatic. The process has improved a great deal and is now much easier than it used to be. With previous versions of Tomcat it was common to have to edit the Windows registry directly, manually install ISAPI filters into your Web server to run it as a service, and so on. Setting up a new Web application required manually editing XML files. Things are far more streamlined now with Tomcat 4.
Note
Tomcat 4.1.3, in alpha version as of this writing, includes a Web-based administration console similar to the ColdFusion Administrator. This allows you to create new Web applications for deployment, edit JDBC settings, add users for authentication, and more.
Once you have downloaded Tomcat, simply follow the instructions in the wizard in the installer application. Tomcat 4.1 (normal installation) consumes about 28 MB of hard disk space. The installer should detect your JDK 1.4 and notify you. Agree to the license.
Then choose the type of install you want. The normal installation includes the following items:
-
Tomcat
-
JSP development shell extensions
-
Tomcat Start Menu group
-
Tomcat docs
-
Example Web apps
To complete your installation, you may need to set two environment variables , depending on your system and your version of Tomcat. Tomcat 4 on Windows XP does not require this, but Tomcat 3.2 does. Otherwise, you can go on to the next section, "Testing the Tomcat Installation."
The variables are JAVA_HOME , which indicates the root directory of the JDK, and TOMCAT_HOME , which is the root directory of your Tomcat installation. (You should have JAVA_HOME set already.)
13.5.0.1 SETTING ENVIRONMENT VARIABLES ON WINDOWS 2000
Environment variables are name -value pairs that are used to configure your system environment and provide pointers to different resources on your computer. Programs that run on the Windows platform often install such variables automatically. Here we need to do this manually.
-
Select Start > Settings > Control Panel > System.
-
Choose the Advanced tab.
-
Click Environment Variables.
-
In the lower pane (System Variables), a number of Variable/Value pairs will likely be visible. Click New.
-
In the dialog box that appears, you will see two fields: Variable Name and Variable Value. Type JAVA_HOME for the Variable Name. For the Variable Value, type the name of the root directory of your JDK. For instance, my value for this is C:\jdk1.4 . Click OK.
-
Now perform the same steps to create a TOMCAT_HOME variable. Click New. For the Variable Name type TOMCAT_HOME . For the Variable Value type the location of the Tomcat directory. For instance, my value for this is C:\tomcat4 .
13.5.0.2 SETTING ENVIRONMENT VARIABLES ON LINUX
Preparing the environment variables setting on Linux is rather similiar. Assuming you have already installed the JDK, you need to set the JAVA_HOME environment variable. For instance, in the bash shell, use the following command:
JAVA_HOME=/user/java/jdk/jdk1.4; export JAVA_HOME
You may need to replace java/jdk/jdk1.4 above with the location of your JDK install.
Next, enter the variable TOMCAT_HOME and its value. The value of this variable is the root directory of your Tomcat installation. In the bash shell, type:
TOMCAT_HOME=/var/tomcat; export TOMCAT_HOME
You may need to replace var/tomcat above with the location of your Tomcat install.
Tomcat should now be installed properly. To test your installation, go to the next section.
13.5.1 Testing the Tomcat Installation
Once your installation is complete, you need to start the service (if you installed it as a Windows NT/2000/XP service), or manually start Tomcat.
On Windows, you can start and stop Tomcat by clicking the appropriate icon on your Start menu.
On Linux, you can start and stop Tomcat by executing <TOMCAT_HOME>/bin/startup.sh or shutdown.sh .
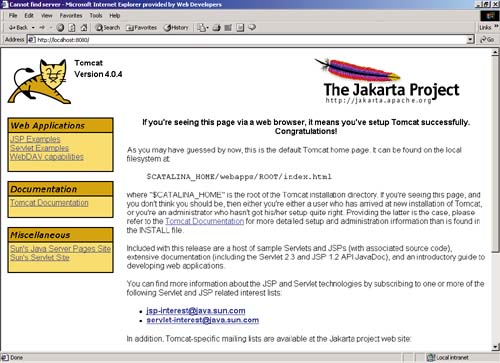
By default, Tomcat listens for requests on port 8080. Therefore, open your Web browser to http://localhost:8080 . If everything went correctly, you should see the Jakarta project start page for Tomcat, as shown in Figure 13.1.
Figure 13.1. Tomcat home start page.
Note
ColdFusion MX and Tomcat run on different ports and have their own internal servers; you can run them both on the same machine at the same time without problems.
The Tomcat home page is an HTML page, however. So the fact that you can view this page does not necessarily mean that your machine is processing JSPs properly.
To make sure that you can process .jsp requests, execute at least one of the sample applications included with Tomcat. To test one, click the JSP Examples link under the Web Applications menu on the Tomcat start page. For example, you might click on the Date example. This will run a page that displays the current date.
You can also view the JSP source code that generates the HTML output by clicking the Source link next to the example. Because the source is included as plain text, your browser will probably attempt to display as much of the page as it can. You therefore need to use your browser's View Source function to see the JSP code.
13.5.2 Troubleshooting the Tomcat Installation
The installation process has been greatly simplified, and you are not likely to run into any snags. If you do, however, here is what you can do about them.
13.5.2.1 INVALID PORT
The most common issue occurs when another process is already using the default Tomcat port, port 8080. When Tomcat starts up, it attempts to bind to this port, and if it can't do it, Tomcat will not run.
The easiest solution to this problem is to change the port on which Tomcat runs. To do this, open the file <TOMCAT_HOME>/conf/server.xml and search for the string 8080. Change this to any other port that isn't in use and is greater than 1024. That's because those ports require superuser access for binding and because a number of these ports are likely to be used by other processes already (80 for HTTP, 25 for mail, 23 for FTP, etc). Note too that, depending on what else you have installed on your machine, ports 8100 and 51000 are used by JRun, and 8500 by ColdFusion MX.
In order to test JSPs now, you will need to refer to the new port number in the URL you are processing.
13.5.2.2 OUT OF ENVIRONMENT SPACE
On rare occasion, an "out of environment space" error can occur when running the batch files in Windows 9X and ME operating systems. It simply means that you need to allocate more space for the server to use.
To correct this, right-click on the STARTUP.BAT and SHUTDOWN.BAT files. Click on Properties then on the Memory tab. For the "Initial Environment" field, enter a value; 4096 should suffice.
13.5.3 Testing a JSP from ColdFusion
If you have an Enterprise or Developer version of ColdFusion MX installed, you can use it as a servlet/JSP container. Before we discuss JSPs in detail, let's write a quick JSP to demonstrate how you can use ColdFusion MX for testing.
Open a text editor, Dreamweaver MX, Sun's Forte 4, or other editor. Enter the following code:
13.5.4 Test.jsp
<%-- File: hello.jsp Purpose: write a test JSP. Sets a String variable and outputs it to the browser. Uses comments, scriptlet, and an expression. --%> <% String n = "Eben"; %> <html> <body> Hello, <%= n %>! </body> </html>
Save this file to <CFusionMX_HOME>\ wwwroot \chp13\test.jsp , and make sure that your ColdFusion service is started. To view this page in your browser, you can call http://localhost:8500/chp13/test.jsp . The output is:
Hello, Eben!
Before we move on to discussing the JSP tags, directives, and expressions, we will look at how to set up a Web application for Tomcat.
Note
Don't close the shell window that pops up when you start Tomcat. This window must be open for as long as you want to run Tomcat applications. Also, when you are done with Tomcat, you should not simply close this window. Navigate to the appropriate icon, .bat , or .sh file and run shutdown to exit normally. Failure to do so can corrupt your Tomcat installation.
| |
| Top |
EAN: 2147483647
Pages: 206