| FileMaker makes generating labels and addressing envelopes easyand a real boon for what sometimes can be an inconvenient process. For more information on using other, standard layouts, see Working with Layouts on page 146. To create a label layout 1. | Switch to Layout mode ( in Windows, in Windows,  on the Mac), then choose Layouts > New Layout/Report ( on the Mac), then choose Layouts > New Layout/Report ( in Windows, in Windows,  on the Mac). on the Mac).
| 2. | When the Create a Layout/Report screen of the New Layout/Report dialog box appears, type a name into the Layout Name text box. Choose Labels in the left-side Select a layout type list and click Next (Figure 11.34).
Figure 11.34. When the New Layout/Report dialog box appears, choose Labels in the left-side list and click Next. 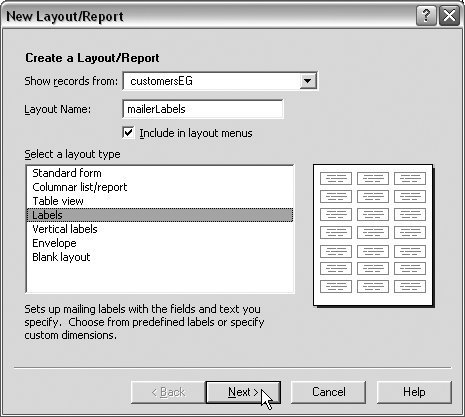
| 3. | The next dialog box gives you the choice of using one of several dozen preset Avery-based label sizes or creating a custom-size label (Figure 11.35).
Figure 11.35. Use the label setup screen to choose a preset Avery-based label size or create a custom size. 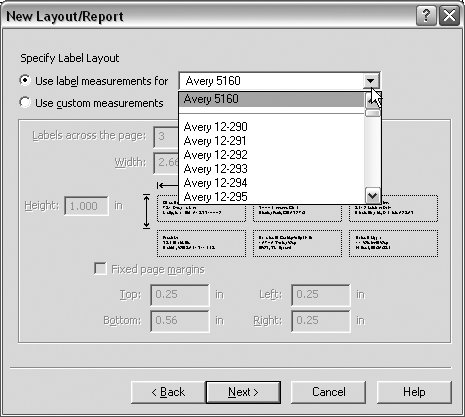
| 4. | To use an Avery-based label, leave the Use label measurements for radio button selected and use the pop-down menu to choose the appropriate Avery size based on the labels you're using. By the way, even non-Avery label packages usually list an Avery-equivalent stock number.
| 5. | To create a custom size, select the Use custom measurements radio button, then use the Labels across the page, Width, and Height boxes to configure your label's size (Figure 11.36).
Figure 11.36. Choosing the Use custom measurements button lets you adjust the label's width and height, and set how many labels fit across the page. 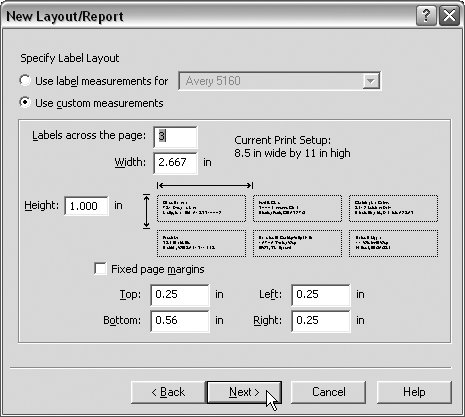
| 6. | Click Next.
| | | 7. | When the Specify screen appears, make a selection in the Available Fields list and click the Add Field button (Figure 11.37). Selected fields appear in the lower window surrounded by « » brackets. The brackets act as placeholders for data.
Figure 11.37. Use the Specify screen to choose the fields you want displayed. 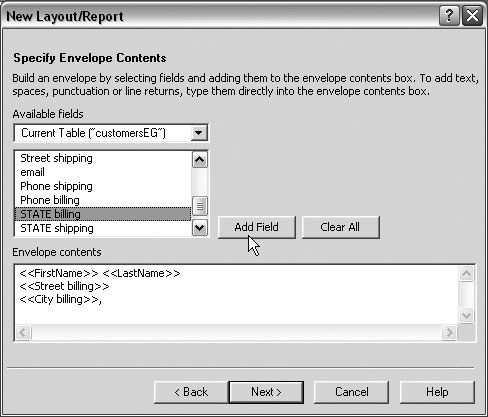
| 8. | To place a field on a new line, press  (Windows) or (Windows) or  (Mac). To insert punctuation marks, space between the fields, or additional text, just use your keyboard. (Mac). To insert punctuation marks, space between the fields, or additional text, just use your keyboard.
| 9. | To remove a mistake, select the entry in the lower box and press  . To start over, click on the dialog box's Clear All button. To further format the layout, see Formatting Fields or Objects on page 203. . To start over, click on the dialog box's Clear All button. To further format the layout, see Formatting Fields or Objects on page 203.
| 10. | When you're done, click Next. One final dialog box appears (Figure 11.38), giving you a choice of switching to Preview mode to see how the labels will print or staying in Layout mode to continue tweaking its appearance. Make your choice and click Finish. The chosen view appears, which in our example is the Layout view (Figure 11.39).
Figure 11.38. Once you're done setting up the layout, you can switch to Preview mode to see how the labels will print, or stay in Layout mode. 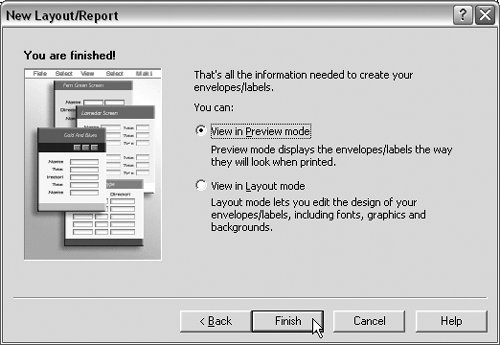
Figure 11.39. The layout for the label appears once you close the Specify Label Contents screen. Click on and drag the vertical marker to adjust the label's width. 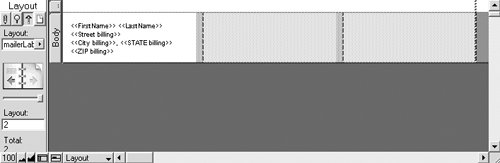
|
 Tip Tip
In step 7, thanks to FileMaker's improved relational database features, you're not limited to just using fields from the current file or table (Figure 11.37). Instead, you have the option of using the Available fields drop-down menu to add fields from any related file or table.
To create an envelope layout 1. | Switch to Layout mode ( in Windows, on the Mac), then choose Layouts > New Layout/Report ( in Windows, on the Mac).
| 2. | When the Create a Layout/Report dialog box appears, type a name into the Layout Name text box. Choose Envelope in the left-side Select a layout type list and click Next (Figure 11.40).
Figure 11.40. When the New Layout/Report dialog box appears, name the layout and choose Envelope in the left-side list. 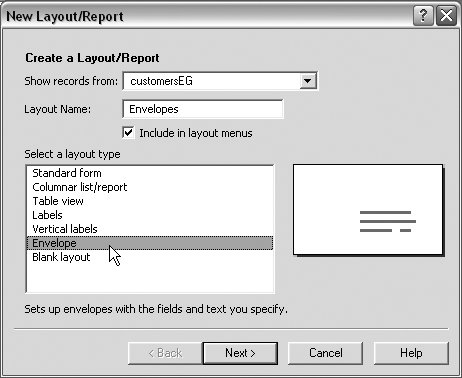
| 3. | When the Specify dialog box appears, double-click on the fields in the upper-left list that displayed or select each one in the list and click the Add Field button (Figure 11.37). Selected fields appear in the lower window surrounded by « » brackets. The brackets act as placeholders for data.
To place a field on a new line, press (Windows) or (Mac). To insert punctuation marks, space between the fields, or additional text, just use your keyboard.
To remove a mistake, select the entry in the lower box and press . To start over, click on the dialog box's Clear All button. To further format the layout, see Formatting Fields or Objects on page 203.
| 4. | When you're done, click Next. One final dialog box appears (Figure 11.38), giving you a choice of switching to Preview mode to see how the envelopes will print or staying in Layout mode to continue tweaking its appearance. Make your choice, click Finish and the layout appears in the chosen mode. For more information on printing, see Printing on page 81.
|
To create an envelope return address 1. | Once you've created an envelope layout, be sure you're still in Layout mode. Select the layout using the pop-down menu just above the book icon.
| 2. | Select the Type tool from within the Layout mode's status area, then click within the envelope layout's header.
| 3. | Type in the return address, using the text options under the Format menu. For more on formatting individual blocks of text, see Formatting Fields or Objects on page 203. For more on database-wide text defaults, see To set formatting defaults on page 200.
| 4. | Click on and drag the double arrow between the header and body to close up the empty space around the return address (Figure 11.41).
Figure 11.41. After creating a return address for an envelope, drag the double arrow to close up empty space around the return address. 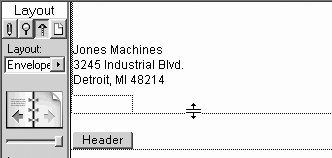
| 5. | Choose Preview from the Mode menu ( in Windows, in Windows,  on the Mac) to double-check your envelope layout before you print it (Figure 11.42). on the Mac) to double-check your envelope layout before you print it (Figure 11.42).
Figure 11.42. Use the Preview command ( in Windows, on the Mac) to double-check the envelope's appearance before printing. 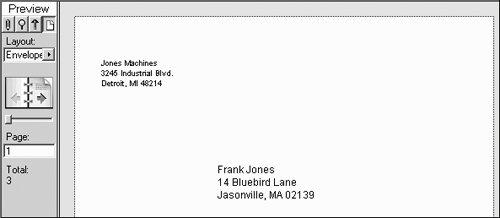
|
|