Choosing a Layout Type
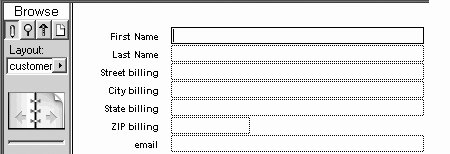
| When you first define fields in a database, FileMaker by default generates a standard layout, which lists the fields and their labels in the order they were created (Figure 11.2). You're free to modify that default layout any way you like. Or you may save yourself some trouble in generating a new layout by choosing from the predefined layout types built into FileMaker. Also consider how your layout may be improved using FileMaker's new tabbed controls, which let you organize information into file-folder-styled tabs. See Using Tabbed Layouts on page 191. Figure 11.2. When you first define fields, FileMaker by default generates a standard layout with fields and labels listed in the order they were created.
Use the New Layout command to create standard, columnar, table, label, envelope, and blank layouts. For information on label and envelope layouts, see Using Label and Envelope Layouts on page 157. Here's a quick comparison of each layout type: Standard: Nothing fancy here. This layout displays all the database's fields in the order they were created. The field labels for each field appear just left of the fields (Figure 11.3). It includes a blank header and footer. Figure 11.3. The Standard layout displays fields and their labels in the order they were created.
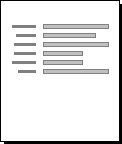
Columnar list/report: This layout places the database's fields in a row across a single page. The labels for the fields appear in the header above the body of the record (Figure 11.4). (The footer is blank.) You determine the order of the fields when creating the layout or you can go back and rearrange them any time. Columnar lists and reports make it easier to compare one record to another or to squeeze multiple records onto the same screen. Figure 11.4. The Columnar list/report layout places fields in a single row across the page.
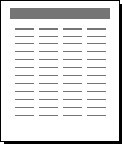
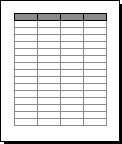
Table view: This isn't actually a layout as FileMaker usually defines the term (Figure 11.5). Instead it is an automatically generated view of your data that is very useful for seeing and sorting multiple records on a single screen. For details on using tables, see page 44. For details on controlling the layout setup for tables, see page 156. Figure 11.5. The Table view is automatically generated and helps you inspect multiple records on a single screen.
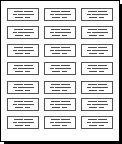
Labels: Use this layout only for labels: you can't enter data into it directly (Figure 11.6). The dialog box that appears lets you choose from dozens of pre-set Avery label styles. For more information, see To create a label layout on page 157. (The new Vertical labels option is useful for Asian characters.) Figure 11.6. The Labels layout handles dozens of preset mailing label styles.
Envelope: This layout is tailored for printing on regular business envelopes and includes main and return address areas (Figure 11.7). Like the labels layout, it's not used for entering data directly. It includes a header and body but no footer. For more information, see To create an envelope layout on page 157. Figure 11.7. The Envelope layout takes the hassle out of generating addressed envelopes.
Blank: This layout is entirely blanknothing appears in the header, body, or footer (Figure 11.8). If you want to start with a clean slate and only add fields as you're ready, this is the layout for you. Figure 11.8. The Blank layout is exactly thata blank slate if you want to start from scratch. |

EAN: 2147483647
Pages: 184