| FreeBSD has a reputation for being difficult to install. While this was true in the past, today's FreeBSD installation CDs lead you through the install without causing brain hemorrhages. To install FreeBSD 5.3 1. | Insert the FreeBSD 5.3 boot disc while booting.
After a few moments, FreeBSD 5.3 starts up and displays its boot menu (Figure C.1).
Figure C.1. The FreeBSD boot menu, featuring FreeBSD's daemon mascot. 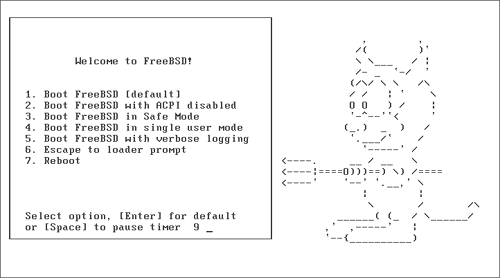
| 2. | Unless you've been having trouble booting FreeBSD, press 1 or wait for the timer to run out.
After a few moments, the sysinstall main menu is displayed (Figure C.2). The sysinstall application is FreeBSD's system-installation tool.
Figure C.2. The sysinstall tool's main menu. 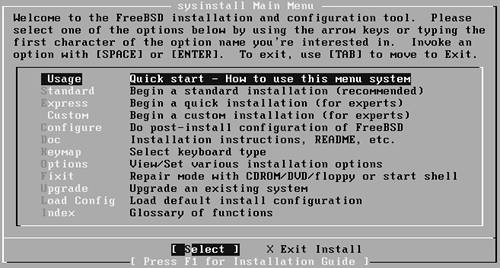
| 3. | Use the arrow keys to choose Standard from the main menu, and press Enter.
sysinstall displays a message telling you how to use the partitioning tool (Figure C.3).
Figure C.3. How to use the partitioning tool. 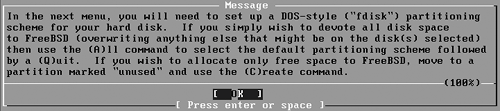
| 4. | Read the message, then press Enter to continue.
The installer displays the FDISK Partition Editor (Figure C.4).
Figure C.4. The FDISK Partition Editor. 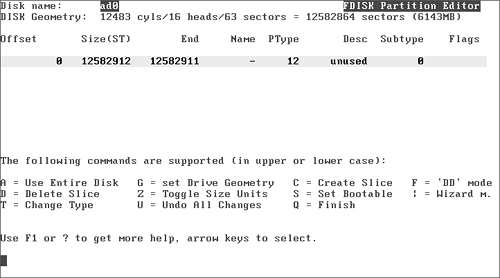
| 5. | To use the entire disk for FreeBSD, press the A key to automatically allocate a FreeBSD partition.
Press Q to exit the partition editor. The installer displays the boot-manager installation screen (Figure C.5).
Figure C.5. Installing a boot manager. 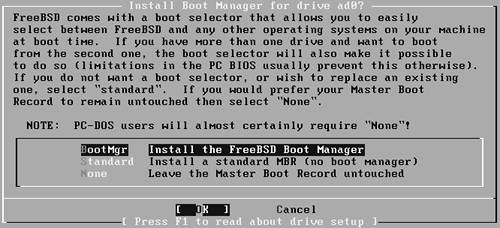
| 6. | Choose BootMgr if FreeBSD is the only operating system installed on this system.
Choose None if you've already got a boot manager installed (such as LILO or GRUB from Linux). You'll need to add your FreeBSD installation to the existing boot manager yourself.
You now need to create BSD partitions (or slices, in BSD parlance) inside the partition you just created (Figure C.6).
Figure C.6. Creating slices in your FreeBSD partition. 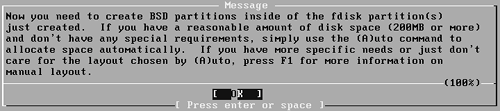
| 7. | Read the message, then press Enter to continue.
The installer displays the FreeBSD Disklabel Editor (Figure C.7).
Figure C.7. The FreeBSD Disklabel Editor. 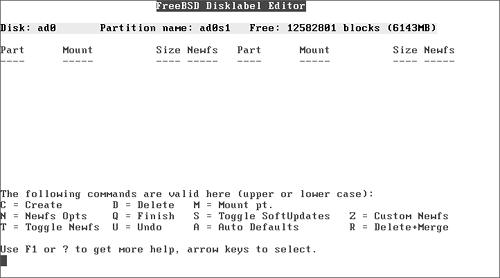
| 8. | Press A to let the installer choose some sensible defaults, then press Q to exit.
The installer displays the Choose Distributions screen (Figure C.8).
Figure C.8. Choosing a distribution set. 
| 9. | We'll need a developer distribution so that we can compile programs later, and it's always good to have a graphical user interface available. Use the arrow keys to select X-Developer, then press Enter.
The installer displays a confirmation dialog (Figure C.9).
Figure C.9. Confirming your choice. 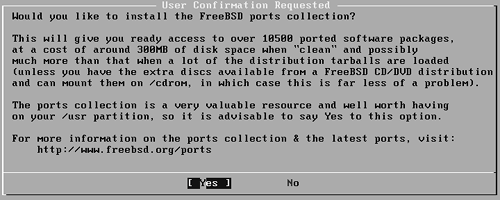
| 10. | The ports collection is one of FreeBSD's great strengthsmore than 10,000 programs that can be easily installed from the network whenever you need them. Select Yes with your arrow keys, then press Enter.
The installer displays the X.Org Distribution screen (Figure C.10).
Figure C.10. Configuring your X.Org distribution. 
| 11. | Luckily, the installer has already chosen the most useful parts of X. Select Exit, then press Enter to continue.
The installer returns you to the Choose Distributions screen (Figure C.11).
Figure C.11. Returning to the Choose Distributions screen. 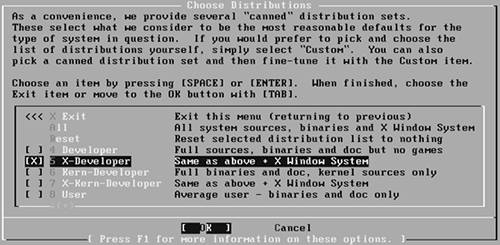
| 12. | We're done here, so select Exit, then press Enter to continue.
The installer displays the Choose Installation Media screen (Figure C.12).
Figure C.12. Choosing your installation media. 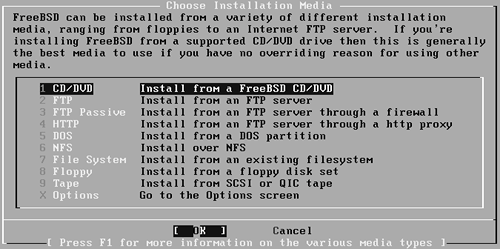
|
To install the FreeBSD packages: 1. | Remove the FreeBSD boot CD and insert the first FreeBSD installation CD.
| 2. | Select CD/DVD in the Choose Installation Media screen, and press Enter to continue the installation from the CD.
You could also install directly over the network using FTP, HTTP, or NFS, as well as several other kinds of media (such as tapes).
The installer displays the Last Chance! confirmation dialog (Figure C.13). Up until this point, the installer has not touched your system. No changes have been made to your hard drive, and nothing has been installed. This really is your last chance to back out of the install.
Figure C.13. It's your last chance! 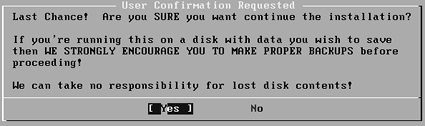
| 3. | If you're ready to install, make sure that Yes is selected and then press Enter to continue.
The installer creates your FreeBSD partition, formats the slices using the appropriate filesystems, and installs FreeBSD on your system (Figure C.14).
Figure C.14. Installing FreeBSD. 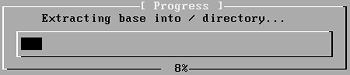
When the installer is finished, it displays a congratulations message (Figure C.15).
Figure C.15. Congratulations! 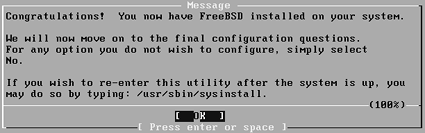
|
To configure FreeBSD: 1. | Press Enter to begin configuring FreeBSD.
The installer displays a dialog asking if you need to install any Ethernet or PPP devices.
| 2. | Select Yes and press Enter to configure your Ethernet card.
The installer displays the "Network interface information required" screen (Figure C.16).
Figure C.16. Gathering network-configuration information. 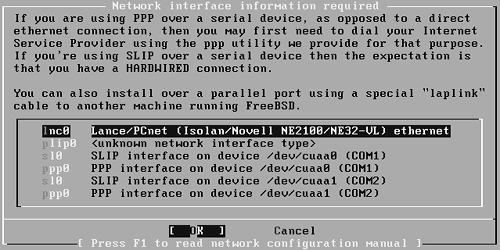
| 3. | Select your Ethernet card from the list and press Enter.
| 4. | Select No in the user confirmation dialog unless you know you need IPv6 support, then press Enter.
If you do need IPv6 support, the configuration is very similar to the IPv4 networking described here, but with the longer IP addresses.
| 5. | Select Yes to use DHCP to configure your network. If you're not using DHCP, select No.
| 6. | Press Enter to continue.
The installer displays the Network Configuration screen (Figure C.17).
Figure C.17. Configuring your network. 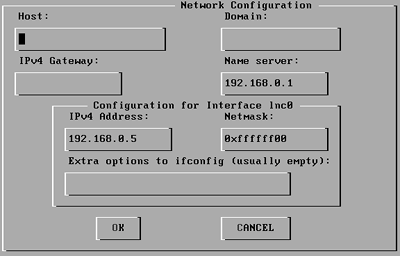
| 7. | Do all of the following:
Enter your system's fully qualified host name (such as chrish.peachpit.com) in the Host field. If you don't have a host name, ask your network administrator (or if you're on your home LAN, make one up). Press Tab to move to the next field (or press Shift-Tab to move to the previous field). Enter your system's domain name in the Domain field. This is usually the host name, minus the computer's name (such as peachpit.com). Enter your gateway and DNS server in the IPv4 Gateway and "Name server" fields. Select OK, then press Enter to continue.
| 8. | Select No in the confirmation dialog that appears because you're not configuring this machine to act as a gateway, then press Enter.
| 9. | Select Yes to enable inetd and its services, then press Enter.
| 10. | Select Yes to enable inetd even after being warned about the potential for security problems, then press Enter.
| 11. | Select No when asked if you want to edit inetd.conf now, then press Enter. We looked at this in Chapter 5.
| 12. | Select No when asked if you want to enable ssh login, then press Enter. We also looked at this in Chapter 5.
| 13. | Select No for anonymous FTP, then press Enter.
| 14. | Select No for acting as an NFS server, then press Enter.
| 15. | Select Yes for acting as an NFS client if you have NFS servers on your network; otherwise, select No. Press Enter to continue.
| 16. | Select No to customizing your console settings, then press Enter.
| 17. | Select Yes to set the machine's time zone, then press Enter.
| 18. | Select Yes if your machine's internal clock is set to GMT; otherwise, select No. If you don't know, select No. Press Enter to c ontinue.
| 19. | Use the Time Zone Selector's series of dialogs (Figure C.18) to find your current time zone. Select your region, country, and time zone, then press Enter.
Figure C.18. Selecting a time zone. 
| 20. | Select No to Linux binary compatibility, then press Enter. If we wanted to run Linux programs, we'd go back a few pages and install Fedora Core!
| 21. | If you have a PS/2 or serial mouse, choose to configure your mouse, then press Enter.
The installer displays the "Please configure your mouse" screen (Figure C.19).
Figure C.19. Configuring your mouse. 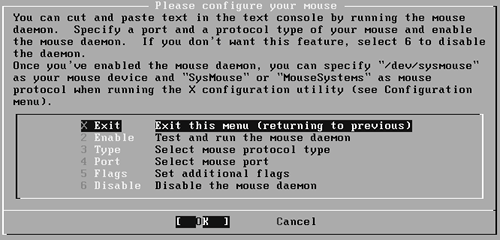
| 22. | Choose Disable, then choose Exit, and press Enter to continue.
| 23. | Select No to browsing the ports collection, then press Enter.
| 24. | Select Yes to adding a user account, then press Enter.
The installer displays the "User and group management" screen (Figure C.20).
Figure C.20. Managing users and groups. 
| 25. | Select Group, then press Enter.
| 26. | The installer displays the "Add a new group" screen (Figure C.21).
Figure C.21. Adding a new group. 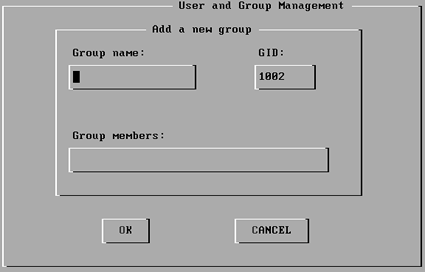
| 27. | Enter the new group's information:
Group name We're making a group for users, so enter users.
GID Group ID; you can leave the default alone.
Group members A list of users that belong to this new group; leave this blank.
Select OK and press Enter to return to the "User and group management" screen (Figure C.20).
| 28. | Select User, then press Enter.
The installer displays the "Add a new user" screen (Figure C.22).
Figure C.22. Adding a new user. 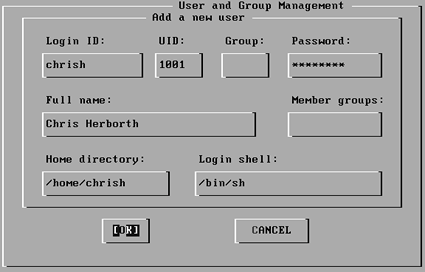
| 29. | Enter the new user's information:
Login ID The account's login name.
UID User ID; you can leave the default alone.
Group Group ID; enter 1001 here, for the users group we just created.
Password The user's initial password.
Full name The user's full name; you can include other useful information (phone extension, and so on) here as well, if there's room (63 characters will fit).
Member groups Other groups this user will belong to; you can leave this blank.
Home directory The user's home directory; you can use the default unless you need the user's home to be somewhere else.
Login shell The shell this user will use by default; use the default.
Select OK and press Enter to return to the "User and group management" screen (Figure C.20).
| 30. | Select Exit, then press Enter.
| 31. | Press Enter to set the root password.
| 32. | Type the root password at the New Password prompt, then press Enter. Type it again at the Retype New Password prompt, then press Enter.
| 33. | Select No, then press Enter when asked if you want to return to the configuration menu.
The installer returns you to the sysinstall Main Menu (Figure C.2)
| 34. | Select Exit Install, then press Enter.
| 35. | Remove your installation CD, select Yes, and press Enter to reboot the system.
Done! Finally!
|
|