| Setting up your e-mail accounts usually requires a few quick changes to your e-mail client. You'll need to enter your name in your client (so that recipients will recognize you), set up your user name and password, and enter the server addresses where you pick up your mail. We'll look at these steps in the popular Microsoft Outlook Express program. These basic steps are the basis for setting up any e-mail program to pick up mail over your network. -
First, set up a new account. Choose Tools, Accounts (Figure 10.1). Figure 10.1. Set up a new e-mail account. 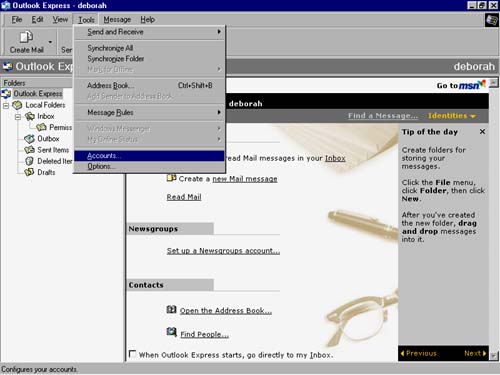 -
Choose Add, Mail (Figure 10.2). Figure 10.2. Choose Mail to start the Internet Connection Wizard. 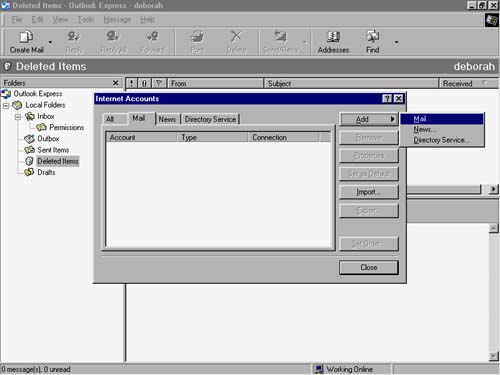 -
The Internet Setup Wizard launches (Figure 10.3). Enter the name people will see when they receive your mail. Click Next. Figure 10.3. Enter your Display name. 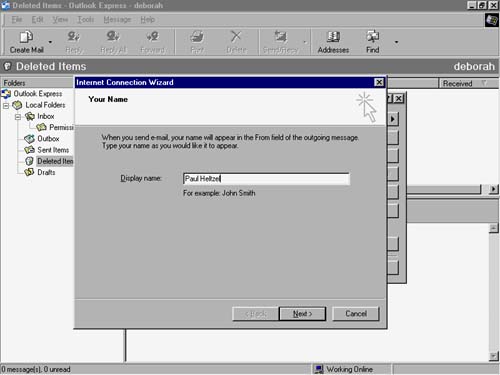 -
Enter your e-mail address. Click Next (Figure 10.4). Figure 10.4. Type in your e-mail address. 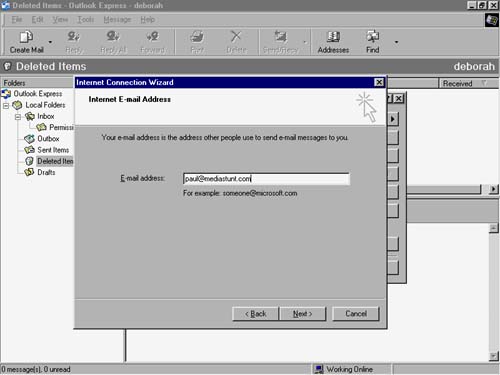 -
Now enter the server addresses your ISP provides to you (Figure 10.5). The mail server receives and stores your incoming mail. The SMTP (Simple Mail Transfer Protocol) server is your outgoing server, the one that will handle all the mail you send. If you are going from a dial-up account to a broadband Internet connection, check out the tip on p. 144, as you might need to use your old SMTP server to pick up mail from your dial-up account. Your broadband service provider will include an e-mail account with your service, but you might not want to do away with a dial-up account you've had for some time, or one that you use when traveling. Figure 10.5. Add your incoming (mail) server and outgoing (SMTP) server. 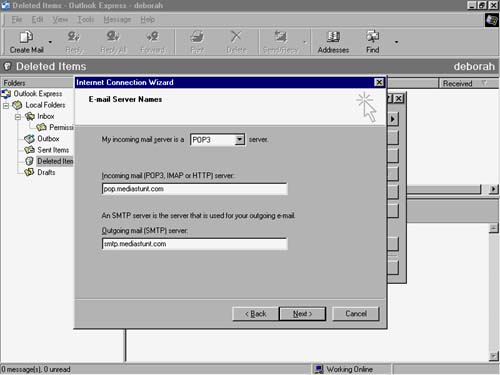 -
In the Account name text box, enter the username your ISP provides you (usually the part of your e-mail address before "@", although some providers use your entire e-mail address to log in). You also need to enter your password. Select the "Remember password" option so you don't have to enter it each time (Figure 10.6). Figure 10.6. Enter your account name and password. 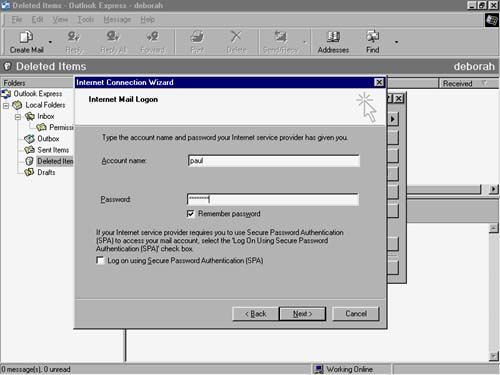 -
That's it! Click the Finish button to complete the setup (Figure 10.7). If your Internet connection is active, you can press the F5 button (the shortcut for Send/Receive mail). Figure 10.7. You're all set. 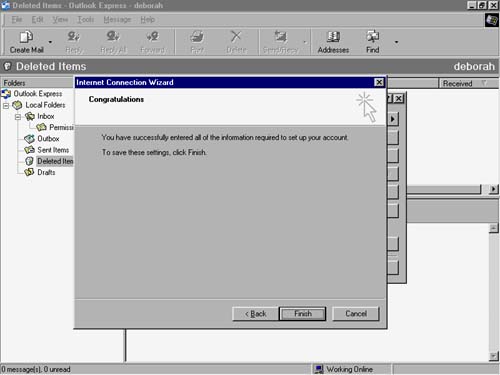 TIP: If you've been using a dial-up account but will now share a broadband modem over your wireless network, you'll probably need to mix the mail server from your old account, and the SMTP server from your broadband account. The catch? As a security measure, some ISPs won't allow you to access their SMTP (outgoing) mail server unless you are also connecting through that provider's Internet connection. For instance, to use the e-mail account from your dial-up connection, you will need to use the mail server from your dial-up account, but use the SMTP server of your broadband connection. Some providers allow this, some don't. You won't know until you try it. If your provider won't allow you to use the SMTP server from your dial-up connection over your broadband account, you can probably still pick up your mail and send it using your dial-up ISP's Web site (most ISPs provide Web-based mail for folks to pick up mail when they're on the go).
Now that you're ready to send and receive mail, let's consider how to start browsing the Web over your wireless network.  |