Planning and Creating Menus
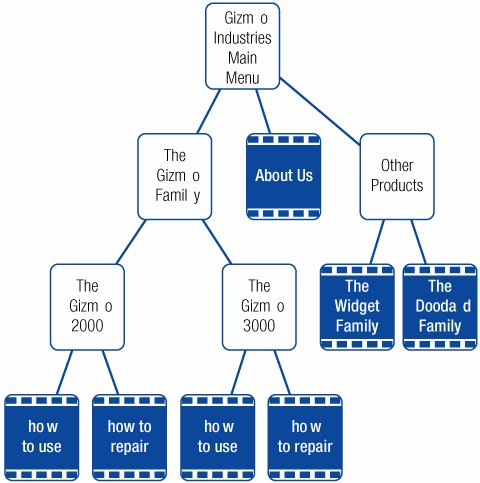
| When creating a DVD, you're also designing a user interface. If your DVD contains a couple of movies and a slide show, the interface will be simple: just one menu containing a few buttons. But if your DVD will contain a dozen movies and another half-dozen slide shows, it will need multiple menus. And that means that you'll need to think about how to structure a menu scheme that is logical and easy to navigate. As you plan a complex DVD, consider how many buttons each menu should have. In iDVD, a menu can have up to 12 buttons. That's a lottoo many choices for a main menu. If you have several movies and slide shows to present, it's better to create a set of submenus that logically categorize your content. It's a balancing act: create too few menus, and you present your viewers with a daunting number of choices. Create too many, and you make them spend time navigating instead of viewing. All of the new themes in iDVD 6 are designed with submenus in mind. You don't have to use these themes for projects containing submenus, but at least note their underlying philosophy: it's a good idea for a submenu to share some common design traits with the menus that lead to it. Planning Your DVD If your DVD will be presenting a large number of movies or slide shows, you need to plan how you will make that content available to the DVD's user. How many menus will you need? How will you categorize the content in each menu? This process is often called information design, and it involves mapping out the way you want to categorize and present your content. A good way to map out a DVD's flow is to create a tree diagram depicting the organization of menus much as a company's organizational chart depicts the pecking order of its management. The chart shown here depicts the flow of a DVD a company might create to promote its new Gizmo product line. A main menu contains three buttons: two lead to other submenus, while the third plays a promotional movie about the company. The submenu "The Gizmo Family" leads to two additional submenus, one for each Gizmo model. The "Other Products" submenu leads to two movies that promote other fine products. Creating Additional Menus To create a submenu, choose Add Submenu from the 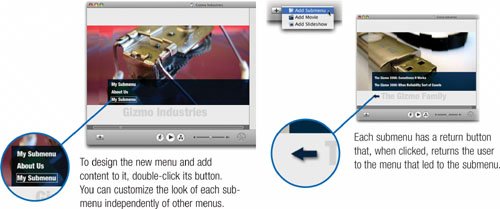 To design the new menu and add content to it, double-click its button. You can customize the look of each submenu independently of other menus. 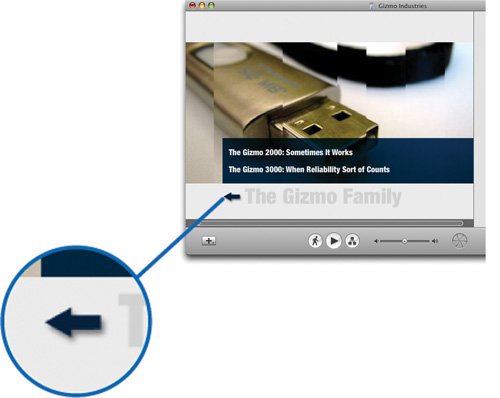 Each submenu has a return button that, when clicked, returns the user to the menu that led to the submenu.
|