| Multipaned HTML Help files are often the most familiar form of user assistive programming (see Figure 10.1). These files allow for topical help descriptions that may be cross-linked using HTML hyperlinks , enabling a user to navigate between related topics. Context-sensitive applications allow access to HTML Help files that relate to the currently selected control. Figure 10.1. A sample HTML Help file. 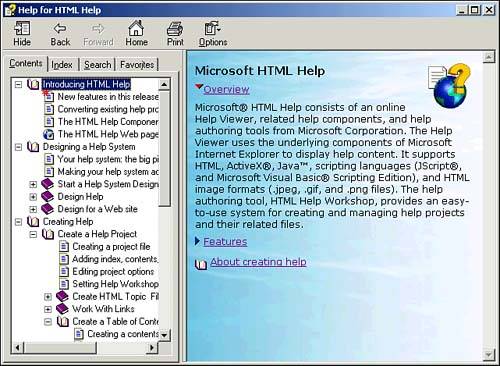  | At the time of the writing of this book, HTML Help version 1.3 is the current standard. Microsoft released a beta of Version 2.0 but in early 2002 dropped plans to ship this version. A replacement has not yet been announced. |
Inside HTML Help Many utilities may be used to create HTML Help files, including shareware and commercial applications such as RoboHelp. When you install Visual Studio .NET, the HTML Help Software Development Kit (SDK) will be installed, which includes a utility intended to make the creation of HTML Help files less arduousthe HTML Help Workshop utility. The HTML Help SDK includes the following items: -
HTML Help Workshop An Integrated Development Environment (IDE) for developing HTML Help files -
HTML Help ActiveX control and HTML Help Java applet Components that can be used for navigation within HTML Help files -
HTML Help Viewer A host application used to display HTML Help files -
HTML Help Image Editor An application that can capture screenshots and perform graphics-editing tasks -
HTML Help An application that can execute HTML Help files outside of the browser -
HTML Help Compiler An application that converts HTML Help Workshop files into actual HTML Help files -
HTML Help Authoring Guide Documentation for HTML Help file developers An HTML Help solution can include several types of files: -
Help project file This file determines the overall structure of the HTML Help file. -
Topic files These files contain individual sections of Help documentation written as HTML files. -
Graphics, sound, animation, and multimedia files These files can be embedded within HTML Help files. -
Contents files These files contain table of contents information. -
Index files These files contain index information. Creating a Help Project The first step toward creating an HTML Help solution is the creation of a Help project, which may be performed by completing the following steps: -
Launch the HTML Help Workshop by choosing Start, Programs, HTML Help Workshop, HTML Help Workshop. -
Select File, New and then choose Project as the new file type. Click OK to launch the New Project Wizard and click Next to bypass the introduction. -
Select an appropriate location and provide a name for the new HTML Help Project file (which uses the extension .hpp ). Click Next. -
Because you do not need to include existing files, you can skip the Existing Files step by clicking Next. -
Click Finish to create the new project file, as shown in Figure 10.2. Figure 10.2. A new Help project in HTML Help Workshop. 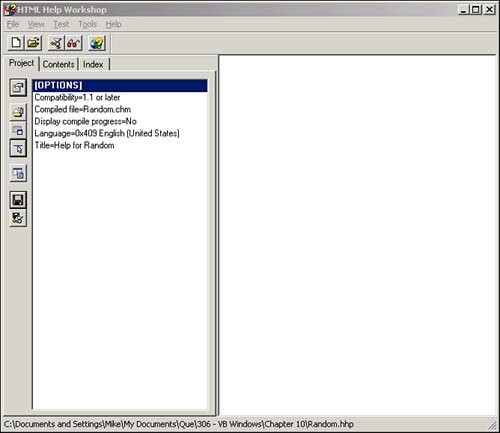 Creating Topic Files Once you have created your HTML Help project, you must then create topic files designed to assist the user in a particular situation. You will first need to know how your application will operate in order to create an appropriate Help file for each situation. You can create a topic file by following these steps: -
In the HTML Help Workshop, select File, New. -
Select HTML File from the available options and click OK to open the new HTML file. -
Provide a meaningful title for the new file and click OK to open the file in the HTML Help Workshop workspace. -
Modify the HTML file to include specific details for the desired topic, as shown here: <!DOCTYPE HTML PUBLIC "-//IETF//DTD HTML//EN"> <HTML> <HEAD> <meta name="GENERATOR" content="Microsoft® HTML Help Workshop 4.1"> <Title>Topic-Specific Title</Title> </HEAD> <BODY> <h1>Topic Heading</h1> <p><img src="SomeImage.jpg"></p> <p>This is the topic help text that will be displayed following the image file noted above.</p> </BODY> </HTML> -
Select File, Save File and provide a filename for the topic file to save it.  | You are not required to edit the raw HTML code here. You can also use any common HTML-editing utility, such as Microsoft's FrontPage. |
Linking Topic Files The use of HTML files for online help allows for the cross-linking of individual topic files through the use of hyperlinks. Hyperlinks should be familiar to anyone who browses the Web. Clicking a hyperlink redirects the browser's focus to another page. This functionality allows users to navigate between related topics. A hyperlink may be placed anywhere in the body of the HTML file (between the <BODY> and </BODY> tags) and may be either a file reference for a local file or a remote URL referencing an external file: <p><a href="anotherpage.htm">Another Page</a></p> <p><a href="http://www.mycorp.com/yetanotherpage.htm"> Yet Another Page</a></p> Creating a Table of Contents To make your HTML Help files useful to users looking for a particular item, you should create a table of contents. Once you have created your topic files, this may be accomplished within the HTML Help Workshop by following these steps: -
In the HTML Help Workshop, select File, New. Then select Table of Contents and click OK. -
Click the Options button on the Projects tab and set the default file to the proper HTML ( .htm ) file as well as the contents file to your newly created table of contents file ( .hhc ). -
Select Edit, Insert Topic to add your topic files ( .htm ). By selecting existing items in the interface, your new additions will become subordinate items within the table of contents listing, as shown in Figure 10.3. Figure 10.3. Topic files listed in a table of contents in the HTML Help Workshop. 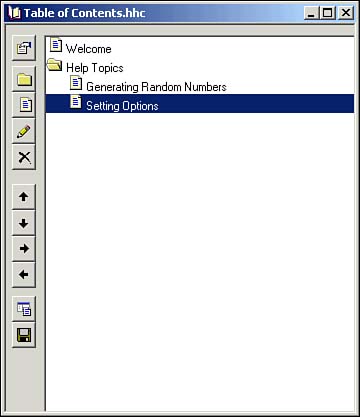 -
Continue adding topics until the contents are complete. Creating an Index One additional measure of assistance for users involves the creation of a searchable index. This may be accomplished in the HTML Help Workshop by completing the following steps: -
In the HTML Help Workshop, select File, New. Then select Index and click OK. -
Provide a meaningful title for the new index ( .hhk ) file and click OK. -
Select Edit, Insert Keyword to open the Keyword dialog box. Then select the target HTML Help file ( .hhp ) project. -
Provide a keyword and select Browse to navigate to the target topic file ( .htm ) for the keyword and then click OK. -
Continue adding all the keywords and then click the Options button on the Project tab of the HTML Help Workshop. -
On the Files tab, set the index file property to the name of the index file you just created and click OK. In a help file, just as in a book, a table of contents provides a structured way for users to find topics of interest, whereas the index allows users to rapidly search for keywords. You should provide both aids for any help file you create. Compiling and Testing an HTML Help File Once you have completed all the topic files, the table of contents, and the index, you may compile the HTML Help project and test it by following these steps: -
In the HTML Help Workshop, save and close all files. Then select File, Compile to open the Create a Compiled File dialog box. -
Select the appropriate options if you want to display or save the compiled files, provide a meaningful name for the completed file, and click Compile. -
After the compilation has been completed, click the View Compiled File button, browse to the newly created file, and click View to open the file in the Help browser. |