Using the Character Formatting Window
| This section describes the more advanced character formatting options of the Character format window.
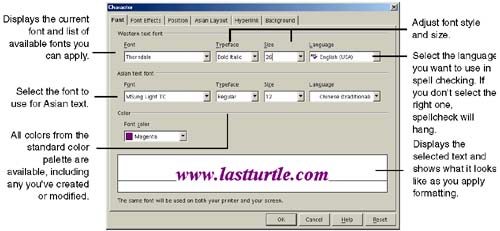
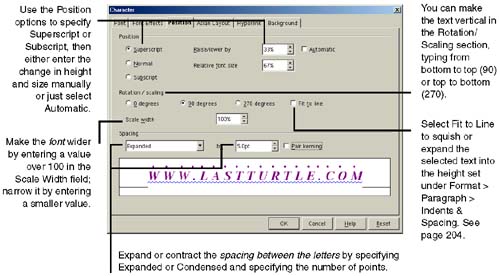
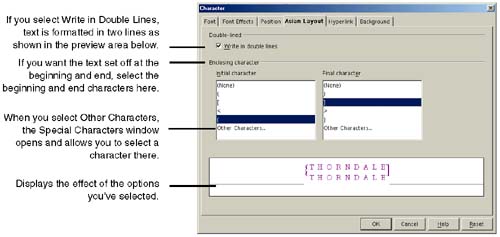
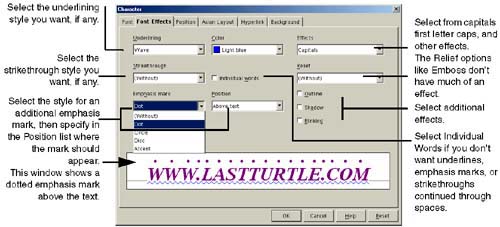
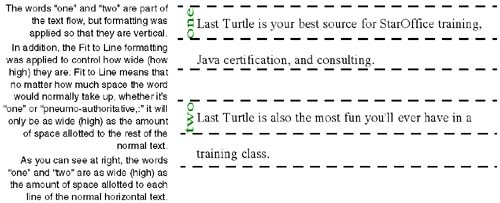
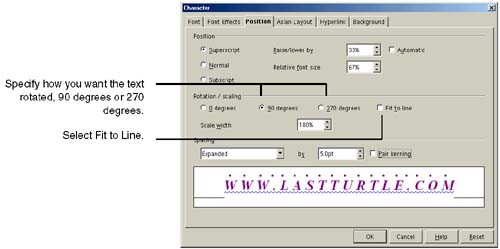
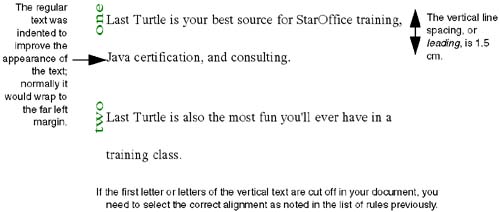
When selecting text to apply character formatting, be aware of selecting spaces at the beginning or end of the selection, because the spaces get formatted, too. For example, if you're applying a fixed-width font (such as courier ) to some selected text and you've selected the space after the text, the space will become fixed-width and may make the spacing seem too big. To avoid this, select a word by double-clicking it. To select more than one word, double-click the first word and drag through the other words you want to select. Figure 7-3 through Figure 7-5 describe character formatting options on each of the tabs in the Character window. For Asian formatting specific tabs, see Figure 7-11 Figure 7-12. Figure 7-3. The Character window, Font tab Figure 7-5. The Character window, Position tab Figure 7-11. Specifying how Asian text should be laid out Figure 7-12. Specifying what font and language to use for Asian text Figure 7-4. The Character window, Font Effects tab Note Pair kerning puts characters closer together to improve text appearance. Making Horizontal Text Fit Within the Line Spacing Height (Using the Fit to Line Option)What the feature doesThe Fit to Line option from Figure 7-5 fits the vertical text into the height of the line as shown in Figure 7-6. Figure 7-6. How the Fit to Line option works The height of the line, or leading , is controlled by the setting in the Paragraph window. Choose Format > Paragraph and select the Indents & Spacing tab. It's Single by default, i.e., equivalent, more or less, to the font size or a little bit bigger. Unless you want a really squished vertical word, or unless your vertical text is a lot smaller, you want the leading to be bigger than single spacing. Rules for making it workTo make the Fit to Line feature work, you must follow these rules:
Applying the Fit to Line featureFollow these steps.
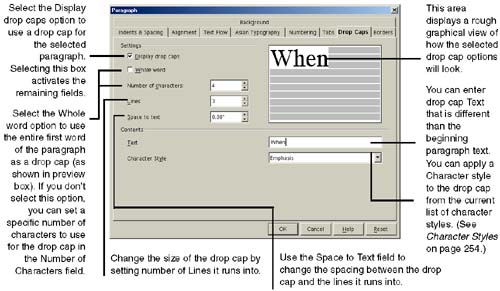
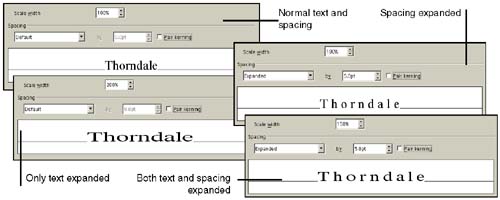
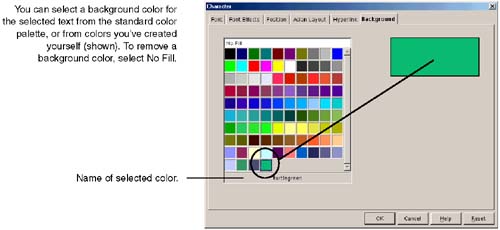
Related advanced formatting featuresThis feature is kind of like the feature that lets you make a few letters bigger than all the others, but keeping the text horizontal. Kind of like those big letters at the beginning of old manuscripts. See Figure 7-22 on page 215. See also Adding Vertical and Diagonal Text to Documents on page 244. Figure 7-22. The Paragraph window, Drop Caps tab Changing Text Width With Scale Width and Spacing OptionsFigure 7-9 shows the differences between scale width (changing the font width) and spacing (changing the width of the spaces between text). Figure 7-9. Expanding text, spacing, neither , or both Figure 7-10 shows the background tab for characters. Figure 7-10. The Character window, Background tab Putting Two Characters Together (Pair Kerning)Pair kerning also supports non-English characters (ligatures) such as . Your printer driver must support ligatures to display and print them correctly. Asian Character FormattingEnsure that you've set up Asian text formatting correctly using the information in Enabling and Setting Up Asian Fonts and Formatting on page 108. Then make the appropriate selections in Figure 7-11 and Figure 7-12. Asian Language Support must be enabled; see Figure 5-10 on page 109. |


EAN: 2147483647
Pages: 407