Section 2.1. Typing in Word
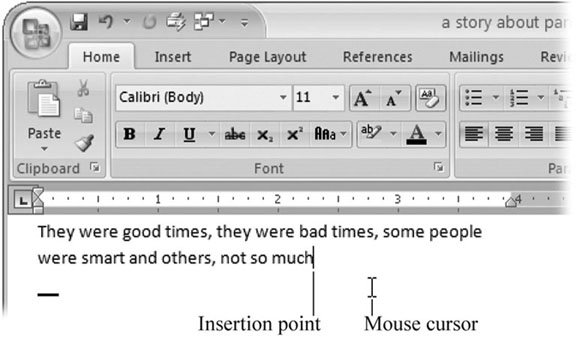
2.1. Typing in WordWhenever you're entering text into Word, the insertion point is where all the action takes place (Figure 2-1). It's that vertical, blinking bar that's a little taller than a capital letter. When you press a key, a letter appears at the insertion point, and the blinking bar moves a space to the right. To type in a different spot, just click somewhere in your text, and the insertion point moves to that location. Press Shift to type capitals or to enter the various punctuation marks you see above the numbers keys (!@#$*&^). When you want to type several words in uppercase letters , press the Caps Lock key. You don't have to keep holding it down. It works like a toggle. Press it once and you're in caps mode. Press it again and you're back to lowercase. The Backspace key and the Delete key both erase characters, but there's a difference: The Backspace erases the characters behind the insertion point, while the Delete key eliminates characters in front.
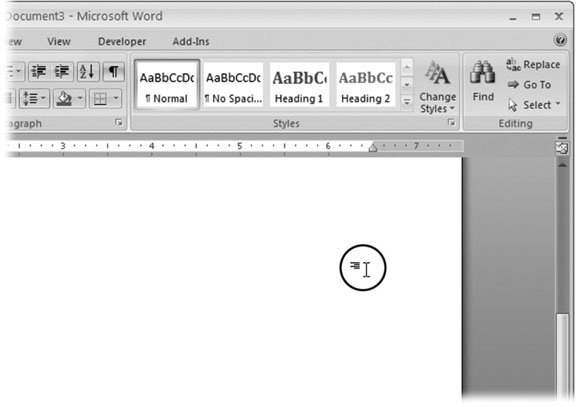
Note: Word's cursor changes its appearance like a chameleon, hinting at what will happen when you click the mouse button. When you move the cursor over the ribbon, it turns into an arrow, indicating that you can point and click a command. Hold it over your text, and it looks like an I-beam, giving you a precise tool for placing the insertion point between characters. But if all you do with Word is type, you're missing out on 95 percent of its potential. What makes Word a 21st-century tool is the ease with which you can edit text, as described next. 2.1.1. Click and Type for Quick FormattingWord's Click and Type feature makes it easy to position and align text on a blank spot on the page. It's great for those jobs where you want to position a block of text in an unusual place. Imagine you're putting together a title page for a report and you want the title about a third of the way down on the right side of the page with text aligned to the right. All you have to do is position your mouse cursor where you want the text. Notice, as you move the cursor around the page, sometimes four small lines appear near the I-beam. When the cursor's on the right side of the page, the lines trail off to the left (Figure 2-2). When the cursor's in the center of the page, the lines are centered at the bottom of the I-beam. As usual, the cursor is giving a hint about what will happen next. If you double-click when the cursor's on the right side of the page (with the lines trailing off to the left), then several things happen. Most noticeable, your insertion point is exactly where you clicked. Behind the scenes, Word makes several other adjustments. If necessary, Word positions the insertion point vertically and horizontally on the page by adding paragraph marks and tabs as needed. Word changes the paragraph alignment setting to Align Rightit's just as if you clicked the button on the ribbon. Fortunately, you don't need to worry about these details; all you have to do is type the text (Figure 2-3).
|

 Symbols
- Using SQL Data Definition Language (DDL) to Create Data Tables and Other Database Objects
- Performing Multiple-table Queries and Creating SQL Data Views
- Working with SQL JOIN Statements and Other Multiple-table Queries
- Monitoring and Enhancing MS-SQL Server Performance
- Writing Advanced Queries and Subqueries