User-Related Objects
User - Related ObjectsThis might seem like an odd place to talk about User objects and related features, but critical security problems can arise from a misunderstanding of the ways in which eDirectory users can be assigned trustee rights. There are three main objects that are used to organize your network users. You can use iManager or ConsoleOne to create and manage each of these types of objects (for more information on both iManager and ConsoleOne basics, see Chapter 3, "Novell Management Tools"):
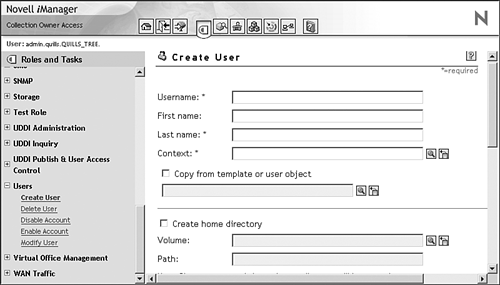
These objects form the foundation from which network services and privileges are ultimately delivered. After all, user-related objects define the human elements of your network. Immediately after a new NetWare 6.5 and eDirectory installation, the only User object that exists is Admin. Although it might be comforting to think of a network of one, you are going to have to create user accounts for every one of your users. Once users have been created, they can begin working on the network. In most cases, users on a network will notice very little difference from working on a stand-alone computer. They still use the applications they were using before. They still open , save, and delete files the same way. They can still play the same gamesbut only if you let them! And that's the goal of network security: to prevent users from taking some action, either unintentionally or intentionally, that might compromise the integrity of the network or expose network resources in such a way that can cause harm to the network or the organization. There are several levels of network security in today's networks, and NetWare 6.5 gives you a great deal of control over each. The User ObjectTo create an eDirectory User object, complete the following steps:
WARNING It is possible to create an eDirectory User object without a password, but it is highly discouraged due to the network security breach that results. If you plan to assign many of your users certain identical properties, you can use a User Template object. The Template object will automatically apply default properties to any new user you create using the template. However, it does not apply those properties to any users who existed before you created the user template. Network administrators often use a template to automatically grant default eDirectory and file system rights to users. To create a User Template object, complete these steps:
Once created, you configure any of the common characteristics you want assigned to all users you create. To do this in iManager, browse to and select the object in the left frame. Modify the template by selecting the appropriate task and providing the desired information. Most of the template information will be specified in the Modify Object and the Rights to Other Objects tasks . The Group ObjectGroup objects are used to apply a common set of trustee rights to different User objects. User objects assigned to a group are made security equivalent to that group, meaning that any rights given to the Group object will also be applied to each of its member users. Creating a group is very similar to creating a user. Complete the following steps to create a group and assign group membership to a user.
The Organizational RoleOrganizational roles function like groups of one. (They can have multiple occupants for process redundancy.) They use explicit security equivalence to provide specific rights to a user who needs to be able to perform a specific task. Organizational roles are generally used to grant some degree of administrative capability for a tree or branch of the tree. Although similar in some respects, an organizational role should not be confused with the role-based services of iManager. The iManager roles are much more flexible in their application than Organizational roles. For more information on iManager roles, see Chapter 3. Complete the following steps to create an organizational role and assign occupancy to a user:
Once created, you can assign any User object to an organizational role to grant specific rights related to specific responsibilities within your organization. |
EAN: 2147483647
Pages: 172