The Retoucher's Toolbox The process of repairing damage to a photo is often referred to as retouching. As there are several different problems that can manifest in a photo, Photoshop offers several tools to respond with. Knowing which tool to use is often a problem, but with a little bit of study and practice, the process can be greatly accelerated. Let's explore how the tools work and give them a try. But first, realize that most of these tools use a paintbrush behavior. Be sure your painting tools are set to Brush size and your other tools to Precise in the Preferences window by choosing Edit > Preferences. This will allow you to better see your tools as you move them in your image. 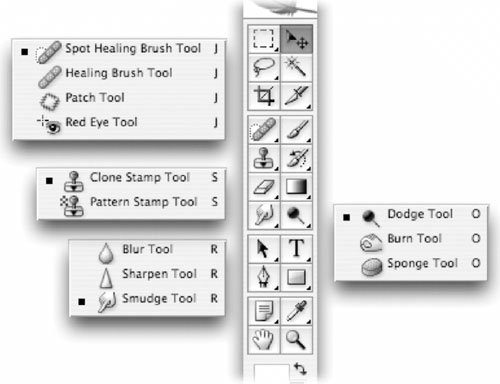 Clone Stamp Tool The Clone Stamp tool works by replacing bad pixels with good pixels. It's a popular tool that is relatively easy to use and achieves accurate results. The Clone Stamp tool allows you to set a sample point (where the good pixels are taken from), then paint into bad areas. This technique is very powerful, as the Photoshop paint engine allows for the softening of the stamp's edge. 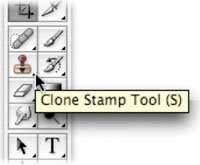 1. | Activate the Clone Stamp tool by pressing S. Roll over the tools icon and be sure you have not accidentally activated the Pattern Stamp tool.
| 2. | Select a soft-edged brush from the Options bar or Brush palette. If needed, modify an existing brush.
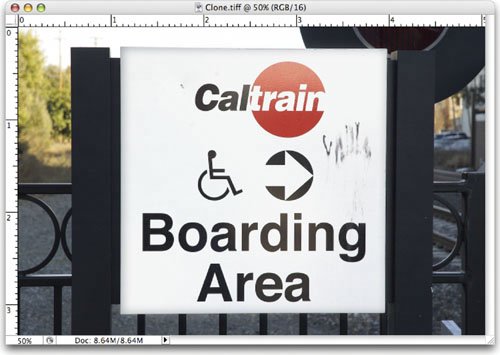
| 3. | Open the file Clone.tif from the Chapter 11 folder on the DVD-ROM. You'll notice some graffiti in the upper-right corner of the sign.
 | | | 4. | You need to specify the alignment for the clone:
For Better Results When Cloning: Tip Try cloning at a lower opacity and build up strokes Try sampling from several different places to fill in an area Experiment with blending modes
- Check Aligned: The sample point and painting point move parallel as you move. If the user clones and moves the cursor to the right, the sample point moves as well. This ultimately creates more variety in the cloning, which is desirable. However, it can lead to the unwanted material instead being repeated into the stroke.
- Uncheck Aligned: If Aligned is not selected, the initial sample point is used (even after you stop and resume cloning). This option makes sure that you are always sampling from the same pixels when starting a new stroke.
Video Training  | Clone an Object |
| 5. | If you're working with a layered image, you can clone from all visible layers by specifying Sample All Layers. If this option is deselected, only the active layer is used.
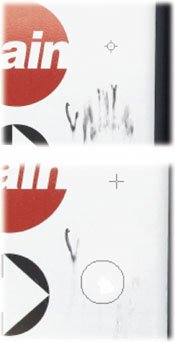 | 6. | Option-click (Alt-click) within the current document (or even another open document set to the same color mode). This defines the source point for sampled pixel data. Click a clear white area in the sign near the pixels that will be replaced.
| 7. | Click and paint as if you were using the Brush tool. The sampled pixels are taken from the Sample Point and cover the bad pixels. Continue cloning until all of the damage is painted over.
|
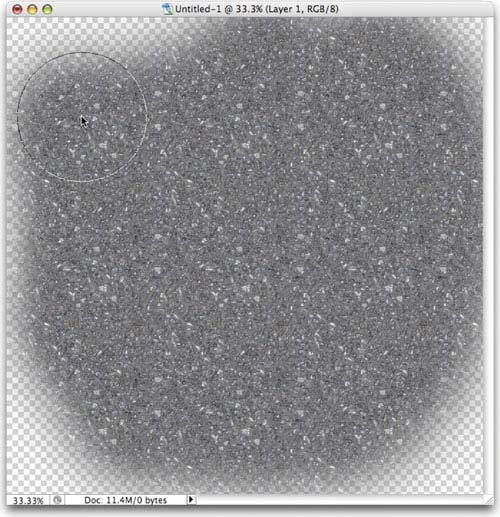
 Pattern Stamp Tool You'll find the Pattern Stamp tool tucked into the same position as the Clone Stamp tool. In fact, many users pick the Pattern Stamp tool by mistake, and quickly learn to avoid it, as its default settings are pretty bad. You see, the Pattern Stamp tool uses seamless patterns to fill in an area. The patterns can be Photoshop presets or custom ones you create based on a photo. The Pattern Stamp tool functions more like a brush, as you do not need to set a source point. Additionally, you may want to click the Aligned button so new strokes remain seamless with existing strokes. Using built-in patterns When you select the Pattern Stamp tool, you'll see a list of patterns in the Options bar. Clicking the drop-down menu will bring up a list of presets. In the Pattern Picker window you can choose a variety of seamless patterns. Additionally, you can click the submenu to load more. 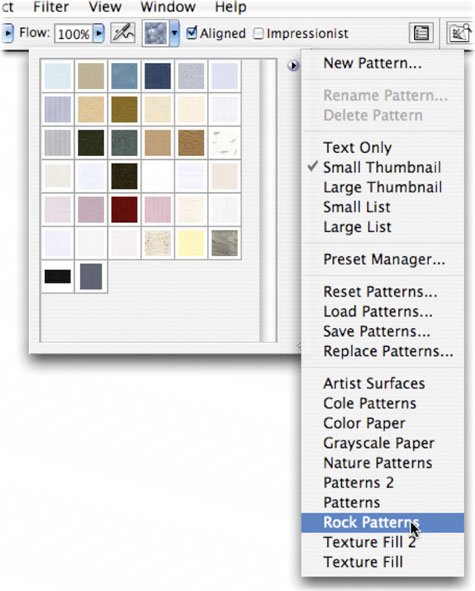 Making a pattern with the Pattern Maker filter Creating a seamless pattern from a photo is easy if you harness the power of the Pattern Maker filter. This special filter can be used to create a photorealistic pattern based on your image. It works best if there's a repeating pattern in the image and not too much detail. Images such as gravel, grass, or carpet, for example, are easy to use to create seamless patterns. Let's give it a try: 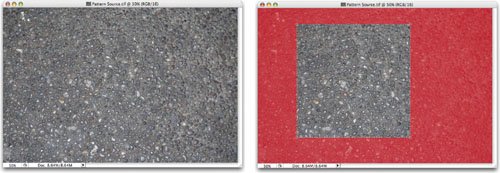 1. | Open the file Pattern Source.tif from the Chapter 11 folder. This image is too large as the seamless pattern needn't be bigger than 600 x 600 pixels for most purposes. If you make the pattern too big, it will just clog up RAM.
| 2. | Select the Crop tool (C) and type in 600 px by 600 px.
 | 3. | Convert the image to 8-bit mode by choosing Image > Mode > 8 Bits/Channel.
| 4. | Choose Select > All or press Cmd+A (Ctrl+A).
| 5. | Choose Filter > Pattern Maker to invoke the Pattern Maker dialog box.
| 6. | Click the Use Image Size button to generate a pattern that matches the size of the layer.
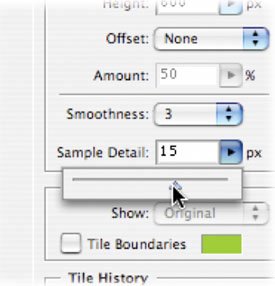 | 7. | The Smoothness setting adjusts the sharp edges in the pattern. By increasing the smoothness, you can reduce edges. The Sample Detail determines how much of the original detail comes through in the pattern. Higher values more closely match the original (but will take longer to generate). Set Smoothness to 3 and Sample Detail to 15 pixels.
| | | 8. | Click Generate to create the pattern. You can press Esc to cancel the generation of the pattern. If you desire, you can click Generate Again to try other options.
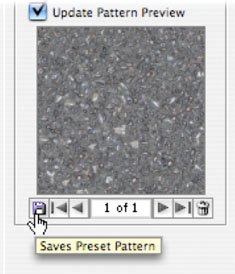
| 9. | When you're satisfied, click the small disk icon in the lower-right corner. This allows you to name and save the pattern as a preset. Name the pattern and click OK.
 | 10. | Try the pattern out. Create a new document sized 2000 x 2000 pixels. Select the Pattern Stamp tool and choose your new pattern from the Pattern Picker window. Click and paint to see the new pattern in action.
 |
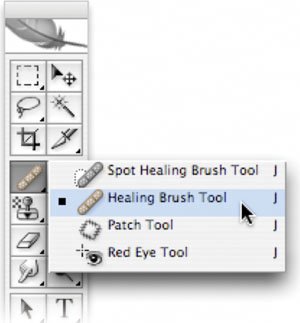
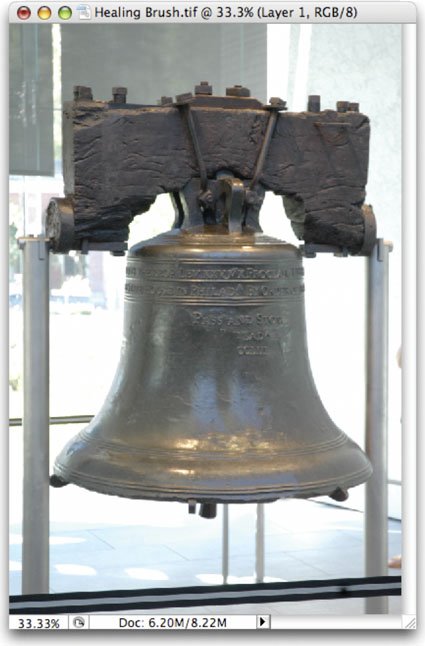
If you'd like to try out another example, tackle the image Seamless Bonus.tif from the Chapter 11 folder. Create a seamless pattern based on the trees, then pattern stamp out the reflector board. 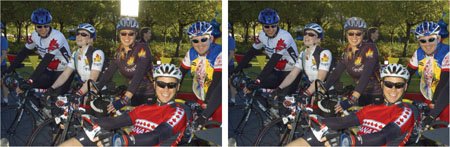 Healing Brush Tool The Healing Brush tool ( J) is an innovative and powerful tool that can be used to repair blemishes in a photo. The Healing Brush tool operates much like the Clone Stamp tool. However, instead of just moving pixels from one area to another, the Healing Brush tool clones pixels while also matching the texture, lighting, and shading of the original pixels. 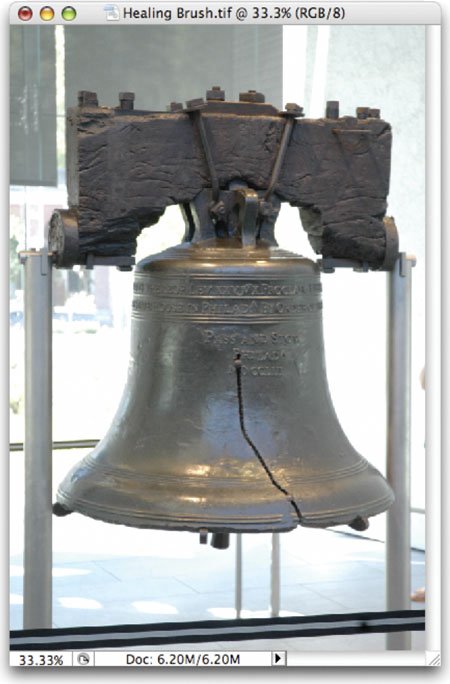 Since the Healing Brush samples surrounding areas, you may want to make an initial selection around the damaged area and feather it. This will give you better results on an area with strong contrast. The selection should be slightly bigger than the area that needs to be healed. It should follow the boundary of high-contrast pixels. For example, if you're healing a blemish on a subject's face, make an initial selection of the skin area to avoid mixing in the adjacent background or clothing. The selection will prevent color bleed-in from outside areas when painting with the Healing Brush tool. 1. | Open the file Healing Brush.tif from the Chapter 11 folder.
| 2. | Activate the Healing Brush tool by pressing J. (Be sure to closely examine the icon and not select the Spot Healing Brush tool.)
| 3. | Select a soft brush from the Options bar or the Brush palette.
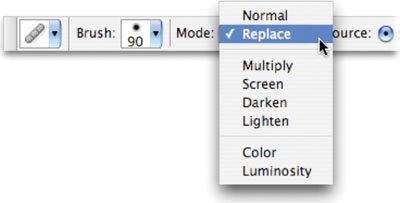
 | 4. | Set the blending mode to Replace. This option preserves noise and texture at the stroke's edges.
 | 5. | Specify a source for repairing pixels in the Options bar. The standard option is to use Sampled. This takes pixels from the area surrounding the sample point. As the brush moves, the sample point also moves to ensure variety in the sampled source.
| | | 6. | Specify the alignment option. If Aligned is selected, the sample point and painting point move parallel as you move the stroke. If Aligned is deselected, the initial sample point is Always. The Always option ensures that you are always sampling from the same area.
| 7. | If you want to heal to an empty layer, check the box to Sample All Layers. This allows you to sample one layer, then apply the healing to a new empty layer above. This will provide greater flexibility in your workflow. If the Sample All Layers box is deselected, only the active layer is used.
| 8. | Add a new, empty layer above the Background layer.
| 9. | Near the bottom of the bell, Option-click (Alt-click) on the striped area.
| 10. | Click and start to paint as if you were using a brush. Because the sampled pixels are drawn from before you click, it may be necessary to release and start over occasionally to avoid cloning the problem area.
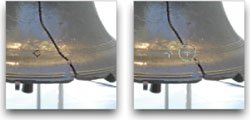 | 11. | After several strokes, release the mouse to merge the sampled pixels. Before the pixels blend, you will have a visible stroke. Afterward, the stroke should gently blend.
 | 12. | Continue to heal the remaining crack in the bell.
|
Spot Healing Brush Tool The Spot Healing Brush tool was added to Photoshop CS2 as a way to harness powerful blending technology with less work (although the Healing Brush is pretty labor-free to begin with). It can quickly remove blemishes and imperfections in photos without requiring a sample point to be set. The Spot Healing Brush tool automatically samples pixels from the area around the retouched area. Let's give the tool a try: 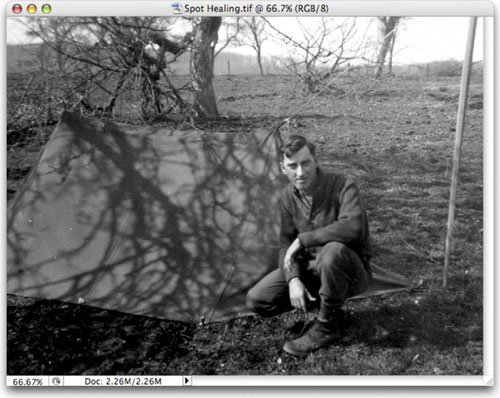 1. | Open the file Spot Healing.tif from the Chapter 11 folder.
| 2. | Activate the Spot Healing Brush tool from the Toolbox.
| 3. | Choose a soft-edged brush from the Options bar. Make the brush only slightly larger than the problem areas. In the case of this image, we'll fix several small scratches in the tent. It's best to cover the area in need of repair with one click.
Video Training  | Restore a Damaged Photo |
Upon close examination, you should notice that we have healed damage and flakes in the photo. 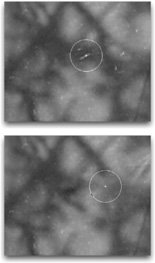 | 4. | Set the blending mode in the Options bar to Replace. This will preserve noise, film grain, and texture at the edges of the stroke.
| 5. | Choose a Type of repair in the Options bar:
- Proximity Match: Pixels from the edge of the selection are used as a patch for the selected area. This should be the first attempt at repair; if it doesn't look good, switch to the Create Texture option.
- Create Texture: Pixels in the selection are used to create a texture to fix the damaged area. If the texture doesn't work, try dragging through the area one more time.
| 6. | Click once on an area you want to fix. You can also click and drag over a larger area.
|
Patch Tool The Patch tool uses the same technology as the Healing Brush tool, but it is better suited to fix larger problems or empty areas. Start using the Patch tool by selecting the area for repair, then dragging to specify the sampled area. For best results, select a small area. Tip: Making Selections While you can make a selection with the Patch tool, you can always make a selection using any other selection tool (such as Marquees or Lassos), then activate the Patch tool. The Patch tool behaves just like the Lasso tool (as far as selections go), but it may not offer the level of control you need.
The Patch tool can be used two different ways: Source: Make a selection in the area that needs repair, then drag to an area of good pixels. Destination: Make a selection in an area of good pixels. Then drag that selection on top of the bad pixels.
Let's give it a try: 1. | Open the file Patch.tif from the Chapter 11 folder.
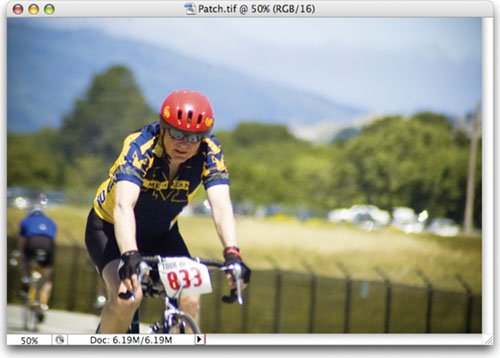 | 2. | Activate the Patch tool by pressing J. (It's in the same well as the Healing Brush tool.)
| 3. | Set the Patch tool to Source.
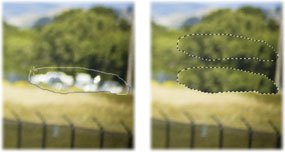
| 4. | Make a selection around the out-of-focus cars near the right edge.
| 5. | Drag into the tree area to sample pixels.
| 6. | Release and let the Patch tool blend.
 |
Red Eye Tool Red eye is caused when the camera flash is reflected in a subject's retinas. This happens frequently in photos taken in a dark room, as the subject's irises are open wide. There are two solutions to fixing red eye in the field: While getting it right in the field is important, you can fix it in Photoshop as well. Photoshop CS2 offers a powerful Red Eye tool that can fix flash problems. It effectively removes red eye from flash photos of people and white or green reflections in the eyes of animals. 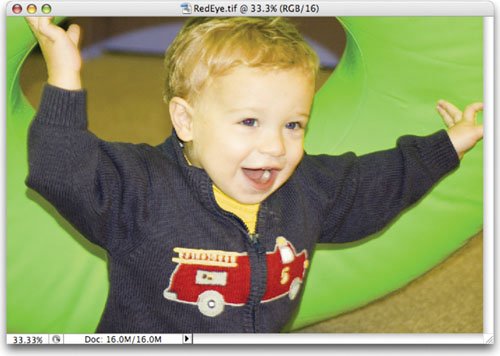 1. | Open the file Red Eye.tif from the Chapter 11 folder.
| 2. | Zoom into the red eye area. An easy way is to take the Zoom tool and drag around the problem area.
| 3. | Select the Red Eye tool from the Toolbox or press J repeatedly to cycle through the tools.
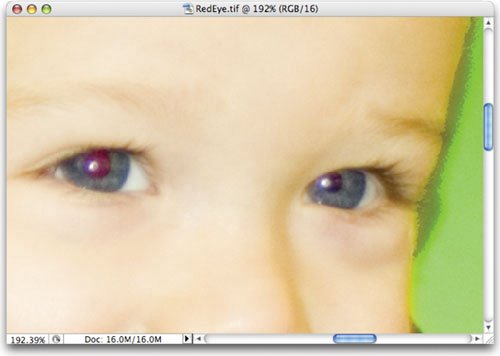 | 4. | Click in the red eye area to remove it. If you're unsatisfied with the results choose undo and modify the following two options.
 | 5. | Adjust the Pupil Size to a higher number if you need to convert a larger area. Adjust the Darken Pupil setting to adjust how dark the pupil will be after the conversion.
|
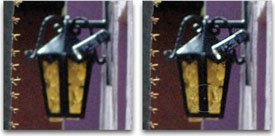
Blur and Sharpen Tools Oftentimes a photo will need a focus adjustment. While global changes are often implemented through blur or sharpen filters, it's frequently necessary to lightly touch up an area by hand. To do this, you can use the Blur tool (to defocus) or the Sharpen tool (to add focus or detail). Both tools are driven by brush-like settings, which allow you to change size, hardness, strength, and blending mode. Remember, if the Caps Lock key is down, brush previews are disabled. 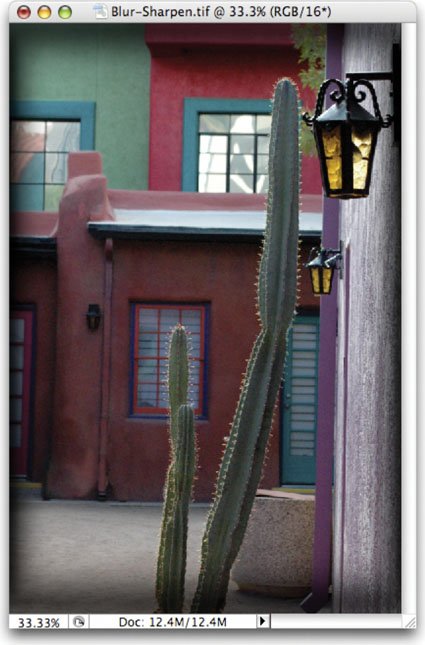 1. | Open the file Blur-Sharpen.tif from the Chapter 11 folder.
| 2. | Select the Blur tool (it looks like a water droplet) by pressing R.
| 3. | Specify a brush size of approximately 120 pixels and a strength of 50%. The strength settings modify how quickly the tool modifies the image. Sometimes several built-up strokes are better for a gentle look.
| 4. | Paint over an area of the photo to soften the image. The graininess in the wall is a good place for touchup.
The image on the right has had the grain softened using the Blur tool. 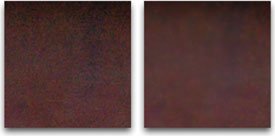 | 5. | Choose a blending mode of the tool. The Darken and Lighten modes are particularly useful for isolating the blurring effect to dark or light areas respectively. Try the Lighten mode and blur the cactuses.
Using the Lighten mode with the Blur tool softened the cactus and brought out the highlights. 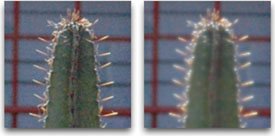 | | | 6. | Switch to the Sharpen tool and try enhancing parts of the image.
 | 7. | Be careful not to oversharpen, as it will quickly introduce visible noise and distortion.
|
Smudge Tool The Smudge tool simulates dragging a finger through wet paint. The pixels are liquid and can be pushed around the screen. With the default settings, the tool uses color from where you first click and pushes it in the direction you move the mouse. This tool is useful for cleaning up dust specks or flakes in a photo. Set the tool's blending mode to Lighten or Darken (depending on the area to be affected), and you have digital makeup to touch up the problem. 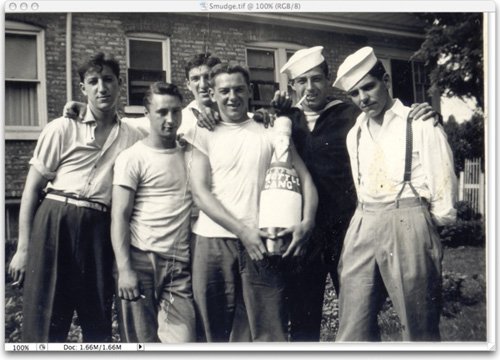 1. | Open the file Smudge.tif from the Chapter 11 folder.
| 2. | Select the Smudge tool (it looks like a finger painting icon) by pressing R to cycle tools.
| 3. | Zoom into the damaged area with the large tear.
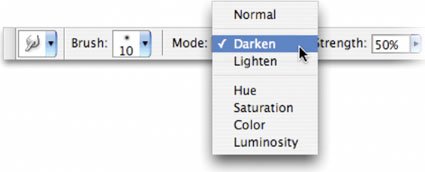 | 4. | Experiment with the Darken and Lighten modes. These are particularly useful for isolating the smudge by pushing only dark or light pixels.
Using the Lighten mode instead of the Smudge tool lets you push lighter pixels over darker ones. 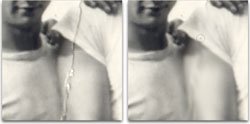 | 5. | Smudge the damaged pixels. Experiment by switching blending modes; you can always undo the smudge then change the tool's mode and resmudge.
|
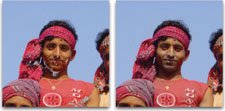
Dodge and Burn Tools The Dodge and Burn tools are known as toning tools. They allow you finer control over lightening or darkening your image. These tools simulate traditional techniques used by photographers. In a darkroom, the photographer would regulate the amount of light on a particular area of a print. These tools are particularly helpful when touching up faded photos, especially when repairing water damage. Let's try both tools out: 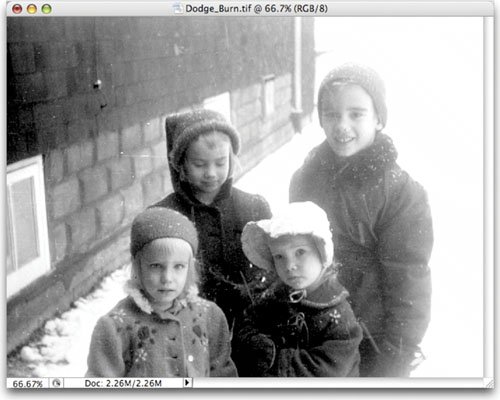 1. | Open the file Dodge_Burn.tif from the Chapter 11 folder.
| 2. | Closely examine the four faces. You should notice that the two on the right look washed out and the two on the left are a bit dark.
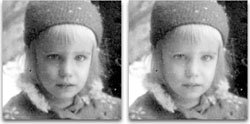
| 3. | Select the Dodge tool from the Toolbox. Adjust the brush to be soft and large (approximately 80 pixels). Set the tool to adjust the Midtones.
 | 4. | Paint over the shadowed faces on the left half of the picture to bring the darkest areas out a bit.
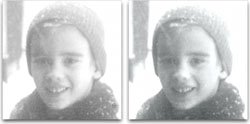
 | 5. | Select the Burn tool from the Toolbox. Adjust the brush to be soft and large (approximately 80 pixels). Set the tool to adjust the Highlights and an Exposure setting of 20%.
| 6. | Paint over the washed-out faces on the left half of the picture to restore the contrast a bit.
 | 7. | Continue to touch up areas in the photos as needed. Lower exposure settings are generally more desirable.
|
Sponge Tool The Sponge tool is very elegant and efficient. This toning tool can be used to make subtle adjustments in color saturation or grayscale contrast. This tool can be used during conversion processes to prepare images for commercial printing or television. The Sponge tool allows you to gently desaturate (or saturate) areas by brushing over them. 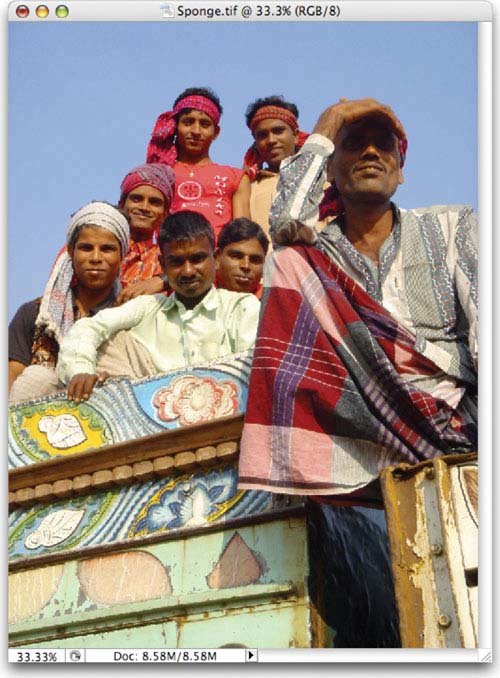 PHOTO BY JAMES BALL 1. | Open the file Sponge.tif from the Chapter 11 folder.
| 2. | When converting RGB images into CMYK, there is often a shift in colors. This is because RGB has a wider color gamut than CMYK, and it can display more colors. Photoshop allows you to highlight the areas that are "out of gamut" or will shift when you convert modes. Choose View > Gamut Warning. The gray areas represent out-of-gamut areas.
| 3. | Select the Sponge tool by pressing O to cycle tools or choose it from the Toolbox.
| 4. | Adjust the brush to a large size and set it to have soft edges.
| 5. | Set the tool to Desaturate and adjust the flow to a lower value. It is generally better to use a slower flow with several applications.
 | 6. | Paint over the gray gamut warning areas with the Sponge tool until they disappear.
| 7. | If needed, you can switch the Sponge tool to Saturate to boost areas. If you see a gray gamut warning, you've gone too far.
 | 8. | When you're done, you can convert the image to CMYK using Image > Mode > CMYK. We'll cover CMYK conversion again in Chapter 17, "Outputting Specialized File Types."
|
|