Using ImportXML
| < Day Day Up > |
Using ImportXMLData isn't always conveniently stored in the current database. Occasionally, you have to import foreign data. Fortunately, the Import Wizard does a good job of handling a number of formats. However, you won't use this wizard to import XML data. Use the ImportXML method to import XML data and schema information using the form Application.ImportXML datasource[, importoptions] where datasource is a required String value that identifies the complete path and filename to the XML file you're importing and importoptions is one of the optional intrinsic constants listed in Table 22.4.
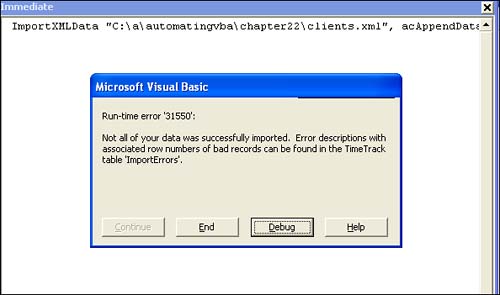
Importing XML data isn't quite as complicated as exporting. For the most part, you just identify the XML file that by default, Access imports into its own new Access table. Occasionally, you might need to import just the file's structure or append the data to an existing table, and then specify one of the constants listed in Table 22.4. An Import ExampleLet's review how the three constants change the result of importing the same file by importing the client data exported in the previous section. First, enter the following procedure in a standard module or use Chapter 22's sample module: Sub ImportXMLData(source As String, Optional impopt As Variant) 'import XML file 'include entire path if necessary If IsMissing(impopt) = True Then impopt = acStructureAndData End If Access.Application.ImportXML source, impopt End Sub This procedure enables you to pass the XML file's name and the constant. You can pass the actual text constant or the Integer value. The second argument is optional, but if you omit it, the procedure assumes you want to use the default, acStructureAndData. Before you import anything, be sure to close all your browser and Word windows that contain the .xml and .html files from previous examples. An open .xml file can return an error in some cases. In the Immediate window, run the following statement: ImportXMLData "path\clients.xml" (If you didn't save clients.xml to the current directory, you might need to include path.) After running the statement, check the Database window for the new table, Clients1. Figure 22.4 shows the new table in Datasheet view it is identical to Clients. The only difference is that the imported table doesn't contain a primary key or any indexes. During the import process, Access concatenates the 1 because the database already contains a table named Clients. Figure 22.4. The ImportXML method easily imports XML data into a new table.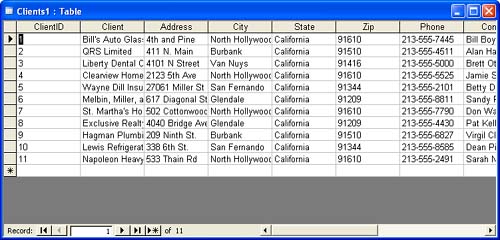 As is, you can't import clients.xml using the acAppendData option because doing so would create duplicate values and violate the existing constraints (indexes), as shown in Figure 22.5. Access imports records that don't trigger a key violation. If a record creates a problem and returns an error, Access logs error information in a table named ImportErrors. Figure 22.5. If importing the data violates key constraints, Access returns an error and doesn't import the offending records.
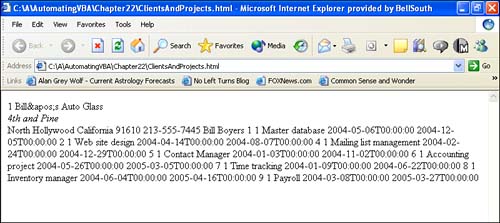
The problem in this case is the ClientID (primary key) values; there's already a ClientID 1 in the Clients table. If you open clients.xml (using Word or some other XML editor) and change the ClientID value of 1 to 100, Access imports the record for Bill's Auto Glass even though the record is actually a duplicate. To import just the table's structure, run the following statement: ImportXMLData pathtoclients.xml acStructureOnly Be sure to update pathtoclients.xml so that it includes the entire pathname and the .xml filename. Figure 22.6 shows the results a new table with no data. Notice that the new table's name is Clients2. As before, Access concatenates the next consecutive value to the table's name because Clients and Clients1 already exist. Figure 22.6. You can import just the table's structure.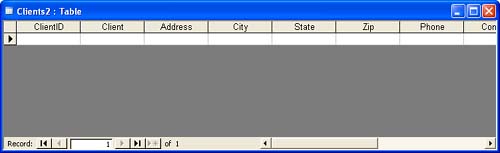 CAUTION Importing the XML file's structure creates a new table with the same fields and properties. However, the process does not copy the original file's primary key or indexes. In the previous section on exporting, you learned how to export related tables to an XML file using the AdditionalData object. Importing related tables is much easier because Access handles the entire process internally. The XML file knows the data is related and it is imported as such, without any additional information from you. To illustrate the ease with which Access handles related data, run the following statement in the Immediate window: ImportXMLData "path\clientsandprojects.html" (Include path if the file isn't in the current directory.) The results are shown in Figure 22.7 Clients3 and Projects1. Notice that the example imports the previously exported .html file and not an actual .xml file. The ImportXML method is flexible enough to handle .html data, although most likely you'll use the method to import .xml data. Figure 22.7. The ImportXML method easily handles related data.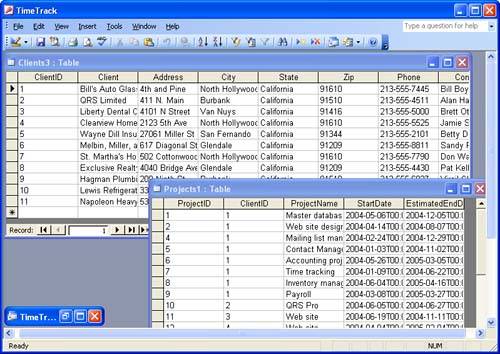 CAUTION Access can import related data from an XML file and can even separate the data into tables, accordingly. However, Access can't create a permanent relationship between the new tables. You must create the relationship yourself.
|

| < Day Day Up > |
EAN: 2147483647
Pages: 186
- Challenging the Unpredictable: Changeable Order Management Systems
- The Second Wave ERP Market: An Australian Viewpoint
- Enterprise Application Integration: New Solutions for a Solved Problem or a Challenging Research Field?
- Context Management of ERP Processes in Virtual Communities
- A Hybrid Clustering Technique to Improve Patient Data Quality