SQL Server 2005 Reporting Essentials
Authors: Hamilton B.
Published year: 2007
Pages: 13-15/31
Buy this book on amazon.com >>


5.3. Publish a Report

In this section, you will publish the report that you created to the report server. Follow these steps.

  1. In the Solution Explorer pane, right-click the report project ( SS2005RE Report Project ) and select Properties from the context menu to display the Property Pages dialog shown in the following figure.

    Figure 5-32. Report Project Property Pages

  2. Click the Configuration Manager... button to display the Configuration Manager dialog shown in the following figure.

    Figure 5-33. Configuration Manager

  3. Select Production from the Active solution configuration drop-down list.

  4. Select Production for the Configuration drop-down list for the SS2005RE Report Project.

  5. Click the Close button to return to the Property Pages dialog.

  6. Select Employee List 2 from the Start Item drop-down list.

  7. Enter the report server virtual directory (not the Report Manager virtual directory) for the TargetServerURL property (http://localhost/ reportserver by default).

  8. Click OK to close the Property Pages dialog.

  9. Save the project by selecting File 
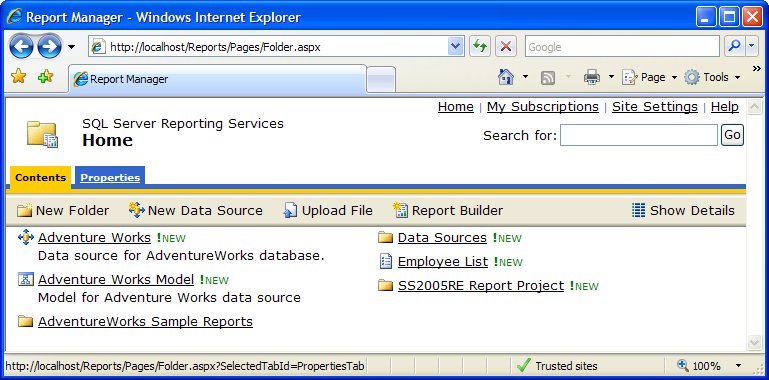
Save All from the main menu or by pressing the Save All toolbar button.

  10. Deploy the report to the report server by selecting Build Deploy SSRE Report Project from the main menu.

You can now access the new report project and the one report it contains through Report Manager as shown in the following figure.

Figure 5-34. Report Manager: New SS2005RE Report Project Folder


Chapter 6. Report Model Designer

You need to create a report model before you can use Report Builder to create reports . The report model lets users explore and select data from the underlying data source using a business-oriented view of the data and of the relationships between data items such as tables and fields. This section shows you how to create a report model. Follow these steps.

  1. Open SQL Server Business Intelligence Development Studio by selecting All Programs Microsoft SQL Server 2005 SQL Server Business Intelligence Development Studio from the Start menu.

  2. Select File New Project... from the main menu to display the New Project dialog.

  3. Specify Business Intelligence Projects as the project type, select the Report Model Project template, name the project SS2005RE Model and specify its location (or accept the default location). Click OK to create the report model project.


6.1. Create a Data Source

Create a data source for the report model. Follow these steps.

  1. Right-click the Data Sources node in the Solution Explorer pane. Select Add New Data Source from the context menu to start the Data Source Wizard.

  2. If the Welcome dialog for the Data Source Wizard appears, click the Next > button.

  3. Add a new Connection by clicking the New... button in the Select how to define the connection dialog shown in the following figure.

    Figure 6-1. Data Source Wizard: Select How to Define the Connection

    Clicking the New... button opens the Connection Manager dialog.

    NOTE

    The SQL Server name is commonly confused with the SQL Server service name MSSQLSERVERthey are not the same. The SQL server name appears in the Connect To Server dialog that appears when you start SQL Server Management Studio and as the value for the Name attribute in the property page for the server node in Object Explorer in SQL Server Management Studio.

  4. Specify the name of your SQL Server in place of <SQL Server Name> in the Server name drop-down list and select the AdventureWorks database as shown in the following figure.

    Figure 6-2. Data Source Wizard: Connection Manager

    Test the connection by clicking the Test button.

    Press the Close button to create the connection and return to the Data Source Wizard dialog, which now displays the new connection in the Data Connections list box.

  5. Click the Finish >> button on the Select how to define the connection dialog.

  6. Click Finish on the Completing the Wizard dialog to create the new data source and end the wizard.

The new data source Adventure Works.ds appears in the Solution Explorer pane under the Data Sources node.


SQL Server 2005 Reporting Essentials
Authors: Hamilton B.
Published year: 2007
Pages: 13-15/31
Buy this book on amazon.com >>