Writing For...Next Loops
A For...Next loop lets you execute a specific group of program statements a set number of times in a macro. This control structure can be useful if you are performing several related calculations, working with collections of Office objects, or processing several pieces of user input. A For...Next loop is really just a shorthand way of writing out a long list of program statements. Because each group of statements in the list would perform essentially the same work, Visual Basic lets you define one group of statements and request that it be executed as many times as you want. The syntax for a For...Next loop looks like this:
For variable = start To end statements to be repeated Next variable |
In this syntax statement, For, To, and Next are required keywords, and equal to (=) is a required operator. You replace the variable placeholder with the name of a numeric variable that keeps track of the current loop count, and you replace start and end with numeric values representing the starting and stopping points for the loop. The line or lines between the For and Next statements are the commands that are repeated each time the loop is executed.
For example, the following For...Next loop uses the TypeParagraph method to insert four carriage returns in a Word document:
For i = 1 To 4 Selection.TypeParagraph Next i |
This loop is the functional equivalent of writing the Selection.TypeParagraph statement four times in a procedure. It looks the same to the Visual Basic interpreter as
Selection.TypeParagraph Selection.TypeParagraph Selection.TypeParagraph Selection.TypeParagraph |
The variable used in the loop is i, a single letter that, by convention, stands for the first integer counter in a For...Next loop. Each time the loop is executed, the counter variable is incremented by one. (The first time through the loop, the variable contains a value of 1, the value of start; the last time through, it contains a value of 4, the value of end.) As you'll see in the following sections, you can use this counter variable to great advantage in your loops.
Using a Loop to Manage Tables
For...Next loops work best when you're processing information that conforms to a particular pattern. For example, For...Next loops are handy when you want to add, remove, or modify information in tables. Each Word document and Microsoft PowerPoint presentation contains a Tables collection that holds each of the tables in a particular document. By using a combination of Table methods and properties, you can create tables, insert information, remove information, format the entries, and so forth.
Creating a Macro that Automatically Builds Tables
The following macro inserts a new table in the active Word document at the insertion point. The macro first prompts you for the number of rows and columns in the table and then creates the table if it's at least 2 X 2 in size. The macro uses a For...Next loop to add entries to each of the cells in the first column and then uses the AutoFormat command to format the entire table.
ON THE WEB
The AutoTable macro is located in the Chap60 document on the Running Office 2000 Reader's Corner page.
- Choose Macros from the Macro submenu of the Tools menu.
- Select the document in which you want to store the macro using the Macros In drop-down list box.
- Type AutoTable in the Name text box, and then click Create.
Word starts the Visual Basic Editor and opens a new macro procedure named AutoTable in the Code window.
- Type the following program statements:
Dim iRows As Integer, iColumns As Integer Dim myTable iRows = InputBox("Number of Rows?") iColumns = InputBox("Number of Columns?") If iRows > 1 And iColumns > 1 Then '2x2 table required Set myTable = ActiveDocument.Tables.Add(Selection.Range, _ iRows, iColumns) For i = 2 To iRows myTable.Cell(i, 1).Range.InsertAfter "Item "& i-1 Next i myTable.AutoFormat Format:=wdTableFormatColorful2 Else MsgBox "Sorry, minimum table size 2 rows and 2 columns." End If - Click the Save button to save the macro to disk.
This macro declares three important variables: iRows, an integer that contains the number of rows in the table; iColumns, an integer that contains the number of columns; and myTable, an object variable that represents the new table in the document. The main part of the macro is contained in an If...Then decision structure that uses the And logical operator to verify that the user has specified a large enough table. (This bounds checking prevents the macro from crashing if the user enters a number that's too small to define a usable table.)
Inside the If...Then decision structure, the For...Next loop uses a starting value of 2 so that text entry begins in the second row. (The first row is reserved for table headings.) The loop then uses the InsertAfter method to add text following the pattern Item 1, Item 2, Item 3, and so forth until no more rows exist in the table.
Running the AutoTable Macro
Follow these steps to run the AutoTable macro you just created:
- Click the View Microsoft Word button on the Visual Basic Editor toolbar.
- Move the insertion point to a place where you'd like to create a table, and then run the AutoTable macro.
Word displays an input box prompting you for the number of rows in your table.
- Type 9 and click OK. Word displays a second input box prompting you for the number of columns.
- Type 4, and click OK.
Word creates a 9-row by 4-column table in the current document, fills the first column with text entries, and applies automatic formatting. (See Figure 39-3.)
- If you plan to use this macro often, return to the Visual Basic Editor and customize the macro code to insert appropriate table headings and column text using the InsertAfter method, and specify your own preferences for table formatting using the AutoFormat method.
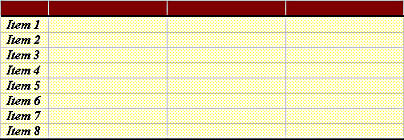
Figure 39-3. The AutoTable macro instantly creates a preformatted table in your document.
Using For...Each Loops
For...Next loops are useful if you know exactly how many times a particular group of statements should run. But what if you simply want to process each object in a collection? Fortunately, the designers of Visual Basic included a special loop called For...Each that is specifically designed to march through each item in a collection. You'll find this especially useful when you're working with the Documents, Tables, Fields, Footnotes, Paragraphs, and Words collections.
The For...Each loop has the following syntax:
For Each element In collection statements to be repeated Next element |
The following items are important:
- The element placeholder represents a variable name that you enter of type Variant. When the loop runs, element stands for each item in the collection one by one.
- The collection placeholder represents the name of a valid collection in Office, such as Documents or Paragraphs.
Processing a Collection Using For...Each
The following macro uses a For...Each loop to check each open Word document in the Documents collection for a file named MyLetter.doc. If the file is found in the collection, the macro makes it the active document in Word. If the file is not found, the macro loads the file from the root folder (C:\) on your hard disk.
WARNING
This macro will only run correctly if you put a file named MyLetter.doc in the root folder on drive C. Because such a file doesn't exist in that location by default, you'll need to create a simple one there to get this example to work, or you'll need to specify a new path location in the macro.
Follow these steps to create the ShowLetter macro:
ON THE WEB
The ShowLetter macro is located in the Chap60 document on the Running Office 2000 Reader's Corner page. A sample MyLetter.doc file is also on the Web site.
- Choose Macros from the Macro submenu of the Tools menu.
- Select the document in which you want to store the macro using the Macros In drop-down list box.
- Type ShowLetter in the Name text box, and then click Create.
Word starts the Visual Basic Editor and opens a new macro procedure named ShowLetter in the Code window.
- Type the following program statements:
Dim aDoc, docFound, docLocation docLocation = ""c:\MyLetter.doc" For Each aDoc In Documents If InStr(1, aDoc.Name, "myletter.doc", 1) Then aDoc.Activate Exit For Else docFound = False End If Next aDoc If docFound = False Then Documents.Open FileName:=docLocation
- Click Save to save the macro to disk.
The macro begins by declaring three variables, all of type Variant. The aDoc variable will represent the current collection element in the For...Each loop, docFound will be assigned a Boolean value of False if the document is not found in the Documents collection, and docLocation will contain the pathname of the MyLetter.doc file on disk.
The For...Each loop cycles through each document in the Documents collection, searching for the MyLetter file. If the file is detected by the InStr function (which detects one text string within another), the file is made the active document. If the file isn't found, the macro opens it by using the Documents object's Open method.
The InStr function's first argument (1) is an optional numeric start argument that sets the starting position for a search. The next two arguments, which are required, respectively specify the text string being searched and the text string that you are looking for within the first string. The last argument, which is also optional, establishes the type of comparison. In this case, 1 represents a text comparison, which is the type of string you are looking for. If you want to see more information about the InStr function's arguments, search for InStr in Visual Basic Help.
Also note the Exit For statement, which we use to exit the For...Next loop when the MyLetter file has been found and activated. Introduced here for the first time, Exit For is a special program statement that you can use to exit a For...Next loop when continuing will cause unwanted results. Periodically, you'll want to use Exit For in your own macros.
Running the ShowLetter Macro
Follow these steps to run the ShowLetter macro:
- Click the View Microsoft Word button on the Visual Basic Editor toolbar.
- Click the New button twice to open two more Word documents.
You should add a few documents to the Documents collection to test the macro properly.

- Click the Word Window menu, and then click the document in which you saved the ShowLetter macro.
- Run the ShowLetter macro to load the MyLetter.doc file.
Word opens MyLetter from the root folder when the macro doesn't locate the file in the Documents collection. Figure 39-4 shows our MyLetter.doc file, a short essay Michael Halvorson wrote about the Italian Renaissance.
- Click the Window menu and display the document containing your macros again, and then run the ShowLetter macro.
This time Word finds the MyLetter document in the Documents collection and displays it using the Activate method.
- Close the MyLetter document and the two empty Word documents, and then click the Save button to save any changes you've made to disk.
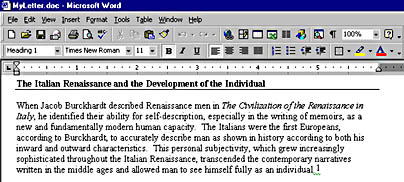
Figure 39-4. The ShowLetter macro opens the MyLetter.doc file if it's not in the current Documents collection.