Using Visual Basic Functions
An excellent use for a variable is to hold information in your macro that has been entered by the user. One way to manage this input is to use special Visual Basic keywords called functions that perform useful work and then return important values to the macro. In this section, you'll learn how to use the InputBox and MsgBox functions to manage input and output in an Office document, and how to use arguments to pass information to a function.
Using a Variable to Store Input
The InputBox function is designed as a simple way to receive input from the user and store it temporarily in a variable. In the following example, you'll enhance the CenterHeading macro by adding a dialog box that prompts the user for the name of a new heading. You'll also learn how to make a procedure call in a macro.
ON THE WEB
The InsertHead macro is located in the Chap59 document on the Running Office 2000 Reader's Corner page.
Follow these steps:
- In Word, choose Macros from the Macro submenu of the Tools menu.
Word opens the Macros dialog box. Because this macro uses the CenterHeading macro that you created earlier in the chapter, you should save the macro in the same document that CenterHeading is stored in.
- Type InsertHead in the Name text box, and then click the Create button.
Word starts the Visual Basic Editor and opens a new macro procedure named InsertHead in the Code window.
- Type the following program statements to declare two variables and use the InputBox function:
- Below the Selection statement, type CenterHeading, and press Enter.
Adding the name of another procedure to your macro is known as calling a procedure. When the Visual Basic interpreter encounters this particular statement, it will run the CenterHeading macro in the InsertHead macro. Figure 38-4 shows the completed macro.
Dim Prompt, Heading Prompt = "Please enter your heading text." Heading = InputBox$(Prompt) Selection.Font.Size = 16 Selection.TypeText Text:=Heading |
This time you're declaring two variables by using the Dim statement: Prompt and Heading. The second line in the event procedure assigns a group of characters, or a text string, to the Prompt variable. The macro then uses this message as a text argument for the InputBox function. (An argument is a value or expression passed to a sub procedure or a function.)
The next line calls (runs) the InputBox function and assigns the result of the execution— the text string the user enters— to the Heading variable. InputBox is a special Visual Basic function that displays a dialog box on the screen and prompts the user for input. In addition to supporting a prompt string, the InputBox function supports other arguments that you might want to use occasionally. Consult the Visual Basic online Help for details.
After InputBox has returned a text string to the macro, the fourth statement in the procedure changes the font size to 16 points (suitable for a heading), and the fifth statement inserts the text into your document using the TypeText method.
Now you'll use the commands in the CenterHeading macro to add some formatting interest to your new head. But rather than type the CenterHeading statements again in your macro, you can accomplish the same effect by simply adding the name of the CenterHeading procedure to the bottom of your routine.
NOTE
If you want to call one procedure from another procedure, you must place the procedures in the same module or declare the called procedure in a module that is in the current project or in the Normal.dot template. Otherwise, Visual Basic won't be able to find the procedure name you specify.

Figure 38-4. The InsertHead macro calls the CenterHeading macro.
Now run the InsertHead macro in your Word document to try out the InputBox function and your two variables. Follow these steps:
- Click the View Microsoft Word button on the Visual Basic Editor toolbar.
Word displays the document you created earlier in the chapter.
- Move the insertion point to a blank line.
- On the Tools menu, click Macro, and then choose the Macros command.
- Click the InsertHead macro if it's not already selected, and then click Run.
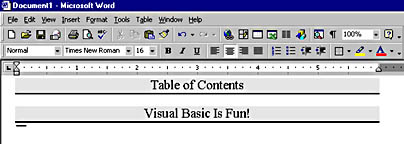
Word runs your macro and displays an InputBox using the prompt string you specified.
- Type Visual Basic Is Fun! and press Enter.
The InputBox function returns your heading to the macro and places it in the Heading variable. The program then uses the variable and the CenterHeading procedure to apply some custom formatting.
Any time you want to prompt the user for information in your programs, you can use the InputBox function. It provides a nice complement to the more sophisticated dialog boxes called UserForms. You'll learn about UserForms in Chapter 40. In the next example, you'll see how to use a similar function to display text in a dialog box.
- Click the Save button on Word's Standard toolbar to save the InsertHead macro to disk.
What Are Arguments?
As you learned using InputBox, Visual Basic functions often use one or more arguments to define their activities. For example, the InputBox function used the Prompt variable as an argument to display dialog box instructions for the user. When a function uses one or more arguments, the arguments are separated by commas, and the whole group of arguments is enclosed in parentheses. The following statement shows a function call that has two arguments:
Using a Variable for Output
You can display the contents of a variable by assigning the variable to a method (such as the TypeText method of the Selection object) or by passing the variable as an argument to a dialog box function. One useful dialog box function for displaying output is the MsgBox function. Like InputBox, MsgBox takes one or more arguments as input, and you can assign the results of the function call to a variable.
The syntax for the MsgBox function is:
ButtonClicked = MsgBox(Message, ButtonStyle, Title) |
The following items are important:
- ButtonClicked represents a variable that receives the result of the function. It indicates which button was clicked in the dialog box.
- Message is the text to be displayed on the screen.
- ButtonStyle is a constant that determines the number and style of the buttons in the dialog box. Options include vbOKOnly, VbOKCancel, VbAbortRetryIgnore, VbYesNoCancel, VbYesNo, and VbRetryCancel.
- Title is the text displayed in the message box title bar.
TIP
In Visual Basic syntax listings, items in italic type are placeholders for variables or other values in your program code. By convention, programmers use italic to highlight the parts of program syntax that you need to customize with your own instructions. (You'll also see the convention in the Visual Basic online Help.)
If you're just displaying a message in MsgBox, the assignment operator (=), the ButtonClicked variable, and the ButtonStyle argument are optional. You won't be using these in the following exercise; for more information about them, search for "MsgBox" in the Visual Basic online Help.
In the following exercise, you'll use a MsgBox function to display the user name associated with your copy of Word. This name is stored on the User Information tab in the Options dialog box, and you can modify it by using the Options command on the Word Tools menu. Word places the registered user name in comments and revision annotations, so it's a good idea to check this setting periodically using a macro.
ON THE WEB
The DisplayUser macro is located in the Chap59 document on the Running Office 2000 Reader's Corner page.
Using MsgBox to Display the Registered User
Often you'll find it handy to display a status message about a document by using a macro. Follow these steps to create a macro that displays information about the registered user:
- In Word, choose Macros from the Macro submenu of the Tools menu.
- Specify the document in which you want to store the macro using the Macros In list box.
- Type DisplayUser in the Name text box, and then click the Create button.
Word starts the Visual Basic Editor and opens a new macro procedure named DisplayUser in the Code window.
- Type the following program statements to declare one variable and use the MsgBox function:
Dim DialogTitle DialogTitle = "The current user name is" MsgBox (Application.UserName), , DialogTitle |
The first statement declares a variable to hold some descriptive text for the MsgBox function. The second statement assigns a text value to the variable. The third statement displays a message box on the screen and places the contents of the DialogTitle variable in the title bar. The UserName property of the Application object is then placed inside the message box. (When you don't use the ButtonClicked variable with MsgBox, the parentheses go around only the first argument.)
TIP
You can also use the UserName property to set the user name in Word. For example, to change the user name to Michael Young, type Application.UserName = "Michael Young".