Using Microsoft Direct Mail Manager
Microsoft Direct Mail Manager is an Office 2000 application that has a special mission in life: it wants to help you plan and execute great direct mail campaigns for your valued customers and contacts. In business parlance, a direct mail campaign is a carefully organized mailing to a target audience of potential customers, supporters, donors, or clients. A typical direct mail campaign consists of a standard form letter and supporting materials, enclosed in a preprinted envelope that satisfies the post office's stringent requirements for bulk mailings.
The actual size of a direct mail campaign can be large or small, but in most cases the source of direct mail names and addresses is a third-party mailing list (provided by a special service bureau) or a customer database on your computer, such as the Microsoft Outlook Contacts folder. Using Direct Mail Manager, you can create well-organized direct mail campaigns in a fraction of the time it would normally take you to assemble the pieces using traditional methods.
NOTE
Direct Mail Manager is one of the four small business tools in Office 2000. If you haven't installed this program yet, do so now by inserting the Small Business Tools CD into your computer (or locating the proper folder on the network) and running the Office 2000 Setup program.
Planning Your Mailing
Before you create your mailing, it makes sense to do a little upfront planning to assess what your exact mailing goals are. Direct Mail Manager requires a standard list of preformatted names and addresses to do its work, so you should check your system for the proper files now, before you get started. Table 34-1 lists the formats supported by Direct Mail Manager, and you can also use Direct Mail Manager to connect to the Web to locate additional third-party mailing lists online. (The third-party mailing list option is offered to you automatically in Direct Mail Manager's Import phase, although these vendors might charge transaction fees to borrow their lists.)
Table 34-1. List Formats Supported by Direct Mail Manager
| Application | File Type (Extension) |
|---|---|
| Microsoft Access database | .mdb, mdw, .mda |
| dBASE III or dBASE IV file | .dbf |
| Microsoft Excel worksheet | .xls |
| Microsoft Word document | .doc |
| Paradox 5.x database | .db, .dbf |
| Text file (delimited) | .txt, csv, tab, asc |
| Microsoft Outlook Contacts file | N/A |
| ODBC data source | SQL Server, and so forth |
Consider the following questions as you plan your mailing. Direct Mail Manager will ask you about the individual components in your mailing when you run the program.
- What are you mailing? Are they standard envelopes, envelopes with windows, postcards, self-mailing flyers, or packages?
- What is in the mailing? Is it a standard form letter? Do you have response cards or other standard items?
- How many pieces are in your mailing? Depending on the number of addresses you include in your direct mail campaign, you might be eligible for postal discounts and additional services.
- How are you printing the mailing? Are you using an attached printer? Do you want to use a third-party mailing service located on the Web?
- How are you sending the mailing? Will you use First-Class mail, Standard mail, or a mailing service?
- How would you like to pay for the mailing? Will you use regular stamps, a permit, precancelled stamps, or a postage meter?
NOTE
By the way, Direct Mail Manager can only support up to 3500 pieces in a single mailing— for larger mailings you'll need to upgrade to the enhanced version of Direct Mail Manager, sold by Envelope Manager Software (http://www.EnvelopeManager.com/).
Creating Direct Mail Pieces
With your mailing list in hand and some basic planning out of the way, you're ready to create direct mail pieces. Direct Mail Manager handles this process quite seamlessly in four simple compilation steps, or phases:
- First, Direct Mail Manager imports the necessary mailing lists and creates a database table for the mailing.
- Second, the program verifies the mailing list by finding postal codes, removing duplicates, checking spelling, and checking other formatting details.
- Next, Direct Mail Manager prints the components that you have requested, including envelopes, labels, form letters, and so on.
- Finally, Direct Mail Manager lets you save any changes that you've made back to the original address list— a handy feature if you've corrected spelling or removed duplicate entries.
Follow these steps to use Direct Mail Manager to create your own mailing:
- Click the Windows Start menu, point to Programs, and click Microsoft Direct Mail Manager.
Office starts the Direct Mail Manager application, as shown in the following dialog box:
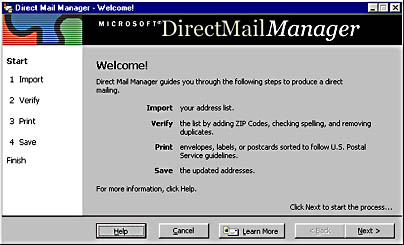
Direct Mail Manager operates like a wizard; it constructs your mailing list by asking a series of questions, and you can move back and forth between the query screens by clicking the Back and Next buttons. At any time, you can also learn more about Direct Mail Manager features by clicking the Help button.
- Click Next to import your direct mail list.
Direct Mail Manager prompts you for the location of your address database. Your options are File (one of the standard database or application file formats listed in Table 34-1), Outlook Folder (the address list in your Contacts folder), and Database Via ODBC (a more sophisticated database format such as SQL Server).
TIP
If you want to explore third-party mailing list options on the Internet now, click the Mailing List Providers button near the bottom of the dialog box.
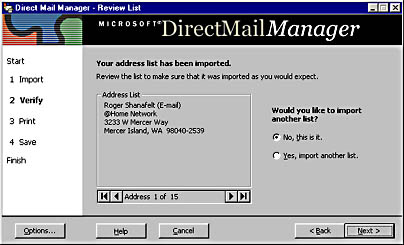
Direct Mail Manager opens the file you requested and examines the address fields in your database.
Because different database programs use different internal names for their address fields, Direct Mail Manager is often cautious about assigning fields to mail pieces without asking for additional guidance. If any questions arise about how your address fields compare to direct mail fields, you'll see a dialog box that looks like the one shown on the next page.

In this particular example, we've asked Direct Mail Manager to import an Outlook Contact list containing 16 addresses for a small, focused mailing. In this dialog box, Direct Mail Manager is asking us to verify that the Company field in the Contacts folder is equivalent to the Company Name field in Direct Mail Manager. In this case, Direct Mail Manager has guessed correctly by visually connecting the fields with solid lines. If a field was not correctly assigned, however, we could select the incorrect field in the left list box and then click the correct field in the right list box, using the scroll bars to display fields that weren't visible.
Direct Mail Manager asks if you want to import the entire list or only part of it.
You now enter the verification phase— the opportunity to see what your addresses will look like when mailed. Your dialog box should look similar to the following:
To facilitate the verification process, Direct Mail Manager will automatically connect to the Internet and use a Microsoft Corporation datasheet to verify that each address and postal code conforms to the local and national standards imposed by the post office for direct mail. If an address isn't correct, Direct Mail Manager will use the official list to suggest a correction. (The most common modification is to convert a five-digit postal code to a nine-digit postal code.) When the analysis is finished, you'll see a dialog box that looks similar to the one shown on the next page.
Direct Mail Manager displays your entire mailing list in a table that has rows corresponding to each customer name and fields corresponding to the different components of the address.
Direct Mail Manager now locates duplicate names and street addresses in your list (if any) and gives you the chance to remove them if you want. (This useful feature will help you reduce your postage costs and minimize customer irritation.)
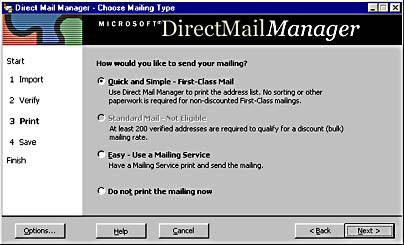
Direct Mail Manager presents your distribution options in a concise list, as shown in the following dialog box. Note that your options might be different, because mailing list size, sorting requirements, regional factors, and other issues limit your options. (For example, our dialog box doesn't include the Standard Mail option, because our list contains less than 200 names.)
TIP
Choosing Not to PrintIf you'd rather not print now, click the Do Not Print the Mailing Now option. Although this won't finalize your list, it gives you the option of moving on (and saving your changes) if you suddenly realize that you don't have the proper envelopes or paper handy.
If you're using an attached printer to create the envelopes or other media, Direct Mail Manager starts Microsoft Word and begins the printing process. Naturally, this will take some time for long lists— be sure you have enough envelopes!
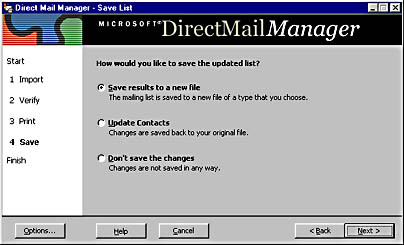
Saving changes to a new file is the best choice if the mailing list you created was for a special purpose and featured multiple lists or special formatting or address changes. You definitely want to save your changes in a new file if you want to use it in the future. (Note that Direct Mail Manager uses Access format for the new file, which means that you can view and manipulate it with Access and other Access-compatible programs.)
Updating your contacts is a good idea if you realized that your contact list was out-of-date and in need of revisions and changes. Select the second option if you want to save those changes to their original file (such as the Outlook Contacts folder). Finally, you can ask Direct Mail Manager to discard all changes— a prudent choice if you're sure you don't want the list again (or you don't want to leave a trace of your mailing activities!).
If you do select Word or Publisher, you'll be prompted for a file location and given the opportunity to read more about using mail merge in those products. Direct Mail will integrate your form letter and even print it if you like!
Congratulations! Direct Mail Manager is a highly capable program for handling mailing tasks, especially if you reused existing mailing lists and customer databases. When you use it in concert with other Office applications, Direct Mail Manager can save you considerable time and effort.