Creating a Web Site
After you have explored some of the differences between print and Web publishing and thought about how you'll edit information that's headed for the Web, you're ready to try your hand at electronic publishing. Publisher 2000 offers a variety of ways to lead you into a Web project.
- The Publisher Web Site Wizard, by far the easiest approach to creating a Web publication, asks for information and then builds a Web site around the answers you supply.
- Create Web Site From Current Publication (a command found on the File menu) begins the process of turning any publication into a Web site, whether you created it using a Publisher wizard or built it from scratch.
- Convert To Web Site (an option available in the Newsletter and Brochure Wizards) allows you to reuse the information in a Publisher-designed publication in a Web site, using a wizard to create the site or asking you to provide your own hyperlinks and layout.
- Creating a Web page using a blank publication provides an opportunity to really try your wings as a Web designer, although this approach assumes that you can handle the design, layout, hyperlinks, and site navigation on your own.
Using a Publisher Web Page Wizard
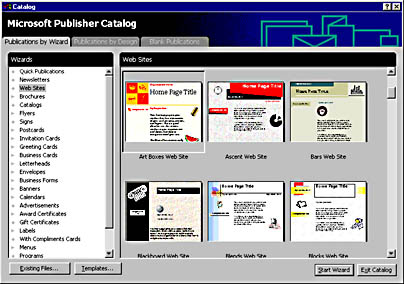
Microsoft wizards provide the friendliest and simplest way to get work done. If this is the first time you've created a Web site, you might want to use the Web Site Wizard to carry out the task. In Publisher 2000, this wizard gives you access to even more design sets than before to help you apply a consistent design scheme to your Web publication. To start the Web Site Wizard when you're already working in Publisher, choose New from the File menu, or, if the Microsoft Publisher Catalog window is displayed, choose Web Sites from the Publications By Wizard list. (Figure 32-1 shows a customized Art Boxes Web site.)
As you work with the sample home page, you'll notice that three tools relating specifically to the Web are now available on the Objects toolbar. (You'll learn more about using them later in the chapter.)
Just like the Publisher wizards you have used to create other types of publications, the Web Site Wizard gives you an opportunity to change the design and color scheme of your Web site. As you use this wizard-supported layout, you'll find placeholder text and graphics in frames where you can insert your own words and illustrations.
Using Form Controls
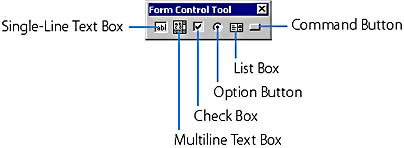
If you want to create an interactive form for your Web site, you can select the type of response form you want to include on your Web page. The wizard supplies a form template, which you can customize by experimenting with the Form Control tool on the Objects toolbar. This tool provides a toolbar that supports six different form properties, which you can add to a response form:
To adjust the form supplied by the wizard, double-click the control you want to change and make your changes in the appropriate dialog box.
Customizing the Navigation Bar
Visitors move through your site by clicking navigation controls, which form a system of built-in hyperlinks holding the pages of your site together. In addition to answering the Web Site Wizard's questions about this option, you can also select and customize a navigation bar by using the Design Gallery. Figure 32-4 shows a vertical navigation bar in the Capsules Design Set after we added a Design Gallery Web Navigation Bar element.
Inserting Sounds
You'll also find an opportunity to add background sound to a page when you use the Web Site Wizard. When you select Background Sound and click the Select Sound button, the Web Properties dialog box appears. With the Page tab selected, click the Browse button and the following dialog box appears, filled with sound files:
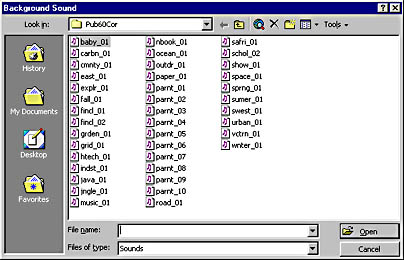
Double-click a sound file to insert it onto your page, and then click OK in the Web Properties dialog box. You won't be able to hear the sound until you preview it in your browser, which you can do by using the Web Page Preview command on the File menu. Test several sounds until you find one that complements your site.
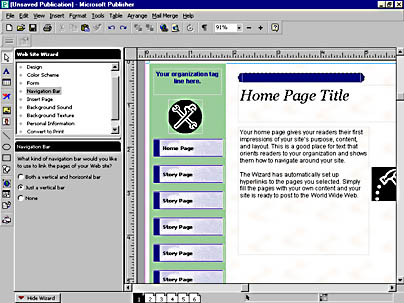
Figure 32-4. You can use a vertical navigation bar to link to other pages on your Web site.
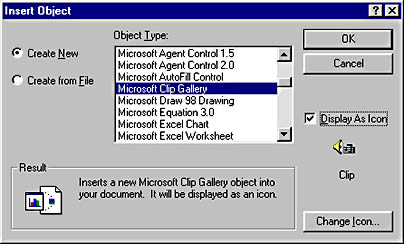
When you want to add a sound file that plays when a visitor selects it (rather than automatically when a page is loaded), visit the Microsoft Clip Gallery. First create a frame for the sound in your publication, using the Clip Gallery Tool button on the Objects toolbar.
When the Microsoft Clip Gallery dialog box appears, select a sound file from those listed in the categories on the Sounds tab. Click the file to display a pop-up menu, and click the Insert Clip button. This pop-up menu is discussed in the section "Inserting Clip Art" Visitors to your site control this type of sound by clicking the icon if they want to hear a sound and bypassing it if they find the sound annoying. You can preview the sound by double-clicking the frame.
Changing the Background of a Web Page
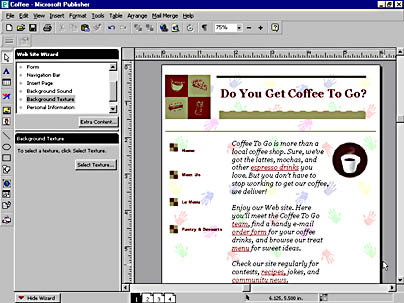
The Web Site Wizard's Background Texture option allows you to change the background texture of your electronic page. When you click the Select Texture button, the Color And Background Scheme dialog box appears. You can create your own background here or click the Browse button (under Background on the Standard tab) to see Publisher's preformatted backgrounds. When the Web Backgrounds dialog box appears, click a background texture file, and then click the Views button and choose Preview to see what the background looks like. It's possible to pack too much of a punch in your Web page with a busy background, as shown in the illustration that follows. Make sure that you can read your text and hyperlinks against the new background before you choose one. Then click OK to apply it. Used with restraint, a background will harmonize with your content.
Creating a Web Site from an Exisiting Publication
When you want to turn any publication into a Web site, whether a Publisher wizard created it or you built it from scratch, open the publication in Publisher, and choose Create Web Site From Current Publication from the File menu. If you are converting a newsletter or brochure, the following dialog box appears and gives you an opportunity to choose how independently you want to work:

If you select the Web Site Wizard option, you'll be in familiar territory. If you're ready to branch out and add your own hyperlinks, electronic layout, and navigation elements, Publisher provides an opportunity to run the Design Checker, which ensures that your publication will perform correctly on the Web. If you want to convert any other type of publication besides a newsletter or brochure, Publisher provides the opportunity to run the Design Checker directly. You won't have access to the Web Site Wizard.
Noticing Graphic Regions
When you ask Publisher to run the Design Checker, you'll often be warned that your publication contains text or objects that lie within the graphic region of other objects. What does this mean? When you've inserted a graphic or pattern into a text frame, created some WordArt, or simply placed different frames close together, you'll find that Publisher interprets those frames as one graphic element when it translates them into HTML. Recall that graphics can take a long time to download. Publisher uses the Design Checker to point this out to you and gives you an opportunity to correct your layout if you want to speed up download times. You can move the frames apart, separate graphics from text, or leave them as is if you want to preserve the formatting.
Converting a Publication into a Web Site
You can effectively reuse information you've compiled for a print publication by posting it to your Web site. If you have created a newsletter or brochure using a Publisher wizard, you'll find the Convert To Web Site option listed among the wizard's layout questions for that publication. When the publication you want to convert is open, click Convert To Web Site, and then click the Create button. Publisher leads you through the conversion process.
Starting a Web Site from Scratch
When you want to apply your design skills to the Web instead of relying on a Web Site Wizard or converting a print publication, follow these steps:
- If the Microsoft Publisher Catalog window is open, select the Blank Publications tab. (If you've been working in Publisher, choose New from the File menu.)
- Select Web Page, and click the Create button.
Publisher provides a blank electronic page for you. The tools for Web page construction are available on the Objects toolbar. If you know HTML, you can use the HTML Code Fragment tool to create a frame in which to add the code. When the HTML Code Fragment Properties dialog box appears, you can paste your HTML code over the placeholder text.
When you want to include dynamic graphics on your Web pages, visit the Microsoft Clip Gallery. It contains hundreds of animated GIF files. These compressed image files download quickly and provide movement and variety on your Web pages. You can find the GIF files displayed here in the Clip Gallery's Food& Dining category on the Motion Clips tab:
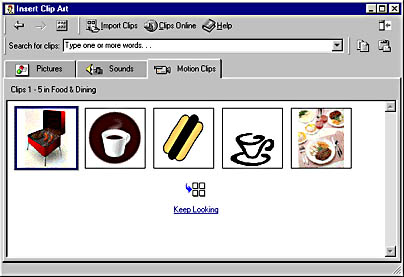
You can import JPEG (Joint Photographic Experts Group) files into the Clip Gallery from your own files or from the Web. JPEGs are most often used for photographs. You can also import video clips to add an interesting dimension to your site, but use them judiciously. Because they take a long time to download and can require users to install special software to play them, video clips are best used when you're sure your audience needs to see them.
EAN: 2147483647
Pages: 228