Writing Sub Procedures
Writing Sub Procedures
A Sub procedure is similar to a Function procedure, except that a Sub procedure doesn't return a value associated with its name. Sub procedures are typically used to get input from the user, display or print information, or manipulate several properties associated with a condition. Sub procedures can also be used to process and update variables received in an argument list during a procedure call, and pass back one or more of these values to the calling program.
Sub Procedure Syntax
The basic syntax for a Sub procedure is
Sub ProcedureName([arguments]) procedure statements End Sub
The following syntax items are important:
ProcedureName is the name of the Sub procedure you're creating.
arguments is a list of optional arguments (separated by commas if there's more than one) to be used in the Sub procedure. Each argument should also be declared as a specific type. (Visual Studio adds the ByVal keyword by default to each argument, indicating that a copy of the data is passed to the function through this argument but that any changes to the arguments won't be returned to the calling routine.)
procedure statements is a block of statements that accomplishes the work of the procedure.
In the Sub procedure call, the number and type of arguments sent to the procedure must match the number and type of arguments in the Sub procedure declaration, and the entire group must be enclosed in parentheses. If variables passed to a Sub procedure are modified during the procedure, the updated variables aren't passed back to the program unless the procedure defined the arguments by using the ByRef keyword. Sub procedures declared in a module are public by default, so they can be called by any event procedure in a project.
IMPORTANT
In Visual Basic 2005, all calls to a Sub procedure must include parentheses after the procedure name. A set of empty parentheses is required if there are no arguments being passed to the procedure. This is a change from Visual Basic 6, where parentheses are required only when an argument is being passed by value to a Sub procedure. You'll learn more about passing variables by reference and by value later in this chapter.
For example, the following Sub procedure receives a string argument representing a person's name and uses a text box to wish that person happy birthday. If this Sub procedure is declared in a module, it can be called from any event procedure in the program.
Sub BirthdayGreeting (ByVal Person As String) Dim Msg As String If Person <> "" Then Msg = "Happy birthday " & Person & "!" Else Msg = "Name not specified." End If MsgBox(Msg, , "Best Wishes") End Sub
The BirthdayGreeting procedure receives the name to be greeted by using the Person argument, a string variable received by value during the procedure call. If the value of Person isn't empty, or null, the specified name is used to build a message string that will be displayed with a MsgBox function. If the argument is null, the procedure displays the message “Name not specified.”
Calling a Sub Procedure
To call a Sub procedure in a program, you specify the name of the procedure, and then list the arguments required by the Sub procedure. For example, to call the BirthdayGreeting procedure, you could type the following statement:
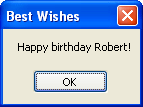
BirthdayGreeting("Robert") In this example, the BirthdayGreeting procedure would insert the name “Robert” into a message string, and the routine would display the following message box:
The space-saving advantages of a procedure become clear when you call the procedure many times using a variable, as shown in the example below:
Dim NewName As String Do NewName = InputBox("Enter a name for greeting.", "Birthday List") BirthdayGreeting(NewName) Loop Until NewName = "" Here the user can enter as many names for birthday greetings as he or she likes. The next exercise gives you a chance to practice using a Sub procedure to handle another type of input in a program.
Using a Sub Procedure to Manage Input
Sub procedures are often used to handle input in a program when information comes from two or more sources and needs to be in the same format. In the following exercise, you'll create a Sub procedure named AddName that prompts the user for input and formats the text so that it can be displayed on multiple lines in a text box. The procedure will save you programming time because you'll use it in two event procedures, each associated with a different text box. Because the procedure will be declared in a module, you'll need to type it in only one place. If you add additional forms to the project, the procedure will be available to them as well.
Create a text box Sub procedure
On the File menu, click the Close Project command.
Visual Studio closes the current project (the Track Wins slot machine).
Create a new project named My Text Box Sub.
The new project is created, and a blank form appears in the Designer.
Use the TextBox control to create two text boxes, side by side, in the middle of the form.
Today you'll make some personnel decisions, and you'll use these text boxes to hold the names of employees you'll be assigning to two departments.
Use the Label control to create two labels above the text boxes.
These labels will hold the names of the departments.
Use the Button control to create three buttons: one under each text box and one at the bottom of the form.
You'll use the first two buttons to assign employees to their departments and the last button to quit the program.
Set the properties shown in the following table for the objects on the form.
Because the text boxes will contain more than one line, you'll set their Multiline properties to True and their ScrollBars properties to Vertical. These settings are typically used when multiple lines are displayed in text boxes. You'll also set their TabStop properties to False and their ReadOnly properties to True so that the information can't be modified.
Object
Property
Setting
TextBox1
Multiline
Name
ReadOnly
ScrollBars
TabStop
True
txtSales
True
Vertical
False
TextBox2
Multiline
Name
ReadOnly
ScrollBars
TabStop
True
txtMkt
True
Vertical
False
Label1
Font
Name
Text
Bold
lblSales
“Sales”
Label2
Font
Name
Text
Bold
lblMkt
“Marketing”
Button1
Name
Text
btnSales
“Add Name”
Button2
Name
Text
btnMkt
“Add Name”
Button3
Name
Text
btnQuit
“Quit”
Form1
Text
“Assign Department Teams”
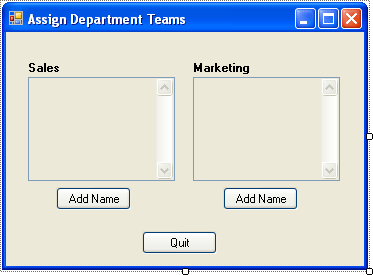
Resize and position the objects so that your form looks similar to this:
Now you'll add a module and create the general-purpose AddName Sub procedure.
On the Project menu, click the Add New Item command, select the Module template, and then click Add.
A new module appears in the Code Editor.
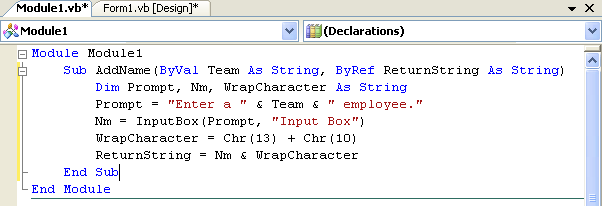
Type the following AddName procedure between the Module Module1 and End Module statements:
Sub AddName(ByVal Team As String, ByRef ReturnString As String) Dim Prompt, Nm, WrapCharacter As String Prompt = "Enter a " & Team & " employee." Nm = InputBox(Prompt, "Input Box") WrapCharacter = Chr(13) + Chr(10) ReturnString = Nm & WrapCharacter End Sub
This general-purpose Sub procedure uses the InputBox function to prompt the user for an employee name. It receives two arguments during the procedure call: Team, a string containing the department name; and ReturnString, an empty string variable that will contain the formatted employee name. ReturnString is declared with the ByRef keyword so that any changes made to this argument in the procedure will be passed back to the calling routine through the argument.
Before the employee name is returned, carriage return and linefeed characters are appended to the string so that each name in the text box will appear on its own line. You can use this general technique in any string to create a new line.
Your Code Editor looks like this:
Display the form again, and then double-click the first Add Name button on the form (the button below the Sales text box). Type the following statements in the btnSales_Click event procedure:
Dim SalesPosition As String = "" AddName("Sales", SalesPosition) txtSales.Text = txtSales.Text & SalesPositionThe call to the AddName Sub procedure includes one argument passed by value ("Sales") and one argument passed by reference (SalesPosition). The last line uses the argument passed by reference to add text to the txtSales text box. The concatenation operator (&) adds the new name to the end of the text in the text box.
In the Code Editor, click the Class Name arrow, and click the btnMkt object in the list. Then click the Method Name arrow, and click the Click event.
The btnMkt_Click event procedure appears in the Code Editor.
Type the following statements in the event procedure:
Dim MktPosition As String = "" AddName("Marketing", MktPosition) txtMkt.Text = txtMkt.Text & MktPositionThis event procedure is identical to btnSales_Click, except that it sends "Marketing" to the AddName procedure and updates the txtMkt text box. (The name of the local return variable MktPosition was renamed to make it more intuitive.)
Click the Class Name arrow, and click the btnQuit object in the list. Then click the Method Name arrow, and click the Click event.
The btnQuit_Click event procedure appears in the Code Editor.
Type End in the btnQuit_Click event procedure.
Click the Save All button on the Standard toolbar, and then specify the c:\vb05sbs\chap10 folder as the location.
That's it! Now you'll run the Text Box Sub program.
Run the Text Box Sub program
TIP
The complete Text Box Sub program is located in the c:\vb05sbs\chap10\text box sub folder.
Click the Start Debugging button on the Standard toolbar to run the program.
Click the Add Name button under the Sales text box, and then type Maria Palermo in the input box. (Feel free to type a different name.)
Your input box looks like this:
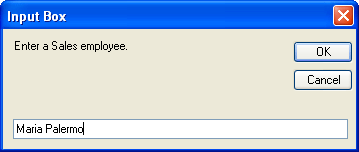
Click the OK button to add the name to the Sales text box.
The name appears in the first text box.
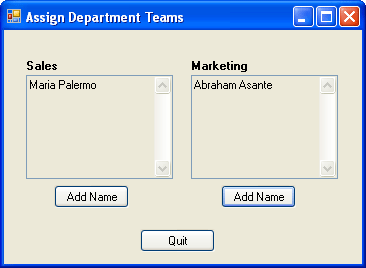
Click the Add Name button under the Marketing text box, type Abraham Asante in the Marketing input box, and then press Enter.
The name appears in the Marketing text box. Your screen looks like this:
Enter a few more names in each of the text boxes. This is your chance to create your own dream departments.
Each name appears on its own line in the text boxes. The text boxes don't scroll automatically, so you won't see every name you've entered if you enter more names than can fit in a text box. You can use the scroll bars to access names that aren't visible.
When you've finished, click the Quit button to stop the program.
You've demonstrated that one Sub procedure can manage input tasks from two or more event procedures. Using this basic concept as a starting point, you can now create more sophisticated programs that use Sub and Function procedures as organizing tools and that place common tasks in logical units that can be called over and over again.
EAN: N/A
Pages: 168